Time lapse Photography – Sound Bites Grill & Snoopy Rock
aka – Snoopy Goes to Sleep
I get to spend quite a bit of time at Sound Bites Grill, being the house photographer. So I am very familiar with the view. And as many times as I see the sun set on the red rocks I am always amazed at how each sunset differs from the one before. On this day with no clouds to help I decided to concentrate on the comic feature built into the red rocks a Charles Schultz character called Snoopy.
Snoopy Rock Time Lapse Video
The initial images were captured with the Lumix GX8 with a 35-100mm f2.8 Vario lens. The settings were for an image captured every 3 seconds. The video was processed in-camera in the GX8 to 4K video with playback speed at 12 frames per second. I had previously processed the 916 images into a 4K 24 fps video and felt it was too fast.
One problem that I wasn’t aware of during capture (cause I was having dinner at the bar) was there were some very severe wind gusts shaking the camera. That’s not a good way to view video. Adobe Premiere Pro CC 2015 to the rescue. Opened the file in Premiere Pro then added the graphics and music. Even more important used the Warp feature to examine and fix the shaky wind buffeted footage to rock steady. Also added a slight Ken Burns effect zooming slowly into the image featuring Snoopy that is possible because of the 4K size files that still leaves you plenty of quality on an HD timeline.
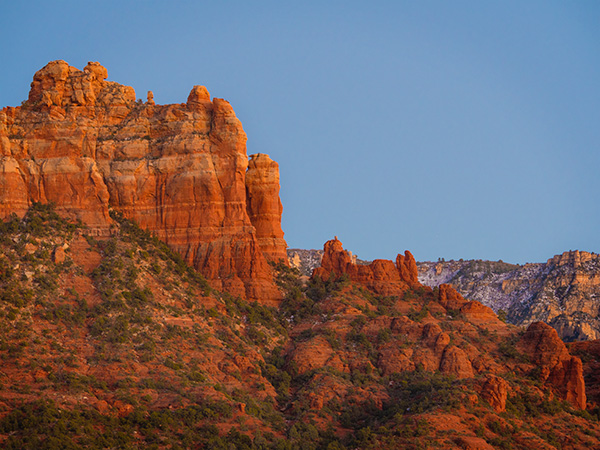
As an added benefit to shooting time lapses there are individual images to choose from to create stills from the same scene. Here’s one with just a bit more color correction in Adobe Camera Raw and Photoshop.
Snoopy Rock still photo at sunset.
I’m really enjoying the ease with which time lapse videos can be made with the Lumix cameras. You don’t need to take the subsequent video into and additional processing program but that enables the addition of information and flourishes depending on your final output.
The Imaging USA trade show put on by Professional Photographers of America is always a popular part of attending the annual convention, especially the first day…
This was captured hand held with the Lumix GH4 and the 7-14mm Lumix Vario f4 lens at the bottom of the escalator in the Georgia World Congress Convention Center. Time lapse was processed in camera. Then it was downloaded to Adobe Premiere Pro for some massaging. Video was smoothed out. A little color correction was applied due to the extreme lighting conditions. Titles, slides and music finished off the video.
Thanks to Eric Miller for the use of the music!
Time Lapse Video captured at Imaging USA in Atlanta, Georgia January 2016
Time Lapse can be a great way to tell a story ’cause that’s a pile of people!! Approximately 560 images, with a frame fired every 3 seconds, were captured and combined. Output at 12 frames per second in 4K video.
Yours in Creative Photography, Bob
PS – See you at Imaging USA in San Antonio next year??
In a previous post I showed you a finished time lapse video captured from the parking lot of Mariposa Restaurant in Sedona overlooking the red rocks after having lunch there last Sunday afternoon. While having a great lunch we were watching the clouds clear after a bit of weather. And you guessed it, I had to run home and grab my gear. Today I’d like to share some ideas on what settings to look at when thinking about creating your own time lapses.
Depending on your scene and how long you would like to cover it you should decide the space between your image captures. Math comes in handy here and you will start to have an idea of your settings almost by instinct. For example, depending upon the speed of moving clouds I’ve found the interval that works for me is between three & five seconds. The rate that the images should be played back is between 12-24 frames per second. The time lapse in the previous post covered a period of about 40 minutes with 3 second intervals and 24 fps. This translated into a video that was about 35 seconds long. Now not being a fan of that much math here is a calculator that will help you figure things out including how much memory you will need to have in your camera to complete your session.
Time Lapse Calculator
Time Lapse Calculator from PhotoPills. You can download your own for your web site or get the App to calculate while on site. Try it right here you’ll like it!
Lumix Time Lapse Processing Features
A great feature in the Lumix cameras like the GX8 used to capture this time lapse is the ability to process the video in camera choosing from a large number of settings in quality and frame rate. When calculating how much memory you need to have on your card remember you’ll need room to process and store the final video as well. I processed out the video using the 4K setting. 4K is four times bigger than HD video which means you can place it in an HD timeline then have room to pan and zoom which adds a lot to the final product. There are many programs you can use but I used Adobe Premiere Pro CC.
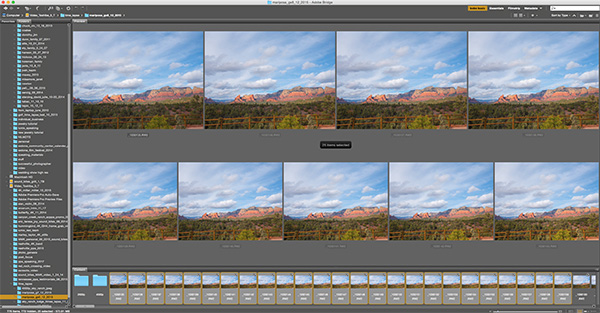
Screen Capture of still files in Adobe Bridge.
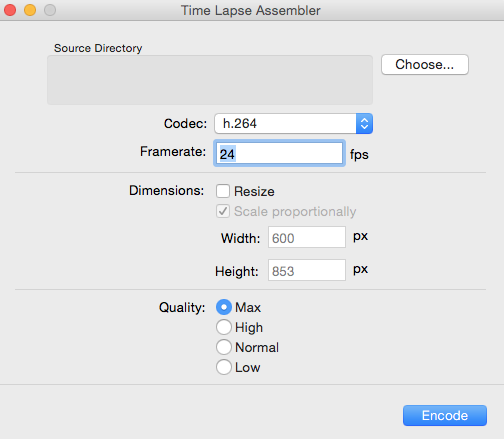
I shoot in RAW so I can process the original files for stills or for color tweaking if necessary. Then process out the files into jpegs and use a free program such as Time Lapse Assembler to put your video together. (link for MAC for link for PC. There are plenty of free or freeware programs to choose from. Find the one you like.
Time Lapse Assembler window. I like it because it’s pretty simple and straightforward!
Shoot longer than you think is necessary. The first couple times out my time lapses were only seven seconds which was a little disappointing. Use the calculator above to save yourself some heartache.
Always found myself interested in time lapse imagery. The Netflix Original series House of Cards show intro brought back the ‘want’ to try to create some of my own. The short time lapse clips used were quite captivating! I had held back in the past because the techniques were too cumbersome and software was a bit of a PIA to manipulate to get some good results. For most cameras you had to have a separate timing gizmo (called an intervalometer if you need one) for a camera to capture your images and be able to program it properly.
Fast Forward to today
Like many things there have been some incredible changes happening in camera technology. Most of the newer Lumix cameras (and other brands and cell phones) have the time lapse capture built right in. You can easily program the camera to capture X number of images at X seconds for X number of captures. The camera will tell you the time the shooting will be completed. OK here’s the really wonderful part. The camera will even process the images into a finished time lapse giving you many choices of quality, size, number of frames per second and output format. This takes a lot of the hassle out of creating time lapses. Now you can use that as a finished file or take it to an editing program like Adobe Premiere Pro to add some more action.
Here’s the Time Lapse
Cloud Time Lapse captured 700+ images with one image every three seconds. Processed in camera at 24 frames per second.
Final Time Lapse Video Thoughts for Today
Used the Lumix GX8 with the 7-14mm f4 Vario lens. Couple of things to think about when setting up the capture. How often should you fire the frame? Subject matter and speed of moving objects need to be considered. Manual or Aperture Priority exposure? How many frames are needed? How long do you want the finished video to run. We’ll talk about these settings and processing in a day or two.
Time lapse videos are very popular these days and they are now easier to create than ever…
I took new Lumix G7 out for a time-lapse spin. The clouds were streaming over the red rocks with an azure blue sky as an accent. Camera was mounted with the Lumix Vario 12-35mm f2.8. Settings were – time lapse with a three second interval. There were 149 images captured. Inside track note – to save wear and tear on the camera’s shutter you can use the electronic shutter vs the mechanical shutter.
Then it’s to the playback menu on the G7. The Time Lapse setting allows you to choose quality and frame rate for the processing of the video. I choose 4K Video & twelve FPS for this video which came out to be about twelve seconds of finished. The camera tells you how long it will take to render and asks you if you would like it to process or not. When you say yes, a few minutes later there’s a video saved to your card (one note – make sure you have large cards time lapse and the video take up some card real estate)
The next piece of the puzzle is the appearance of camera movement while the Time Lapse is being made. That’s why I choose the 4K Quality setting when rendering the Time Lapse to a movie. I took the resulting movie file straight from the camera and put it int Adobe Premiere on a 1080 timeline. Since the video is four times the size of 1080 there is room to use a Ken Burns type effect to show camera movement. Love the possibilities this brings to mind!!
Thirty second G7 time lapse in the Village of Oak Creek in Sedona, Arizona
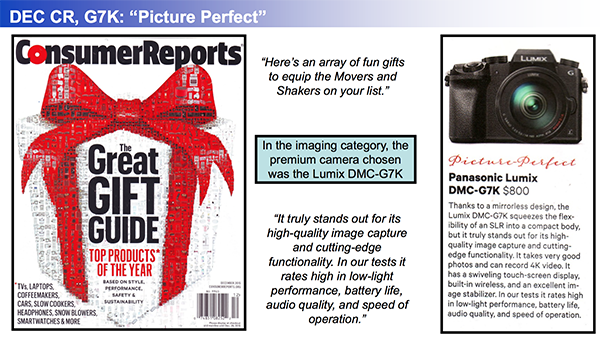
It’s pretty cool when you see others appreciate the tools with which you are working. Consumer Reports Holiday Gift Guide put the G7 on the list as one of the Top Products of the Year for gadgets and gifts.
G7 is listed as on of the Top Products of the Year
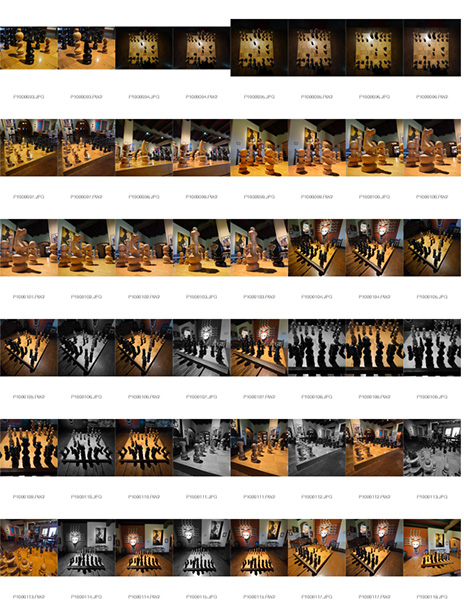
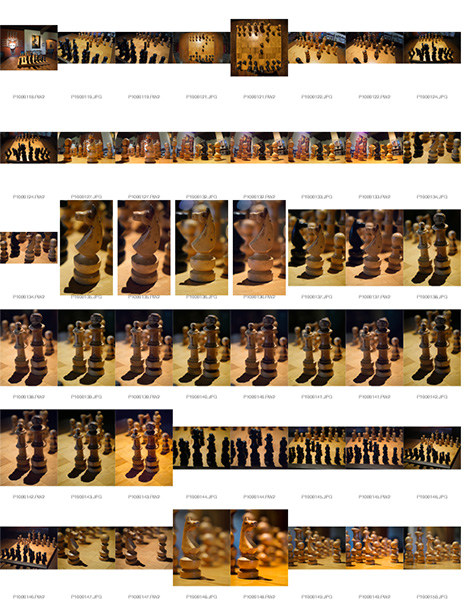
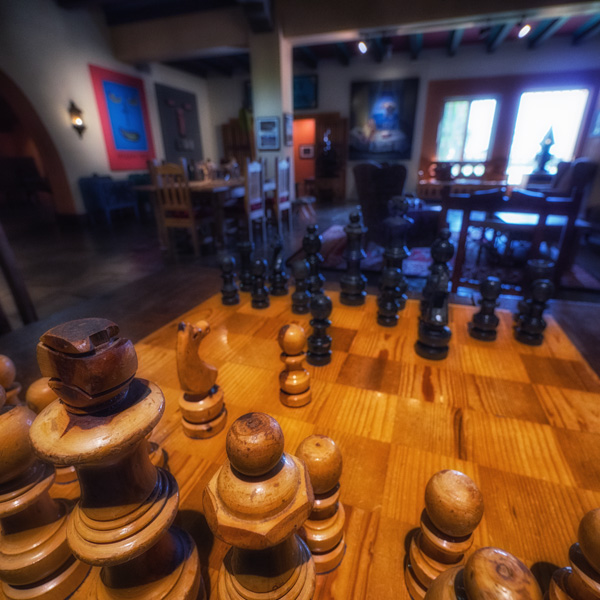
I believe you need to look around before you can see. And, you need to spend time seeing before you can create a vision with your photography. This is a post about an exercise I did and ask people to do to expand their vision. There are many variations on forcing yourself to study an area until you’ve come close to exhausting the photographic possibilities. In this case the ‘assignment’ was to photograph this subject without moving more than 5 feet in any direction for a minimum of 30 minutes to an hour.
Having a capable camera with you at all times helps to define your vision. The low profile and light weight of the micro 4/3rds system makes it easy for me to be more creative. In this case various Lumix lenses and the Lumix GX8 were used in the capture…
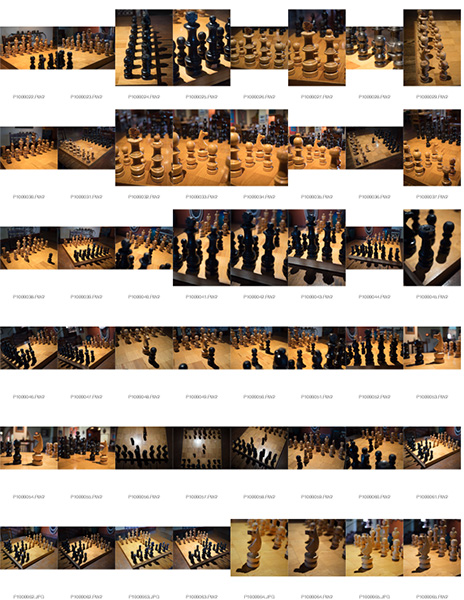
Here are contact sheets from the shoot followed by some of my favorites from the shoot…
Contact sheet one images are SOOC (straight out of Camera)
Contact sheet 2
Contact sheet 3… There were about 4 plus contact sheets all together but you get the idea!
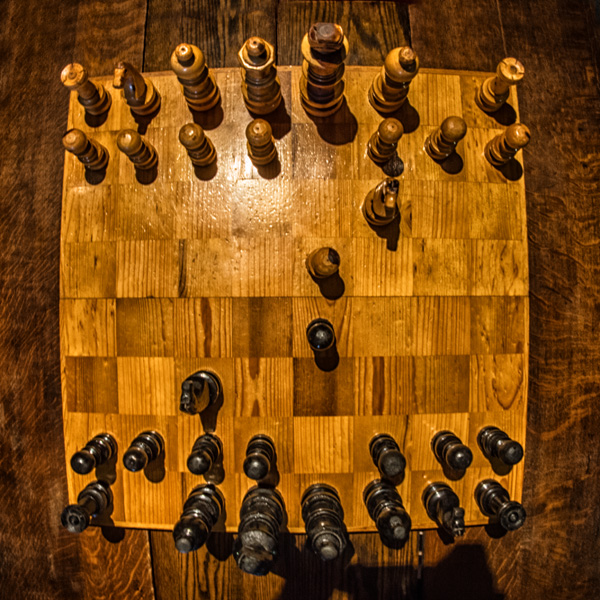
Below were a few of the images I worked up from the session followed by a Time-Lapse of the shoot.
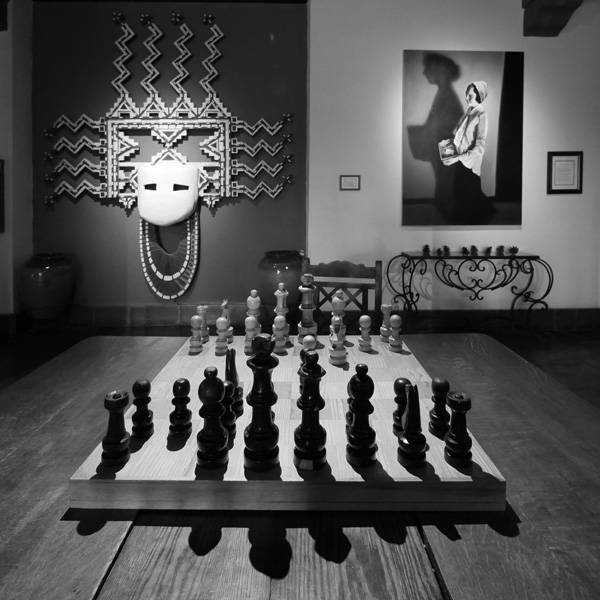
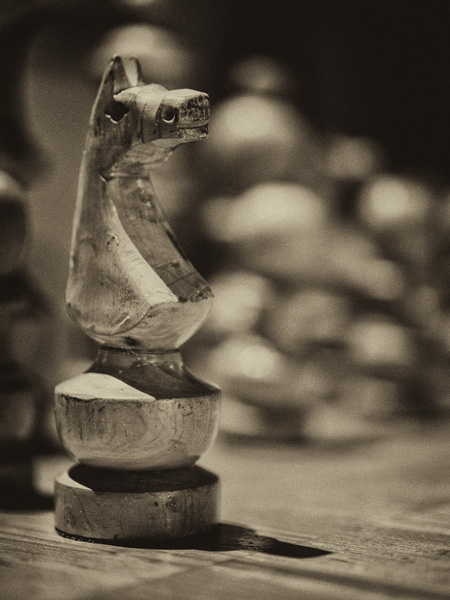
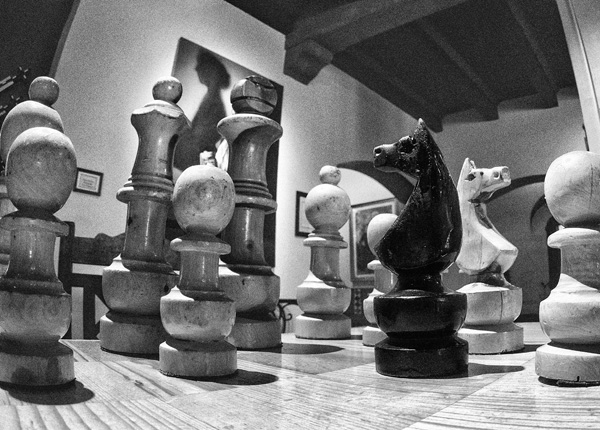
Black and white turned this into a very graphic feel and tells the story of ‘Place’
Aerial view with fish eye lens
Mood piece with some NIK Color Pro 4 FX. Dreamy…
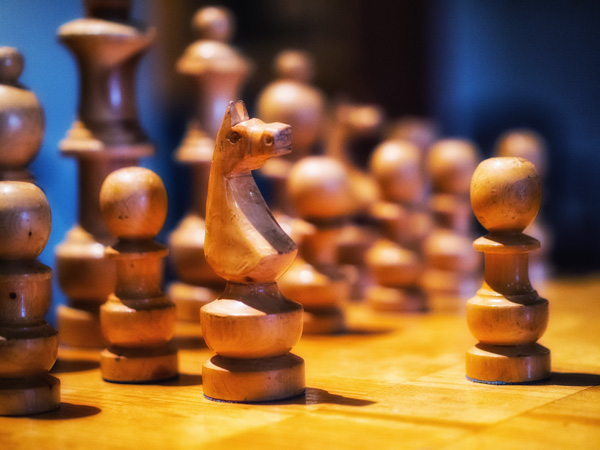
Then it was on to the story of the Knights.
Many other images were captured during the ‘assignment’ but these were the ones I thought I’d share.
Time-lapse showing the shoot shot with Lumix FZ1000 mounted on tripod capturing an image every three seconds. Processed in camera to MP4. Very cool feature!
For infrared conversion of my cameras I use LifePixel. Infrared allows you to put an older camera to use and opens up a new time time of day for productive image creation.
Fotopro tripods are well worth checking out. You can learn about the ones I use and recommend by clicking on the Fotopro Tripods link at the top of this page. If you want to see what other tripods might fit your needs check out the Fotopro.com website. Check back with me before you buy as a Fotopro Ambassador I’m able to get you discounted pricing including complementary continental USA shipping for my followers that you won’t find through retail outlets.
Learn Photoshop in a fun environment. Aaron Nace applies the right amount of fun with easy to understand and follow tutorials. Actions and brushes are included with lessons!
Lightning, waterdroplets, sound, time-lapse, HDR sequences, smiles and much more control for your camera!
Cameras Get Smarter -
A High Speed Smart Camera Remote
Best embroidery ever. Give Queensboro a try, get a $20 instant credit to get started by clicking on the logo! They specialize in great quality custom logo apparel and promotional products with the best customer service.
Platypod has become a great resource for being creative in getting your camera gear easily into unusual places. As an Platypod Pro I get to work/play with the gear even before it comes out. Head over to Platypod, subscribe to the newsletter and you will get special discounts reserved only for subscribers.
 Snoopy Rock still photo at sunset.