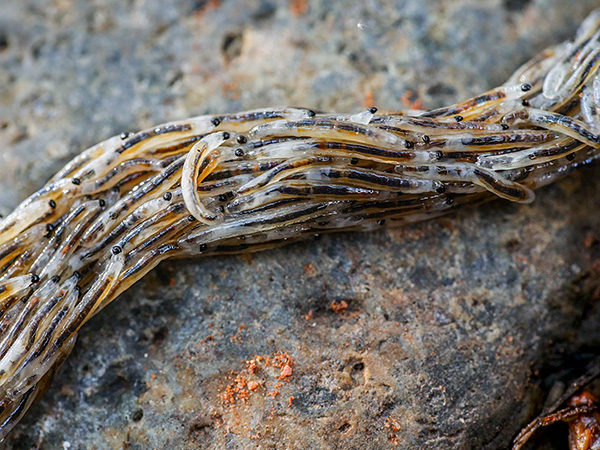
Ran into a very interesting phenomenon pointed out by my wife. She was working in the yard and saw these long strands of moving stuff. (tech talk here) Never saw anything like it. Turns out it was tens of thousands of Gnat larva on a migration.
I wanted to get a shot of the larva to help identify it. Grabbed the GH5, my Leica 45mm Macro-Elmarit f2.8 lens, and a small tripod and was having no success. Even at 6400 ISO I couldn’t get a sharp photo of the moving, writhing masses due to the macro lens and speed with which the larva was moving.
I decided to try the Post Focus Photo Mode just to see if it could help. The photo mode uses all 225 focus points in the camera and captures them in a 6K video. Each of those 225 frames can be pulled and processed into an eighteen meg-pixel photo. The intended use in the beginning was to allow the user to decide which focus point to use later. An addition to the mode is the ability to fuse all the frames together giving you just the sharpest bits. The beauty is this can be processed in camera. Focus stacking in camera! Able to give you a 50MB plus file.
6K Photo mode image focus stacked in camera.
Even though this was a moving mass because each focus point is being photographed separately it is stopped and in focus. When all the images are processed together I get a Depth of Field i couldn’t with a single capture it also processed the sharp areas into a still image even though there was lots of movement.
Single capture of the same general subject.
The new technology can be leveraged in many ways to make it possible to create images in a different way.
The other day I showed you the set for photographing items in the studio with a beautiful radiating feathered edge glow around the subject..(check that post here) The images from that post were cameras which were larger than today products.
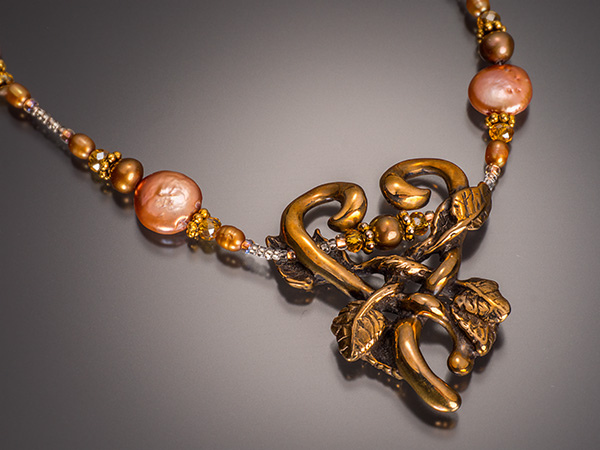
Jewelry is a different subject with different needs but can be on the same basic set. The difference is that the scrim is much closer to the subject than it was for the cameras.
Jewelry is well served in this setting.
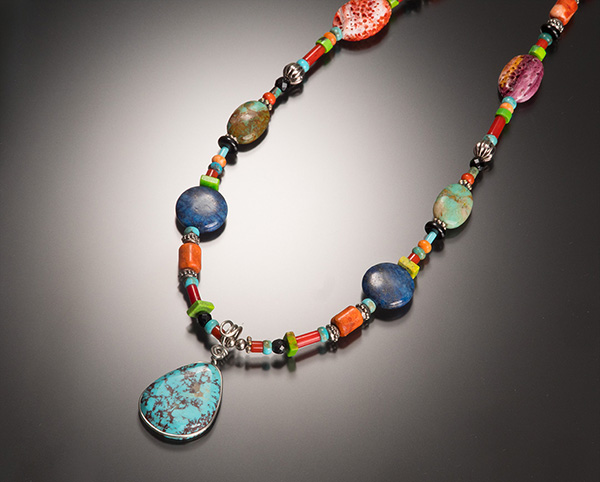
In the image above the transitions from light to shadow make the color of the beads and turquoise and out from the background, but still have quite a bit of interest overall.
This is a piece of my wife’s jewelry. She noted that it actually could have used a bit of polishing.
When photographing product you need to know what the subject should look like. Since this was a lesson session, I am the final client and think it looks great. If this were a paying customer, I would have noted more information as to the handling of the piece. Also, sets and product must be kept sanitary and dust free. Being very careful while prepping for shooting can save an enormous amount of time in post production. On the job, I will even use a magnifying glass to ensure there is as little schumda in the photo as possible.
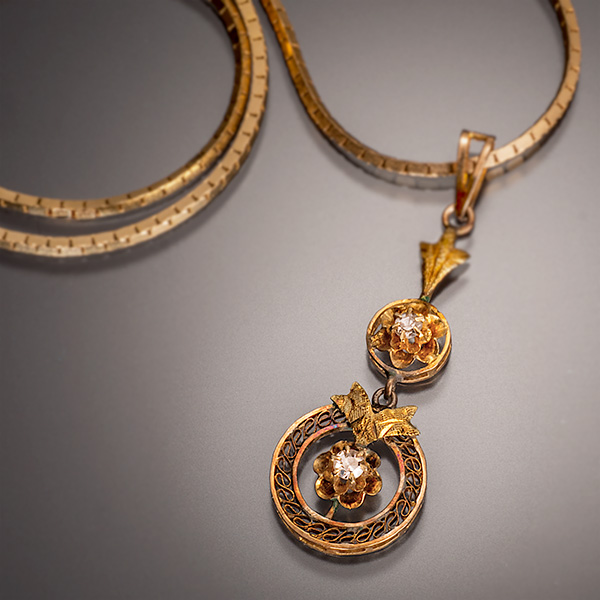
Rose gold and diamonds. Care with chains and their layout is critical. Here also a shallow depth of field takes some attention away from the chain.
Jewelry with facets such as diamonds need a bit of extra thought, care and maybe a few additional exposures. Facets of stones are highlighted by light striking different surfaces. If the light is hitting one surface, it won’t necessarily be showing off another surface. One way to sculpt the stone to best effect in to make multiple images with the light in different positions. Then by layering the exposures, it is possible using masks to show off exactly the stone as you wish.
Getting good, solid lighting is the best thing you can do to highlight the features of products. Today’s post is how I set up to photograph some jewelry and a couple of my cameras. I will suggest you practice lighting techniques long before you need to use them. It allows you to refine the look rather than trying to tweak on set.
This set-up is relatively straightforward yet gives a compelling and professional look to your product photography.
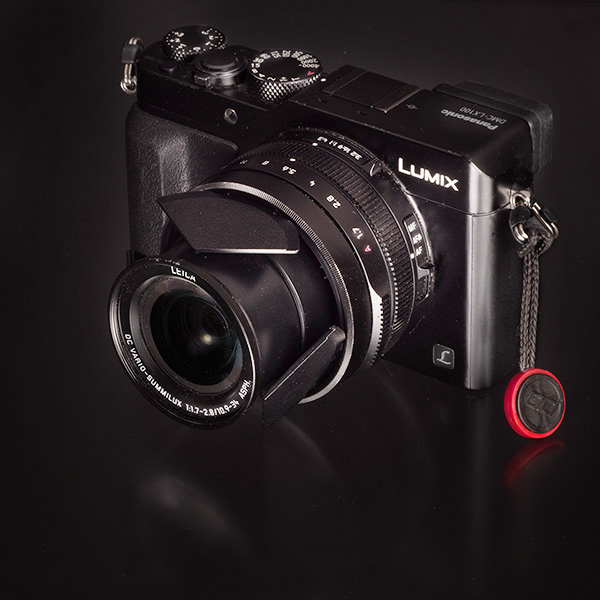
Gear in use. Two Paul C Buff X3200 flash heads. One Paul C Buff Ultra Zap1600 flash head. Paul C Buff Octobox (35 inch) Snoot. Strobes are fired with Buff Trigger. A sheet of Non-glare glass. Scrims with diffusion material. Sekonic L478D light meter. Lumix GH5 camera with various lenses depending on the subject to be photographed. Light stands, one with Boom to suspend light over the set.
The power of the lights is not germane to lighting on set. If you work with lights at less power or varied, you will want to put the most powerful one above the set. It will be going through the snoot and the scrim both of which suck up some of your light. With this set, you have the ability to change the size of you lighting circle. If the light from the snoot is closer to the scrim, it will be tighter as shown in this view. If you move the snoot higher, you’ll see the light spread more and feather to a larger circle. The height of the scrim above the product will also have an effect on the light pattern.
The glass (make sure it is non-glare) is suspended above a sheet of black paper. Depending on how much light you pump into the scene and the direction of that light you can create a background for your product that can be gray or black.
You don’t necessarily need an Octobox as a modifier for your main light. I use it because it is quick to set up and break down and gives a solid direction of light. At the very least, you will need to have a softbox. If you use an umbrella, the light is harder to control on the set, and the bounce of light from the walls and ceiling can infect the set. Control is essential.
Let’s look at a couple of camera photos.Lumix LX100 camera. I call this the ‘professional’s point and shoot’. This is an example of going black with very little light from above. Solid but stark image. It will always depend on what look your client is trying to achieve.
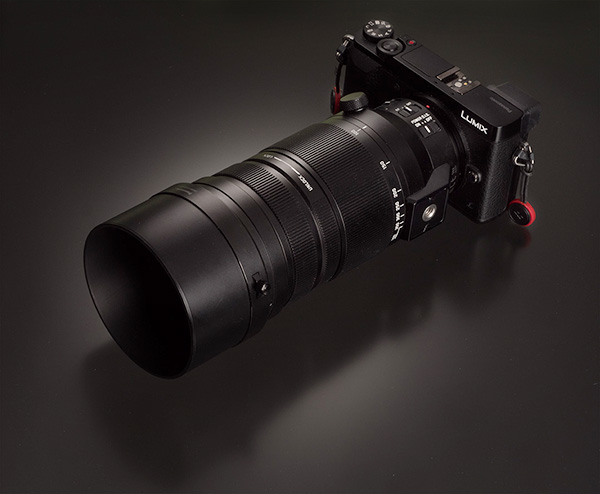
Photo of Lumix GX85 with Leica DG Vario-Elmarit 100-400mm f4.0-6.3 lens made with the down light to give some more depth and dimension to the final image the gradient is made with the snoot and the scrim as shown above at the top of the page in the BTS shot but not as close to the scrim.
Let’s pause here until the next installment where the images will be of jewelry using the same set and adjusted accordingly. Part three of this will show before/afters and talk about post processing.
This is Part two of a four-part series on a ‘day in the life on Oak Creek’ while photographing nature and wildlife. Check out the first installment here.
The second camera I brought on my nature adventure was the Lumix GX8 and 20mm 1.7 lens. (1.5 Pounds) This combination is for capturing time-lapse and/or video. Because the lens is a pancake style it fits in my Think Tank Mirrorless Mover 20 along with two additional lenses. On this day I ended up using the camera for video but I like to have the option of having the second camera body for taking time-lapse while photographing other subjects at the same time.
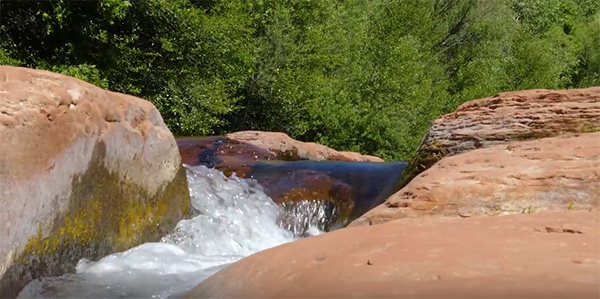
Here’s a still image screen capture from the video
Oak Creek and Cathedral Rock video. A little one and a half minute respite with flowing water and the spectacular rock formation that is probably one of the top ten most photographed places in the United Staes.
the video was captured in 4K quality. Shooting in 4K allows for creating additional camera movements like a Ken Burns movement in post production. A tiny tripod was used to steady the camera a bit but this was for fun and most of this was handheld. It tells the story of the day. The sound was recorded with the in-camera stereo microphones. The 20mm lens was a bit too static so I switched over to the Leica DG Vario-Elmarit 12-60mm f2.8-4.0 lens. This lens has a wonderful range from wide angle to medium distance zoom.
The next installment will be centered around another camera and lens combination. The Lumix G6 and the 14-140mm G Vario f4.0-5.8 lens. This camera has been converted to infrared by Lifepixel and has opened up the middle of the day for more creative imagery.
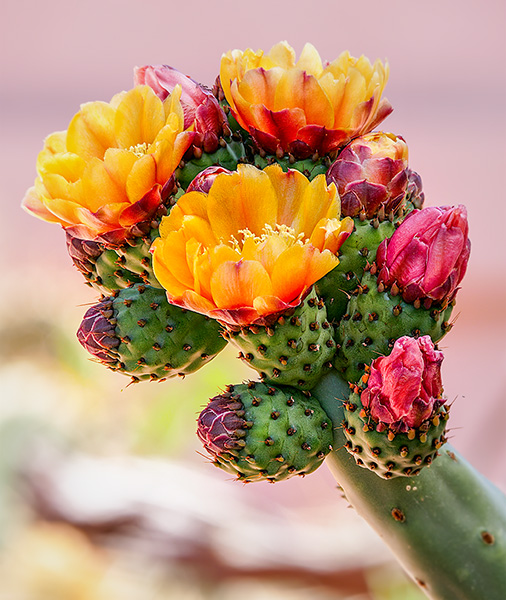
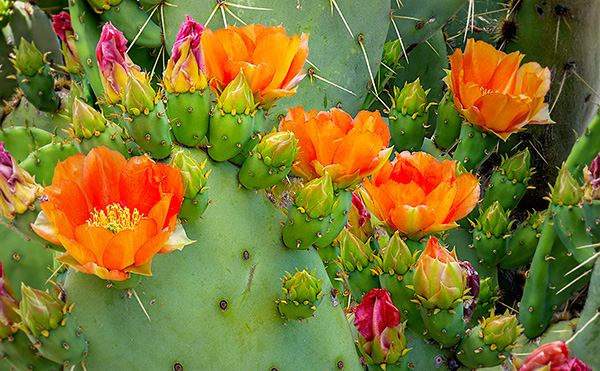
Let’s look at some more examples of using the Post Focus Photo Mode (see part one here).
The focus is all throughout the image. Detail works in this case.
With the post focus mode used to capture this image there is still a soft bokeh even though the camera used every focus point in the processing. But because the background is so far in the distance the background stays very soft and all the flowers are super sharp.
I’ve been testing the Lumix GH5 and the Post Focus Mode in which the camera leverages a 6K Photo Mode wherein the camera creates a short video clip using all two-hundred and twenty-five focus points. Any one of these points can be pulled as an eighteen MegaPixel file. Or a range of images choosing a set of focus points. Or even better, it will combine all of the focus points into a fully focus stacked final image. This is an amazing technology to secure a look that is not possible in a regular capture with a camera. I love leveraging this tech to create artistic images.
For infrared conversion of my cameras I use LifePixel. Infrared allows you to put an older camera to use and opens up a new time time of day for productive image creation.
Learn Photoshop in a fun environment. Aaron Nace applies the right amount of fun with easy to understand and follow tutorials. Actions and brushes are included with lessons!
Best embroidery ever. Give Queensboro a try, get a $20 instant credit to get started by clicking on the logo! They specialize in great quality custom logo apparel and promotional products with the best customer service.
Platypod has become a great resource for being creative in getting your camera gear easily into unusual places. As an Platypod Pro I get to work/play with the gear even before it comes out. Head over to Platypod, subscribe to the newsletter and you will get special discounts reserved only for subscribers.

 6K Photo mode image focus stacked in camera.
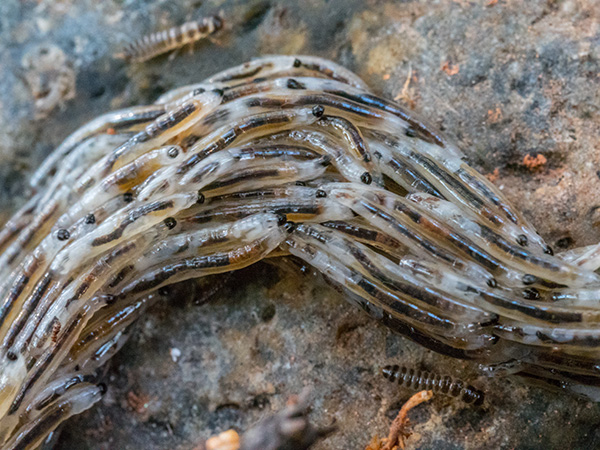 Single capture of the same general subject.