by successfulbob | commercial photography, Lumix G9, photography, photography education, photography gear, photography software
Tether the Lumix G9 Camera
I was working on a commercial job photographing product for the Crystal Magic website today. I’ve got to tell you the tethering experience with this camera was sublime. I know that is some pretty intense emotion for working with a camera. But, if you’ve worked with other systems that don’t hook up quickly to the computer or drop the connection in the middle of a shoot, numerous times, you know exactly how I feel.
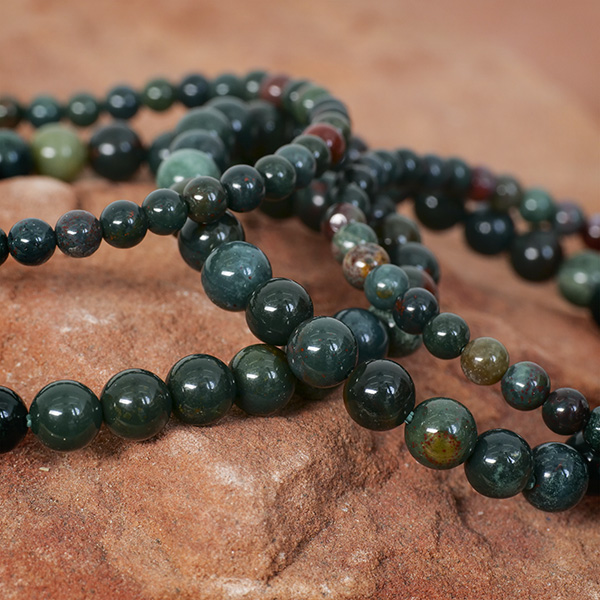
 Here’s one of the finished beauty shots of the bracelets showing the detail and closeup color.
I’ve been shooting with this set-up for a while and realized I hadn’t shared the ease of this and how wonderful it is when you are working on set with a designer or other creative. When they can see exactly what is happening with the live view, it speeds the setup time immensely. And, then immediately see the finished exposure seconds later, while moving RAW files, well what can I say? Wahoo!
I was working with Molly from https://www.crystalmagic.com, and we were shooting a large number of bracelets that needed multiple shots of each. With Molly getting confirmation on each Item and angle as we worked it sped up the process immensely.
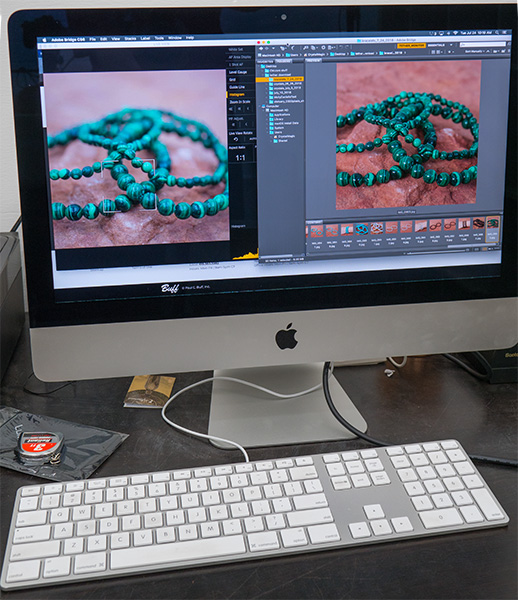 Screen showing Live View from the with Adobe Bridge on the right with the captured photo
With the free download of Lumix Tether which you can get with Lumix G9 camera ownership, you can control the camera, use Live View and move images to your computer in a snap via a USB cord. I shoot to a folder on my desktop and link Adobe Bridge to that folder. When an image is photographed, you can see it almost immediately.
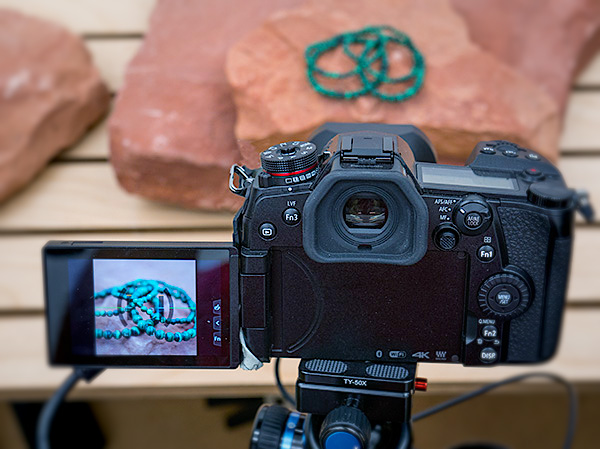 Lumix G9 on set. Note that the camera is set to show what the image will look like in a square format.
All images on the website are to be square aspect ratio. The camera is set to show that to make it easier to determine composition. It’s a great feature, but in case you want to view the entire image in 2/3 or 4/3 format after the fact you can strip away the crop and see all of the photos, but only if you shoot in RAW. If you shoot in jpeg, the crop factor is baked into the file.
In a couple of weeks I will be doing a video on the full use and ease of setup on the G9 and Lumix Tether system.
Yours in Creative Photography, Bob

by successfulbob | commercial photography, LumixGH5, people photography, photography, photography gear, photography lighting resources
Go Pet Friendly – Part Two
Here’s a follow-up to the post from the other day about shooting an author’s photo and some support images for a book project. Amy Burkert and her husband Rod are on the road searching and researching pet friendly travel venues and a book is being written about traveling with pets as an addition to the Go Pet Friendly website
One of the images was the whole crew and the thirty-seven foot Winnebago with which they travel the country. Lighting conditions were a bit on the contrastly side with high sun and shade under the awning.
 Go Pet Friendly home on the road and the family that lives there.
I used two Paul C Buff White Lightning X-3200 lights to control the contrast of the scene. The main light was fitted with a thirty-six-inch Octabox and the other was used for fill with a thirty by sixty inch foldable softbox camera right. A couple of braketed exposuers were made to get a lighter exposure on the tree that was in shadow to bring back some detail that would have blocked up otherwise.
The lights were powered with Paul C Buff Vagabond Mini battery packs. Portable power comes in very handy on location as it keeps from dealing with cords. It makes it easier to position lights exactly where you would like them to be.
Amy also wanted to show off her ‘children’ Ty and Buster.
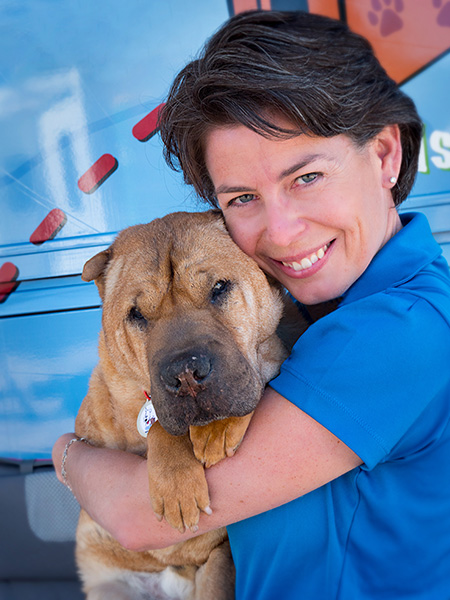 Amy and her dog Ty pose for a portrait
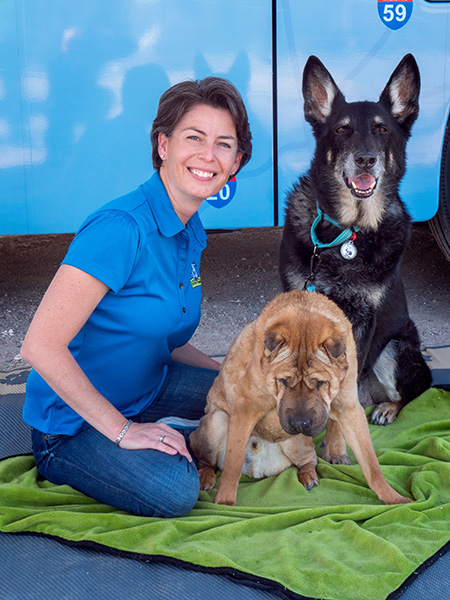 Amy, Ty and Buster pose in front of the RV
Images captured with the Lumix GH5 and the Leica 12-60mm G LEICA DG VARIO-ELMARIT PROFESSIONAL f2.8-4.0 lens
Yours in Creative Photography, Bob

by successfulbob | commercial photography, lighting, LumixGH5, photography lighting resources
Go Pet Friendly – Book Session
I don’t often share my commercial work on Successful-Photographer. I probably should.
So I will.
I received a call from a pleasant voice asking about a photography session for a book cover. Images needed would include an RV, two people, and two dogs. The owner of the friendly voice is named Amy Burkert. She and her husband Rod have been on the road for about six years traveling the country in an RV, looking for pet-friendly places and sharing their findings via their blog https://blog.gopetfriendly.com
The main photo Amy for which Amy was looking was her back cover author’s image. Especially for the book, she has written, the image should make her appear open, friendly, and inviting while telling a bit of her story. I always ask plenty of questions before coming up with a plan for the capture.
What is the layout of the book? Do you need a horizontal or vertical photo/ Have you considered your wardrobe? What background would you like to have, studio or environmental? What story do you wish to convey?
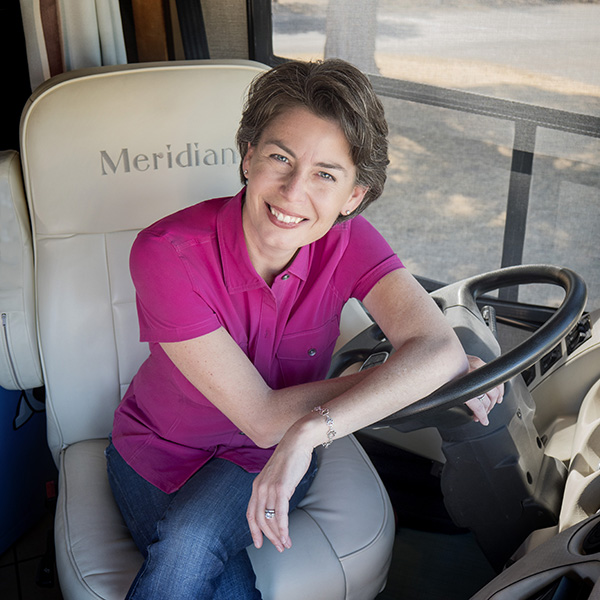 Amy at the wheel of the thirty-seven foot Winnebago
After all the questions were answered, we ended up with Amy behind the wheel as she does most of the driving while they are on the road. There wasn’t a lot of room for supplemental lighting which made me reach into my bag for LED lighting bricks from Fiilex. With three of the bricks, I was able to add some fill light and get some background separation. These battery operated lights are color and brightness tunable and can be tucked into tiny spaces.
I choose a high angle from which to shoot to enhance Amy’s friendly and open feel. When the subject is looking up in an image it makes the viewer feel they are looking down on the person. It didn’t hurt that the camera likes Amy and she was entirely comfortable in front of the camera.
I supplied a horizontal and a square version of Amy’s portrait. Additional support images were made of the RV with Rod and the rest of the crew including the two dogs Ty and buster which I’ll share in a future post.
Images were made with the Lumix GH5 and the Leica 12-60mm f2.8-4.0 Lens
Yours in Creative Photography, Bob
by successfulbob | photography creativity, photography education
Studio Photography – Part Two Jewelry
The other day I showed you the set for photographing items in the studio with a beautiful radiating feathered edge glow around the subject..(check that post here) The images from that post were cameras which were larger than today products.
Jewelry is a different subject with different needs but can be on the same basic set. The difference is that the scrim is much closer to the subject than it was for the cameras.
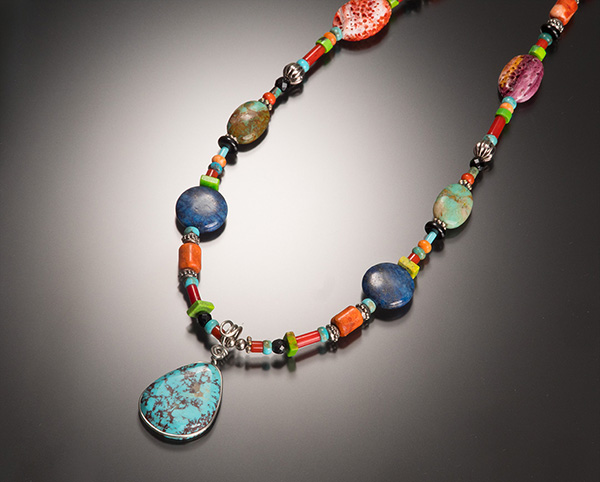 Jewelry is well served in this setting.
In the image above the transitions from light to shadow make the color of the beads and turquoise and out from the background, but still have quite a bit of interest overall.
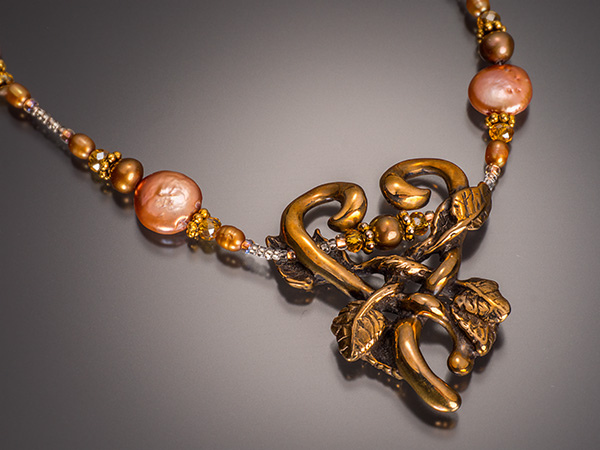 This is a piece of my wife’s jewelry. She noted that it actually could have used a bit of polishing.
When photographing product you need to know what the subject should look like. Since this was a lesson session, I am the final client and think it looks great. If this were a paying customer, I would have noted more information as to the handling of the piece. Also, sets and product must be kept sanitary and dust free. Being very careful while prepping for shooting can save an enormous amount of time in post production. On the job, I will even use a magnifying glass to ensure there is as little schumda in the photo as possible.
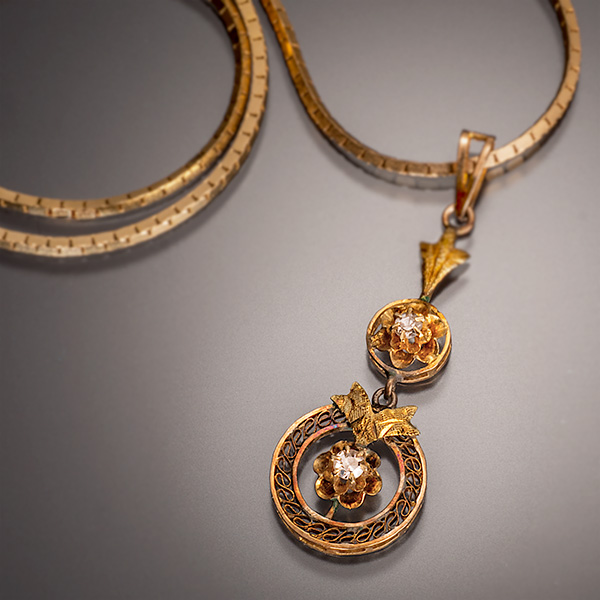
 Rose gold and diamonds. Care with chains and their layout is critical. Here also a shallow depth of field takes some attention away from the chain.
Jewelry with facets such as diamonds need a bit of extra thought, care and maybe a few additional exposures. Facets of stones are highlighted by light striking different surfaces. If the light is hitting one surface, it won’t necessarily be showing off another surface. One way to sculpt the stone to best effect in to make multiple images with the light in different positions. Then by layering the exposures, it is possible using masks to show off exactly the stone as you wish.
Yours in creative Photography, Bob

by successfulbob | graphic design, graphic design, Lumix GH4, Lumix Lounge, photography creativity
BJ’s Brewhouse Art Piece – ColoadoSprings, Colorado
Had a great time sharing Adobe Photoshop techniques from my PhotoSynthesis program for the Professional Photographers Guild of Colorado Springs. During my All Day hands-on class, I was charged with creating artwork from scratch live in front of the attendees including making selections and sharing the thought process as I created the image.
 Here’s the image I made for the class with a few elements cleaned up for clarity
This technique was one I created for art application but I keep finding that it is working its way into my commercial work as well. You can see the original photo below. The textures I used were images that we had gathered on-site that morning. The idea is you can create a significantly different image using many different techniques, textures, masks and blend modes.
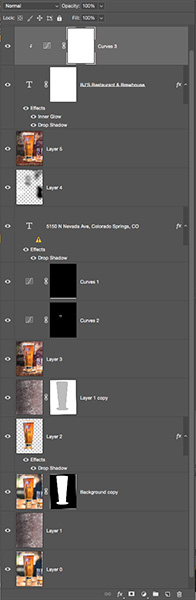 Here’s the Photoshop Layers Palette in a screen grab illustrating some of the techniques used.
The text was created using the fx palette. A large font was used for the name to attract attention. It was ‘dressed’ with bright color, an inner glow with a bright edge and a drop shadow. All of the text effects were chosen to help make the name stand out. The text for the address was more informational and was rendered white to be in high contrast with the rest of the image.
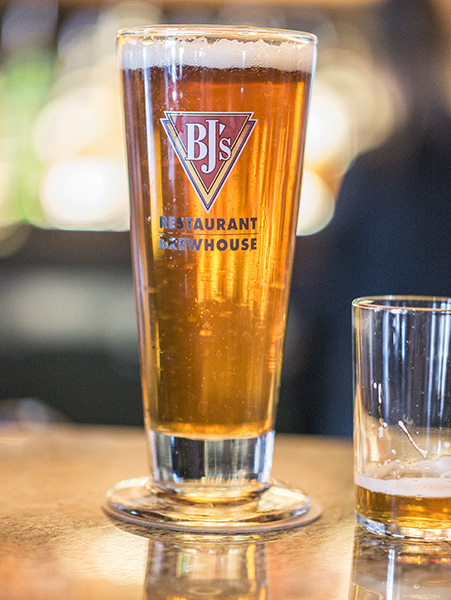 Here is the original capture SOOC ( straight out of camera) when my beer was delivered at the bar. Made with the LumixGH4 and the 35-100mm f2.8 G Vario lens
Got questions? Give me a shout.
Yours in Creative Photography, Bob
Save
Save