by successfulbob | architectural photography, infrared photography, landscape photography, Lumix G6, LumixGH5, photography creativity
Infrared Capture for Photographing Architecture
We don’t necessarily think about using IR capture when taking everyday images of architecture. It can give you a different look. And I like it.
Always the difference will be dependent upon what the final image use will be. Since I am my client when doing architecture images for art presentation, I get to choose. I’ll show you a couple of different captures and let you decide. Let me know what you think.
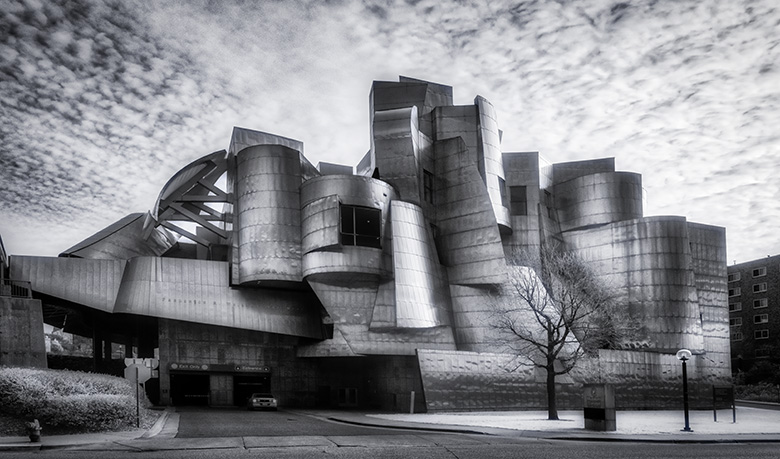
 Weisman Museum IR capture Lumix G6 Camera converted to Infrared Capture by LifePixel Processed in Adobe Camera RAW and Skylum (AKA MacPhun’s) Luminar
I think the infrared gave this image a bit of an otherworld feeling complementing otherworld style architecture.
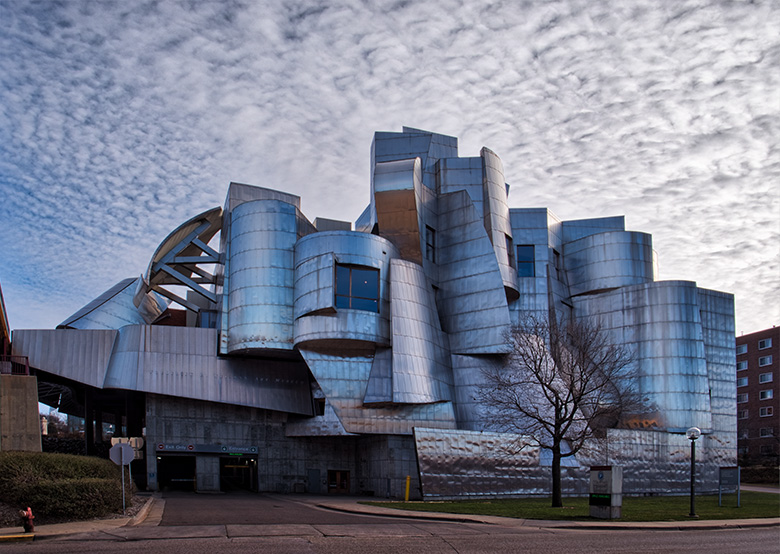 Here’s a color capture made with the Lumix GH5. Processed in Adobe Camera RAW and Skylum (AKA MacPhun’s) Luminar
I always try to work a subject over and above a straight-forward rendition. This includes different angles, framing, and processing. See a couple of images below for examples. I would have tried quite a few different ideas, but I stopped on my way to the airport and didn’t want to miss my flight. Art suffers from a tight schedule!
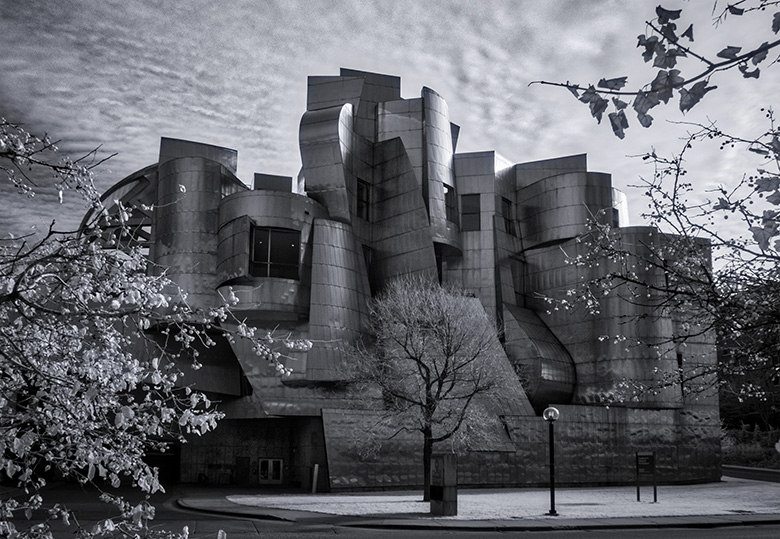 While not showing off the architecture quite as much I feel the framing made for a more interesting photo.
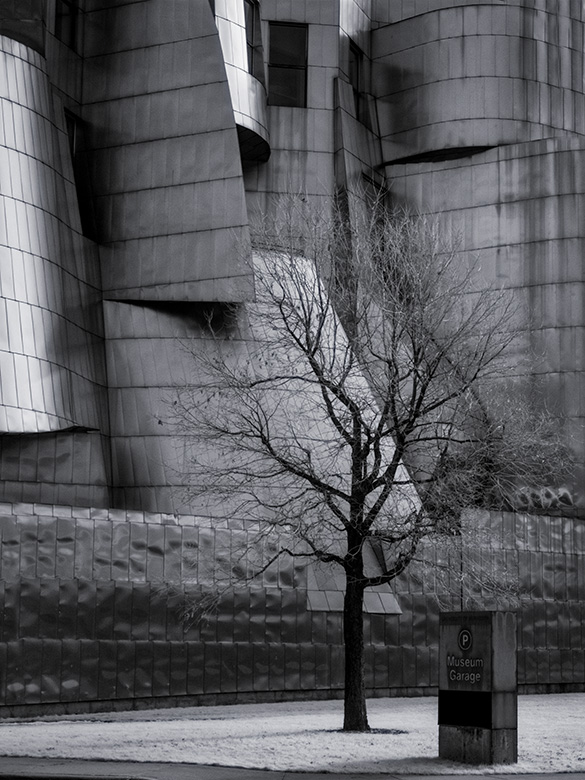 Details can always add to the story. I liked the barren tree against the architecture in this image.

by successfulbob | black & white, cloud photography, infrared photography, landscape photography, Lumix G6, photography, photography gear
Outdoor Photography – Walking Oak Creek Part Three
This is a four-part series. Here are the links to previous posts. Part one. Part two.
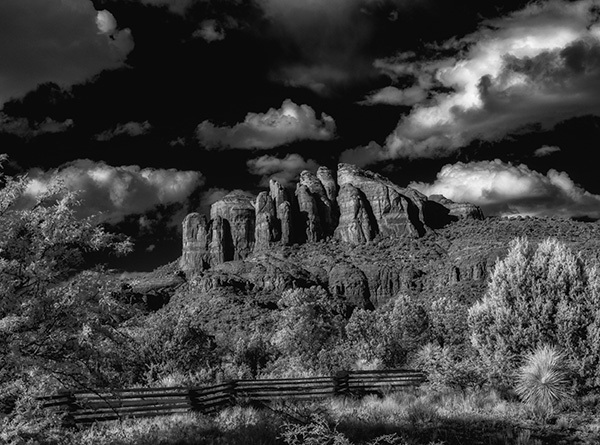
When out photographing for the day the camera that is converted to infrared makes shooting under the sun high in the sky quite interesting. Non-visible light can be captured with an IR converted camera. Lumix G6 (link to newer camera G7) with 14-140mm Lumix Lens. I used LifePixel for my conversion to a 720nm filter. There is quite an array of information on their website to help you decide what kind of IR filter to have installed on your camera. Many people put their older camera models back into service this way.
Usually, mid-day is not an ideal time for making images due to the high contrast of the light. This is exactly what makes creating images with an IR camera work the best. There’s high contrast, but it renders as dramatic with blue skies trending toward black and clouds picking up this iridescent glow. Green vegetation will provide white tones. This complete change in the way we view a scene creates excitement.
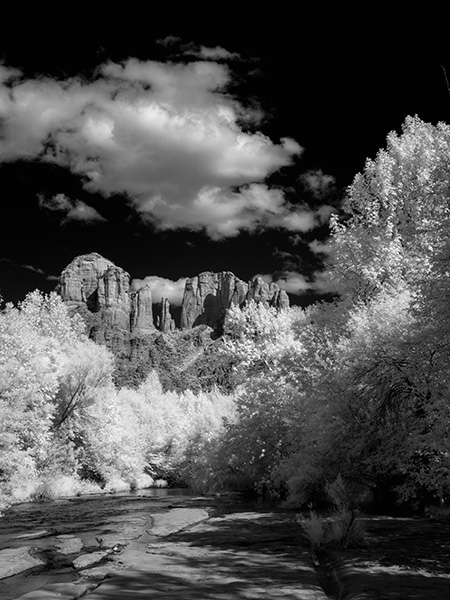 Green trees render white. Blue skies turn black with white puffy clouds. Infrared photo made with Lumix G6 converted to IR.
The benefits to creating IR images in the digital realm is that what you see on the live viewfinder is what you get. To make this happen, I set the camera to monochrome and shoot RAW plus jpeg. The resulting image on the back of the camera makes it easier to judge what the final will be. The RAW files will come into the camera in a magenta color and need processing. The jpeg file will be just as you see them and still need a little post production work but don’t have as much information in the file. The RAW plus jpeg is the best of both worlds.
 This photo is a detail of the center of Cathedral Rock. The 14-140mm zoomed for in-camera cropping.
 I enjoy the light and airy feeling of deciduous trees when rendered with infrared.
 Taken with side light a bit later than ‘normal’ time of day for IR imagery and with side-light leads to very contrasty image rendering. I like it because it’s a wee bit different. Always looking to experiment.
Yours in Creative Photography, Bob
PS – if you have a question don’t hesitate to give me a shout by leaving a comment!
Save
Save
Save

by successfulbob | architectural photography, black & white, infrared photography, Lumix G6, photo walkabout, photography, photography creativity, photography gear
Wandering – Scottsdale, Arizona
Today is the start of a new feature here on the Successful-Photographer blog. Wandering will have images from a walk around a place with no other objective than to see what images might be gathered. Wandering is a way to keep your eye sharp and experiment with new ideas or test out new gear.
The first stop on the SP wandering tour is Downtown Scottsdale, Arizona. Scottsdale is a high-end community with lots of art galleries and interesting new architecture mixed with buildings built in the ’20’s. I was down in the Valley of the Sun for meetings that started in early morning and stretched into the night with some downtime in the middle of the day. With full sun basting the town I thought it would be fun to put the infrared camera through some paces. For convenience, I mounted the 14-140mm (28-280mm full frame equivalent) on the LifePixel converted IR and set off to see what I could capture.
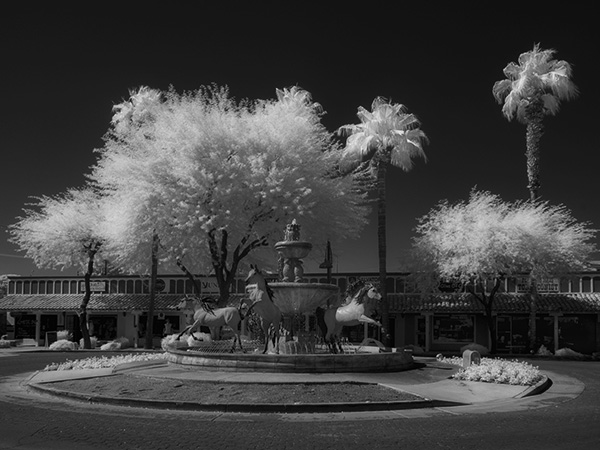 Fountain on the central circle.
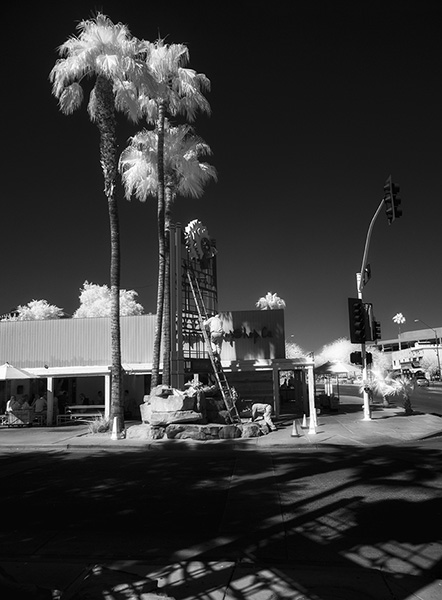 Working on the sign under the palms.
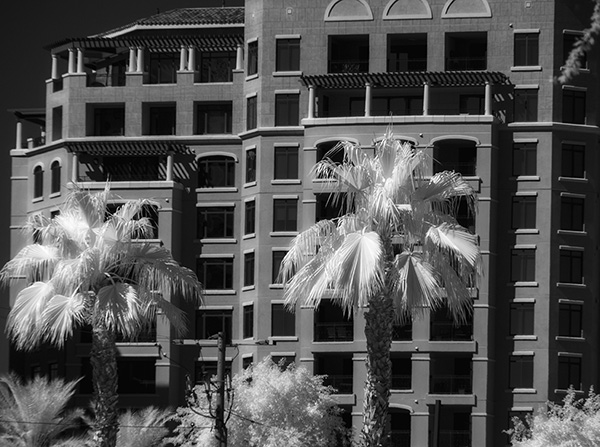 Glowing palms against the modern architecture.
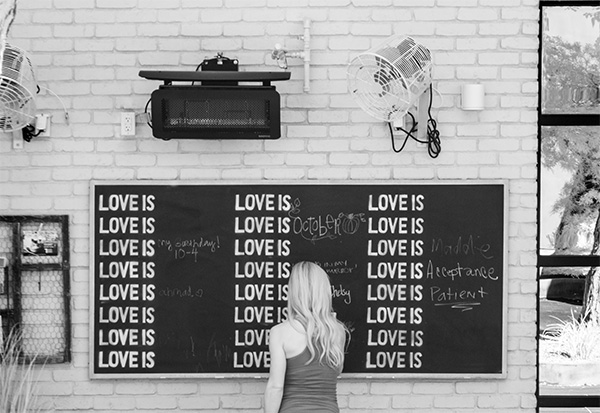 ‘Love is…’ bulletin-blackboard outside a restaurant. Even though there was no full sun the infrared capture renders this scene with lots of contrast.
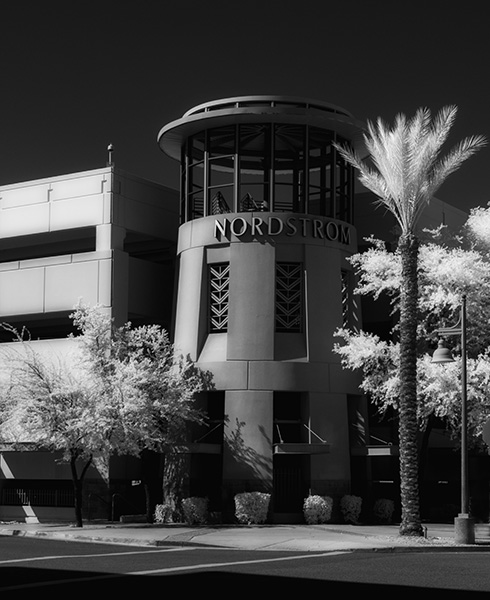 Nordstroms tower architectural detail.
Always having a camera with you allows you to take downtime and turn it into a learning experience. With the light weight and quality of the micro four thirds cameras, it’s easier than ever to always have a reliable capture device with you.
It’s a great time to be a photographic artist.
Yours in creative Photography, Bob
by successfulbob | black & white, cloud photography, infrared photography, Lumix G6, Lumix Lounge
Infrared Cloud Images
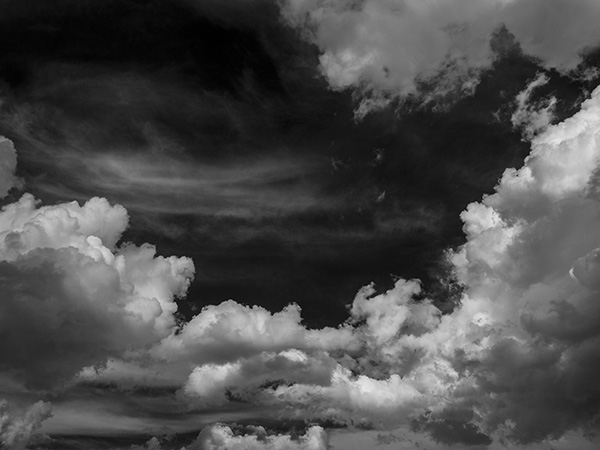
I enjoy the high-contrast look of clouds when photographed in infrared. I use a Lumix G6 with the filter changed out to infrared by LifePixel.
 Processed in Adobe Camera RAW
Clouds can have lots of personality when paired with an infrared capture. The high contrast can be a lot of fun. I’m starting to collect IR cloud images just as I have for my regular work. Having a library of clouds can help add interest to art photo composites.
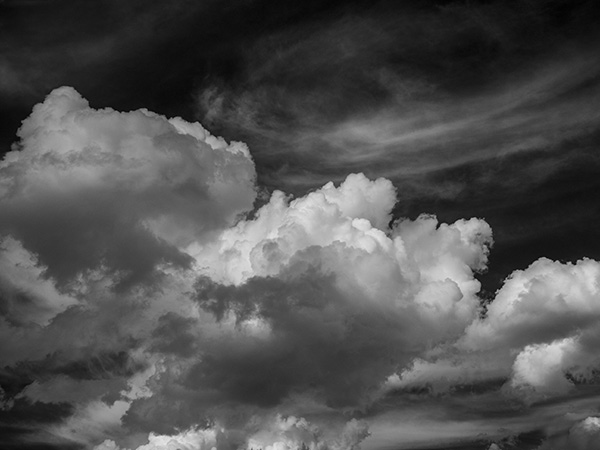 These were taken in Sedona.
I was cooking dinner and looked out of the window and saw the clouds starting to march through the area. They only showed this kind of depth for a few minutes. If you see cloud formations happening, take it ASAP. Usually, if you wait a little bit, or drive down the road a little ways you won’t get what you were looking for as clouds are an ever changing kaleidoscope of shape and form.
Yours in creative Photography, Bob
Save
Save
by successfulbob | black & white, cloud photography, infrared photography, landscape photography, Lumix G6, Lumix Lounge
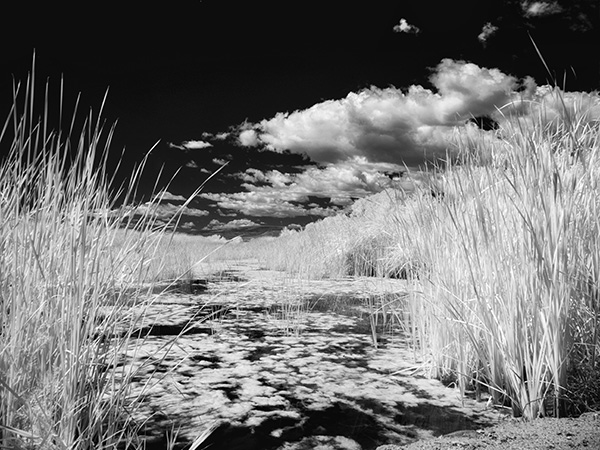
Infrared Image Wetlands Near Sedona, Arizona
The Lumix G6 is coming in very handy now that it is converted over to infrared capture by LifePixel. Midday is not the best time in the world for catching beautiful photos with standard color capture. But move to infrared and the middle of the day is a whole new world.
I was out scouting some new areas to photograph with wildlife and really didn’t think I would be capturing any images but I had the new Lumix GX85 and the 100-300mm lens and had some fun there in spite of the time of day. (check the post here) And I also had the G6 in IR. This is one of the advantages to shooting with micro 4/3rds gear. I was able to have all these options with me with no strain when hiking around and scouting. Used to be I would leave gear behind until I was absolutely certain I wanted to make images. Now opportunity abounds and I’m having more fun and getting more images.
 Sedona Wetlands (learn more about them here). Designed land to help with the processing of wastewater while creating habitat for wildlife. There are quite a number of species taking advantage of the new ‘watering holes’!
I’ve started to narrow down my processing of infrared images. I have bee taking the RAW file and lowering the color and tint sliders to 0. Dialing in highlight and shadow to taste. A pinch of Clarity. Add some black. Add some white. Then tweak the contrast. Open the image and take it to NIK Color FX Pro 4 for a little Glamour Glow and we are looking pretty good. Once I am pretty certain this is the processing path I want to take I’ll set up a preset in ACR which will dial in all the goodies to get me close then tweak. When I set that up I’ll share it here on the Successful-Photographer blog. You can see a bit more in-depth info on this IR conversion in this post on LifePixel.
Yours in Creative Photography, Bob