by successfulbob | infrared photography, landscape photography, Lumix G6, Lumix Lounge
Infrared Photo – Sedona
Monsoon weather.
Clouds of all shapes and sizes dance and glide through the area on a regular basis.
Normally, mid-day is not the best time to be out photographing in full sun. With my Lumix G6 camera converted to infrared the middle of the day becomes a playground of absolutely beautiful high contrast. I love this look and the possibilities it brings.
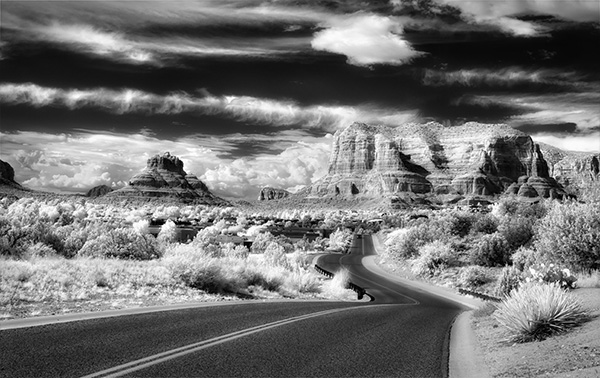
 Infrared black & white image Village of Oak Creek, Sedona, Arizona
The camera was converted to infrared by LifePixel. It took a slightly older camera and gave me a new look for images in my photography life. The way I capture is in RAW plus jpeg and bracketing by three stops. For this image, I processed the three jpegs and layered them together using the information from each using Masks in Photoshop. I took the layer showing the highlights and moved it into NIK Color FX Pro 4* and added a Glamour Glow Filter to get the “IR Glow.”
Yours in Creative Photography, Bob
* You can download the entire series of NIK filters at no charge. Go get ‘um. There probably won’t be any updates but they are an incredible set of tools for use right now.
PS – I expanded upon this blog with more information on ‘Working a Scene-Multiple Compositions’ on the LifePixel site.
Save
Save

by successfulbob | black & white, HDR photography, infrared photography, landscape photography, Lumix G6, Lumix Lounge, photography creativity
Infrared Photography Panorama Style
“The sailing clouds went by, like ships upon the sea.” — Henry Wadsworth Longfellow
Clouds scudding across the azure skies. Words can take you to some beautiful places but as the Chinese say, a picture is worth a thousand words. That’s why I keep an eye peeled on the sky. When the clouds start racing, or even lumbering through the red-rock country of Sedona I grab a camera because interest is added to the scene.
Even if it’s mid-day, I grab a camera and head outdoors. My camera of choice for these times is infrared. I enjoy the high contrast black and white rendering of clouds rendered against a deep dark sky. A Lumix G6 was converted by LifePixel and it has expanded my shooting times as infrared shines when it’s time to put the camera up for regular color photography. I used the Kit lens that came with the camera and was pleasantly surprised at the solid quality of the captures. (G Vario 14-42mm f3.5-5.6) It makes for a super light-weight combo.
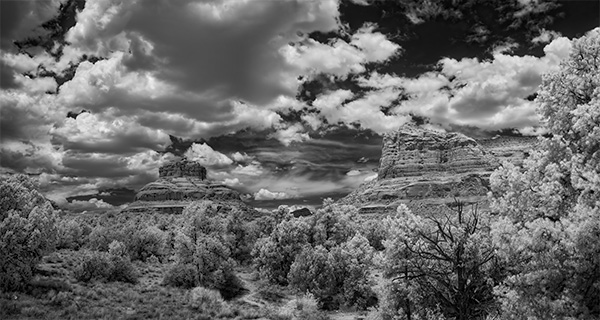 Bell Rock Vista in Sedona – Infrared Panoramic image with Courthouse Butte
I tend to try to push the envelope and experiment when I’m on self-assignment. In yesterday’s adventure, it was to add panorama to infrared. It took quite a bit more work. I’ll let you be the judge to see if it was worth it.
Five images overlapping by about 40% were captured. With the camera set to black & white, three exposures one stop apart were saved in jpeg format to ensure detail in highlight and shadow areas once they were processed. Each set of three images were treated in Aurora HDR software.
 Screenshot of images used before processing
Each of the final five images was loaded into Adobe Photoshop to process the panorama. Whoops! That was an unusual fail. Could be the handheld capture caused some extra deformity in the files. Usually, I can depend on Photoshop to render a solid panorama but with this set of images, there was way too much distortion in the resulting output. (I’ll experiment with these files again when I have some more time and see if different rendering intent might be of help) I couldn’t find my AutoPano Pro software on this computer so I resorted to having Photoshop load all the files into Layers and added my own Masks blending the images together by hand. It’s good to remember the ‘Old School’ methods when the automatic software options aren’t there for you.
Yours in Creative Photography, Bob
PS – Another cloud description I enjoy. “Clouds hastening like messengers through heaven.” —John Hall Wheelock
PPS – Cloud quotes referenced in this post were found in The Free Dictionary by Farlex. I’m book-marking that page for future reference!
Save
by successfulbob | black & white, infrared photography, landscape photography, Lumix G6, Lumix Lounge, photography, photography creativity
Infrared Photography on the Oak Creek
My job is tough!
Yesterday I took on the task of going hiking in Oak Creek Canyon in Sedona, Arizona to capture infrared photos. OK, maybe tough isn’t the correct word for this assignment. I love almost all aspects of working in photography. Getting out into nature and exploring is high on the list of the good parts.
I’m up in Oak Creek Canyon between Sedona & Flagstaff. The picnic area is called ‘Halfway.’ So named because it’s halfway between the hugely popular (& crowded) swimming hole known as Slide Rock and an excellent trail called West Fork. Halfway is a little less traveled spot as you have to scramble down a fairly steep embankment while climbing over rocks. Once down to the creek there’s a bit of rock hopping to navigate your way around.
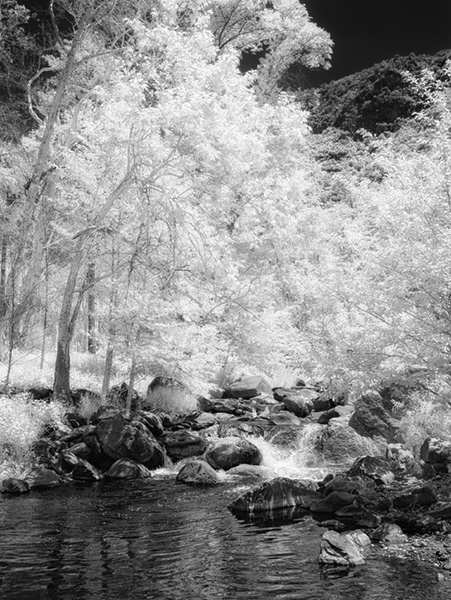
 LUMIX G6 20MM LENS F1.7 LENS @F9 ISO 160 1/200TH SEC
But I digress.
On to today’s thoughts on working the with a camera converted to infrared. I had my Lumix G6 converted by LifePixel with a standard IR filter ad it is working out pretty much as I had hoped it would. I find myself using the 20mm Lumix f1.7 lens quite often. It’s sharp, fast, light and has a very low profile. I guess at a 40mm full frame equivalent it pretty closely matches a standard field of view which I feel lends itself to most of my infrared captures.
As I make my IR captures I have been bracketing exposures. When I first started I was bracketing by five stops as I was learning how the camera ‘sees’ with the IR filter installed. I’ve now moved to a three-stop exposure bracket but I also set an exposure compensation adjustment depending on the dynamic range of the scene in front of me. I am capturing the images in RAW plus jpeg with the camera set to black and white. White balance is set to daylight.
The image above is two jpegs blended together to achieve the tonal contrast for which I was looking. After getting the tones blended in Photoshop using a mask, the Layers were merged and a trip to NIK Silver FX Pro 2 for some sharpening. I used the Structure and Fine Structure settings si tweak the sharpness and change the resulting layer blend mode to Luminosity. Only the luminous information is then transferred to the image. Then NIK Color FX Pro 4 was added utilizing the Glamour Glow to add some IR life to the highlights. The shadows were protected from the glow.
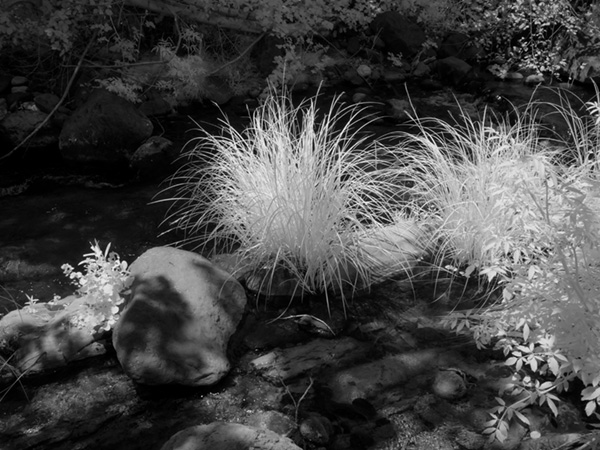 LUMIX G6 20MM LENS F1.7 LENS @F14 ISO 400 1/200TH SEC
This image was processed from a single jpeg which was opened in Adobe Camera RAW. Jpegs can be opened in the RAW editor to use the controls available but it does not have all the information of a RAW file. I was just trying to control contrast with this treatment so I didn’t feel the need to start with the RAW file. Exposure was adjusted as well as the highlight and shadow detail. A soft light layer was added for some dodging and burning. A vignette completes the treatment. I enjoy all the textures and tones of this scene.
Infrared photography can take midday, which is usually a tough time of day for making photographs and turn it into a blast.
That was my play yesterday. I created a few more scenes I’ll share with you tomorrow.
Yours in Creative Photography, Bob

by successfulbob | black & white, cloud photography, infrared photography, landscape photography, Lumix G6, Lumix Lounge
Stud Horse Point Infrared Photography – Page Arizona
Infrared imaging can add interest to a scene that otherwise would be OK but rather mundane. I have a Lumix G6 that I had converted to IR by LifePixel. It’s great to take an older camera that isn’t getting much use and have it converted to Infrared. Or if you don’t have an older candidate that will work you can but up a used camera and have it repurposed.
But why is it good Bob?
Some times of day are just not conducive to solid imagery. Usually, midday is less than ideal for making photos and that is when IR photography can shine especially when there are clouds and or trees in the scene. Here was an example where I wasn’t thrilled witht the lighting. We were hoping for great color in the sunset. You know how that goes. All looks good then falls flat. Rather than come home empty handed I kinda like the outcome of these.
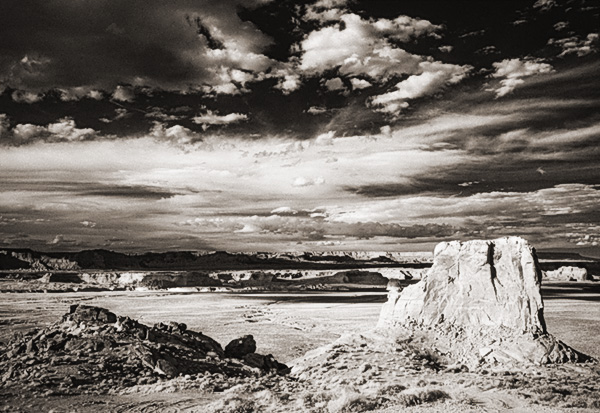 Outside Page, Arizona – Stud Horse Point
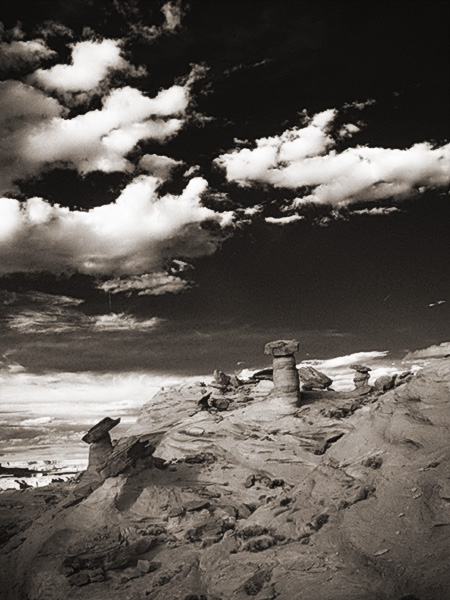 Hoodoos at Stud Horse Point
When capturing IR photos I tend to shoot in RAW + jpeg with the camera set to black and white. The black and white allows me to get a better sense of how the scene will render as the RAW image will come in with a magenta cast. I also bracket exposures as the camera’s meter and histogram are still ‘thinking’ in full spectrum color mode.
I picked the RAW images I wanted to process. Then output them to Photoshop and added some dodging and burning. Then took the image to NIK ColorFX Pro 4 to add some Glamour Glow and a little grain to emulate the look of film IR. As a final step, I evened out the overall color and added a light sepia tone over the image using a Hue/Saturation action.
Yours in Creative Photography, Bob
by successfulbob | black & white, cloud photography, infrared photography, landscape photography, Lumix G6, photography education
As you can probably tell by my lack of posting the last few days it has been extremely busy in bob’s world. Had a full two day shoot for the Sky Ranch Lodge after their remodel. I’ll share some photos with you as soon as the processing is done along with some of the techniques I used to get the images.
In the meantime, I did have a chance to process another image from my infrared photography. I really enjoy black and white images and the infrared adds another whole new dimension to it. I converted my Lumix G6 through LifePixel with a 750 NM (standard) IR filter. This gives you images that are on the pink side and of course need some processing to get them into final shape of Infrared BW images. As I practice and process more I am able to get a better range of tones throughout the photo.
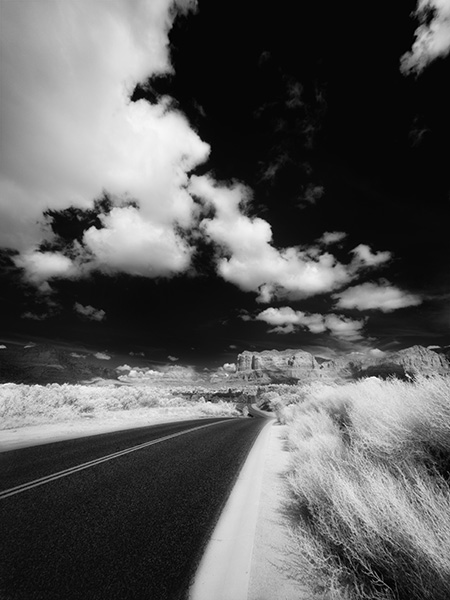
Captured in the Village of Oak Creek, Sedona, AZ. Courthouse Butte is the main rock formation.
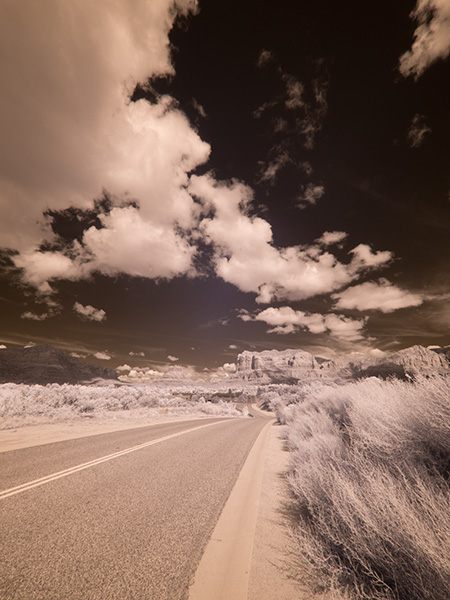
Here’s the IR image Straight out of Camera Note the pink cast. Finding I need to underexpose a bit in order to not loose highlights even though the histogram indicates it is with the scope. You have to remember that the histogram is letting you know about visible light not necessarily infrared exposure.
One of the really great things about having a dedicated IR camera is the ability to set recording for RAW + jpeg and have both images to work from in post production. If you shoot only in RAW you don’t get the processing from the camera. I set the camera to capture BW images so I can get a ballpark preview of the scene as I work.
You don’t need to convert a camera to IR you can always go ‘old school’ with a Wratten IR filter in front of your lens. The problem with doing that is your exposure time will be lengthy and focus can be a bit of a pain as IR light rays and visible light focus at a different depth on the sensor so additional calculations need to be made. (although the extended time might be cool for capturing cloud movement!) Might have to pick up an IR filter myself too…
Best part is infrared photography really opens up the mid-day time slot for creatively capturing images as it is usually too much contrast for regular photography.
Are you shooting IR yet?
Yours in Creative Photography, Bob