Having a camera with you all the time allows you to see a quick moment and record it. This enables you to learn how different objects look in different lighting situations. I do a fair amount of commercial photography and product and often clients are looking for a natural setting photograph that has the feel as if not set up for an ad. Making little studies like this keeps me sharp when figuring out details for future shoots.
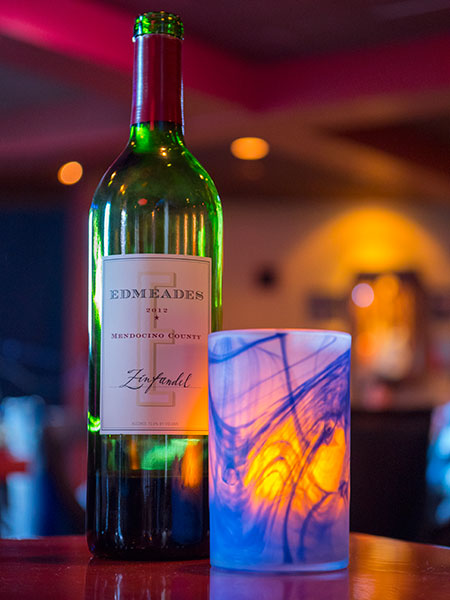
Captured with the Lumix GH4 and 35-100mm Vario f2.8 lens 1/15 sec f2.8 ISO 1600
I really enjoy the warmth of this image. Light was coming from the sky through sliding glass doors. The repeating orange light gives this a lot of depth. If I was photographing this for a client I would have added some more controlled light onto the wine bottle with very soft edged highlights and perhaps have added a glass of wine to the set-up.
But since I was there enjoying the music and having dinner with my wife I didn’t push it toooooo much.
A couple days ago I shared some images from working with Pash Galbavy when she was doing a model posing for a life drawing class. She was posing in the Butoh style, something I had never heard of before documenting this class. See the post here.
One of the great features of the Lumix cameras that doesn’t get spoken about too often is the ability to shoot time lapse sequences. I mounted the Lumix FZ-1000 on a tripod and set it to capture an image every 30 seconds. I was looking to tell the story of the life drawing class and how this particular session of Butoh posing was done.
Pash and the artists at work in the Life Drawing Class over a couple hour period.
These images were given a quick process to control color and contrast and saved to 600 pixel jpegs. For the time lapse 94 images were used at 7 frames a second giving a 13 second film output as an H.264 codec which produces a .MOV file. They were assembled using Time Lapse Assembler a free program for MAC or PC. One thing to remember when creating a time lapse movie that a normal playback speed is using 24 frames per second. which means you often need to capture images about every 1-3 seconds over a long period of time to have a longer final film.
Pretty amazing what we get to learn as photographers…
I was asked by a model friend, Pash Galbavy, (see her site and work with other artists here) to help document a life drawing modeling session she was doing utilizing Butoh posing.
Butoh posing?? What the heck is that? And the continuing education of this photographer goes on…
Butohis a form of Japanese dance theatre that encompasses a diverse range of activities, techniques and motivations for dance, performance, or movement. Following World War II, butoh arose in 1959 through collaborations between its two key founders Hijikata Tatsumi and Ohno Kazuo. The art form is known to “resist fixity” and be difficult to define. If you’d like to learn more check Wikipedia here.
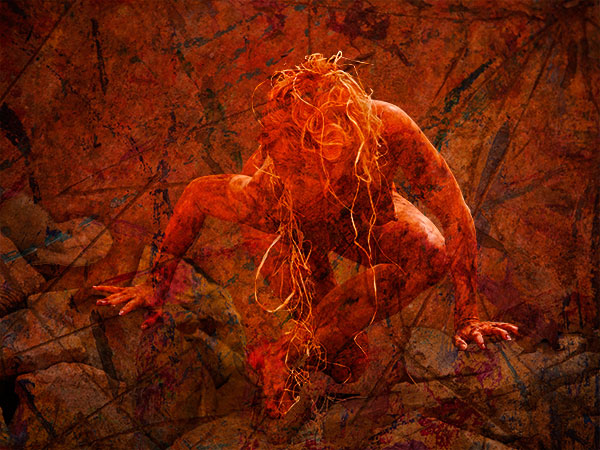
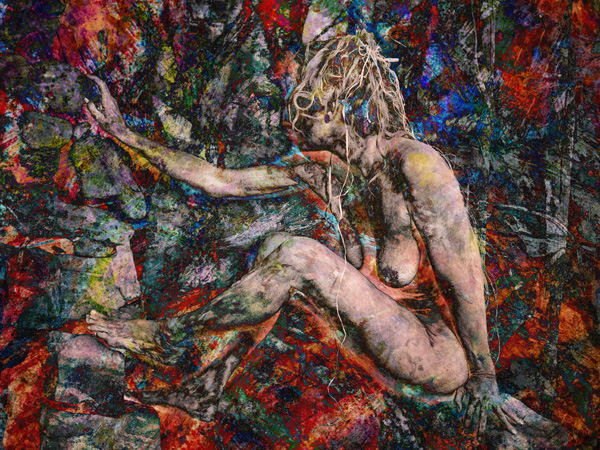
Pash Galbavy of Sedona at Elephantine in an art rendition using textures and colors photographed at the same time.
Pash wore clay and twined straw into her hair to enhance the Butoh look.
Pash is absolutely amazing as a model. She’s able to hold poses for a long period of time with no motion
yet still able to bring emotion forward.
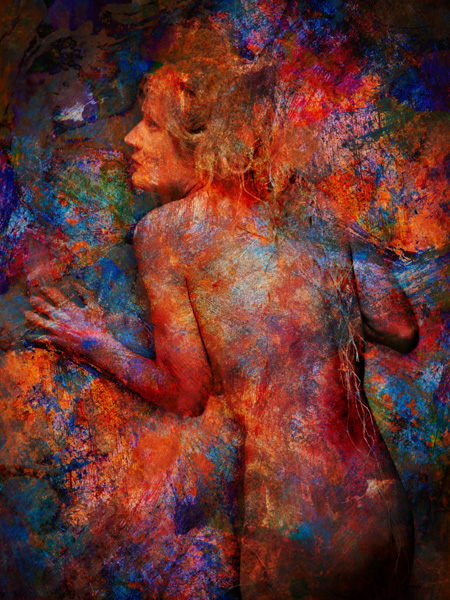
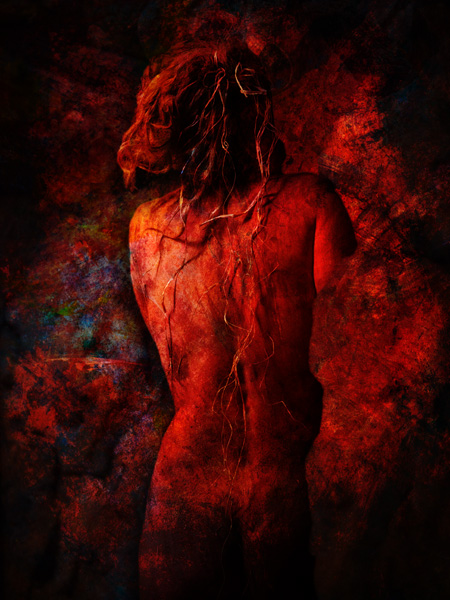
Images were captured with the Lumix GH4 and the Lumix Vario 35-100mm f2.8 lens. ISO’s were from 1600 to 3200…
Images were then taken into Adobe Photoshop where I added layers of color textures from photos and used Blend Modes, Selections and Masks to create the final artwork. In working this way I have numerous renditions with different amounts of color. or lack thereof for each of these images. This is the technique I’ve dubbed ‘Photo-Synthesis’.
Yours in Creative Photography, Bob
PS – If you are ever in the Sedona, Arizona area and need a life model who is incredibly talented make sure you see if Pash is available. She’s truly a work of art in her own right with her posing ability.
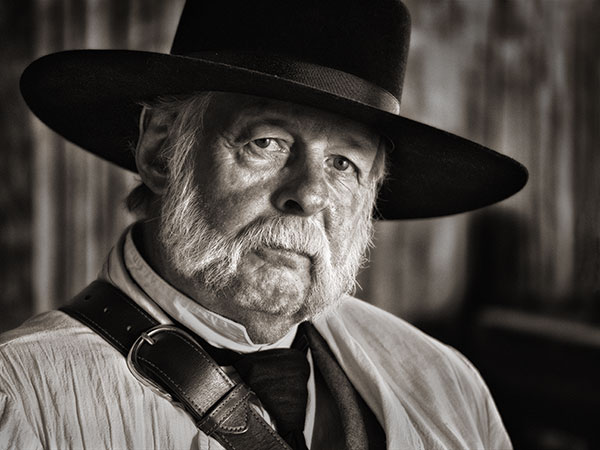
I’m working on a video for a future seminar being hosted by the Arizona Professional Photographers Association (AZPPA) in the fall and here is an image of one of the character actors expected to join us in a western setting. Steve AKA the ‘Sheriff’ is a pleasure to work with as are all the people who will be dressed in period costumes at the event.
‘Sheriff’ Steve in costume.
Steve was captured with the Lumix GH4 and the 35-100mm f2.8 Lumix Vario Lens. Natural light from a somewhat overcast but bright day coming through a doorway camera right and behind Steve so I could shoot into the shadow side of his face to add depth, dimension and drama to his features.1/15th sec f3.2 ISO 1600 in Aperture Priority with a slight bump in Exposure Compensation to open shadows just a bit.
Post processing often plays into the creation of my images. As Ansel Adams proclaimed, “The negative is comparable to the composer’s score and the print to its performance. Each performance differs in subtle ways.” So here is the original digital capture with no adjustments.
Straight Out of Camera (SOOC)
Top Image was processed in Silver FX Pro 2 to convert to Black and White.
Then some small retouching moves, mostly dodging and burning to control the contrast of the scene.
NIK Color FX Pro 4 Bleach Bypass Filter. Used a Layer Mask to bring back some detail that got whacked.
Back into NIK Color FX Pro 4 to use the Tonal Contrast Filter to highlight details and bump contrast.Layer Mask to control specific areas.
Added a Soft vingette.
Soft Light Blend Mode Layer added to retouch and add extra life to his eyes.
Then a conversion to Sepia Tone using a Hue Saturation Adjustment Layer with the settings Hue 30 Saturation 10 Lightness 0 and Colorize checked. (Got this recipe, or something very similar, about 15 years ago from longtime photographer friend Tom Cheswick)
Do you have to buy a new more expensive camera? Nope. You just have to learn how to sew… I mean stitch.
Basically even with the 16MP micro 4/3rds chip we are working with in the Lumix line of cameras we have multi-megapixel (like 100MP plus) cameras in our hands if we take multiple images and overlap them. Here is an example.
This is 13 images overlapped with the camera held in the vertical orientation. This file comes in at 385MB after processing in Photoshop.
I could easily print this image 26 inches by 158 inches. That’s about 2 feet by 13 feet!
Here’s another version with 2 rows of 10 images overlapped with camera held in vertical orientation. This file is almost 400MB after processing. Could easily be printed to 3 feet by 10 feet…
This technique can be used with large group portraits, architecture and any stationary subjects.
Images were captured with the Lumix GH4 and the Lumix Vario 35-100mm f2.8 lens at ISO 200 f10 1/320th sec. The built in level on the GH4 helps to keep the horizon straight during this hand held capture to make the panorama stitching easier in the software. My overlap of individual images is about 30%. Any less than that and you’ll tend to find stitching errors in the final image.
So you’ve heard the expression “Go big or go home!” Now you can with whatever gear you are working with….
Yours in Creative Photography, Bob
PS – using links on this site to make your gear purchases help to support this web site and the education being shared. Thanks in advance!
For infrared conversion of my cameras I use LifePixel. Infrared allows you to put an older camera to use and opens up a new time time of day for productive image creation.
Learn Photoshop in a fun environment. Aaron Nace applies the right amount of fun with easy to understand and follow tutorials. Actions and brushes are included with lessons!
Lightning, waterdroplets, sound, time-lapse, HDR sequences, smiles and much more control for your camera!
Cameras Get Smarter -
A High Speed Smart Camera Remote
Best embroidery ever. Give Queensboro a try, get a $20 instant credit to get started by clicking on the logo! They specialize in great quality custom logo apparel and promotional products with the best customer service.
Platypod has become a great resource for being creative in getting your camera gear easily into unusual places. As an Platypod Pro I get to work/play with the gear even before it comes out. Head over to Platypod, subscribe to the newsletter and you will get special discounts reserved only for subscribers.