by successfulbob | bird photography, landscape photography, Lumix GX85, Lumix Lounge, photography, photography creativity, wildlife photography
Bosque del Apache Wildlife Refuge Part Five
This post is the final in this series from a very productive shoot at the wildlife refuge in New Mexico. The refuge is a very target rich environment for making bird images. The scenery wasn’t bad either! Let’s talk about creativity just a bit more. I saw a lot of photographers while I was there. And except for gear difference such as long lenses, I believe most photographers there were getting pretty much the same photo.
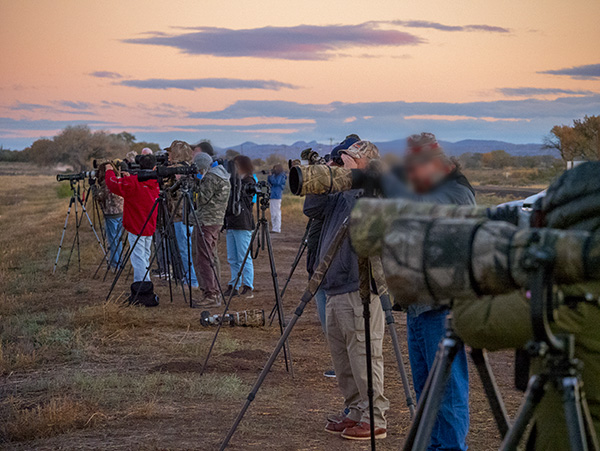
Why would I say that? Check out the photo below of the scene at almost every location in the refuge. What do you see?
 Take a careful look. Every camera is at the photographer’s eye level.
I saw this ALL the time. To obtain a different look to your images, you need to look at things from a different viewpoint. I spent a fair amount of time on my knees, sitting on my butt and getting the camera off of the tripod. Look back through my past posts, and I think you’ll see lots of variety. Bosque Pt 1 Bosque Pt 2Bosque Pt 3 Bosque Pt 4 Changing the height that you shoot from can have a dramatic effect on what is in the background of your subject.
I also heard a lot of motor drives at 8-15 frames per second going off. Motor drives can be helpful when tracking moving subjects or quickly changing background and lighting conditions, but I would see that happening when a photographer was shooting a relatively stable subject in constant light. Save yourself from extra editing time on the computer, Turn off the motor drive when you don’t need it.
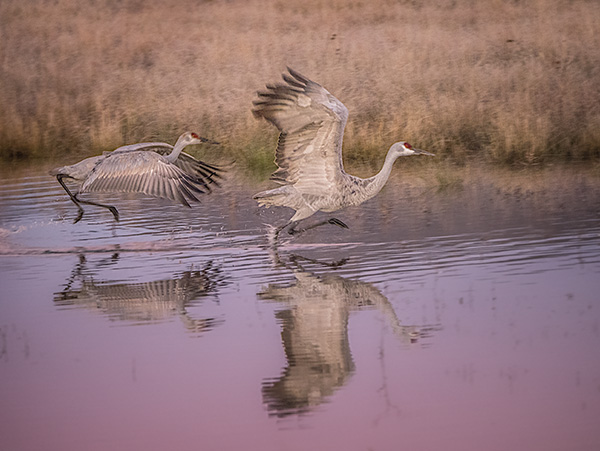 Taking a lower angle allowed for the reflection with the grassland environment in the background.
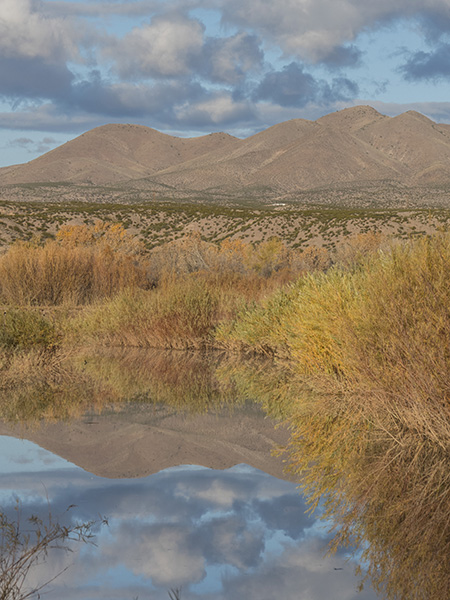 Had to be on my knees to get the composition of the reflection where I wanted it placed.
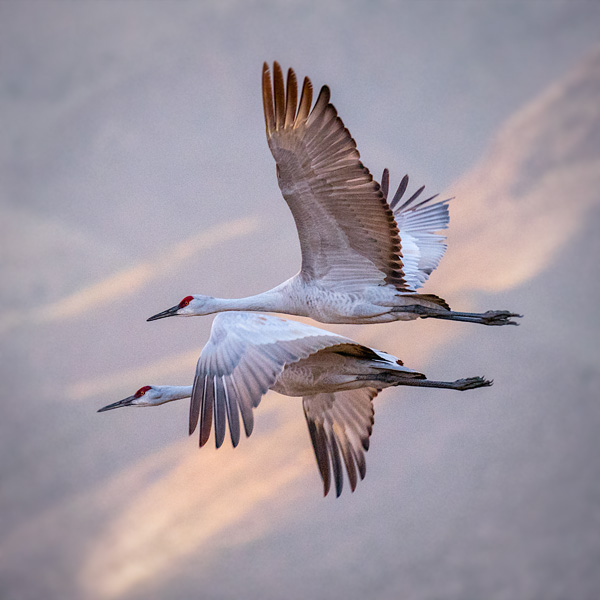 Generally, a gimbaled tripod head would be needed to capture solid images of birds in flight. With new gear and in-camera stabilization improvements, more creativity is possible. The Sandhill Crane images were captured handheld with the Lumix GX85 and the Lumix 100-400mm lens (200-800 35mm equivalent) lens fully extended.
Excited about possibilities as I push this camera and lens combo even further.
See what you can do to differentiate your images from others at every chance you get.
Yours in Creative Photography, Bob
Save
Save
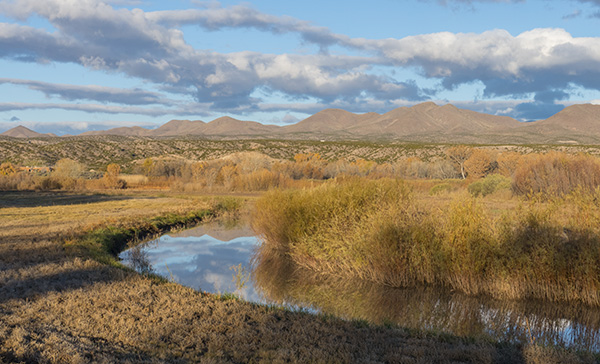
by successfulbob | landscape photography, Lumix GX85, Lumix Lounge, photography creativity
Bosque del Apache Wildlife Refuge – Part Three
The refuge is quite beautiful in and of itself even without the birds. I made sure to capture images of the landscape as a subject all of its own. Here are a few scenes from the area.
 Even though there are Cranes in the foreground, this is more about the landscape than the birds. Made with the in-camera panorama feature of the Lumix GX85.
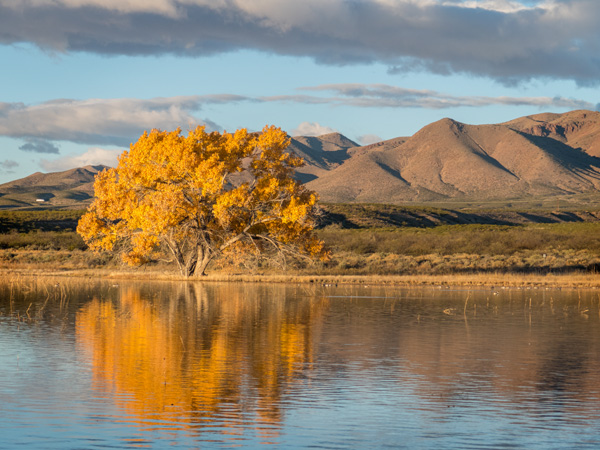 Sunrise just after the Sandhill Cranes made their ascent leaving the pond for the day to forage in the cornfield.
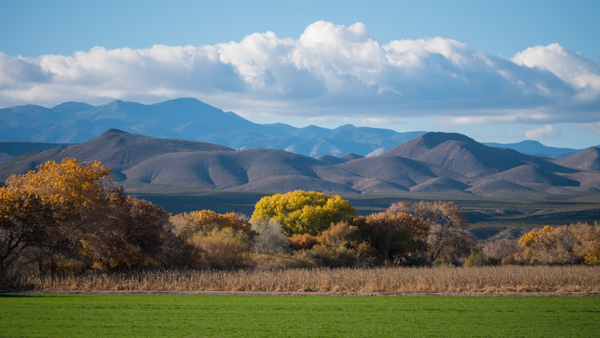 Lots of layers in this landscape.
 Reflection in the bend.
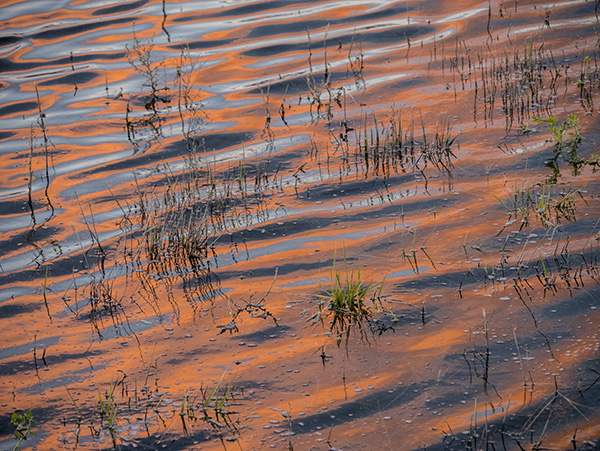 Reflections of sunrise among the grasses help tell the story of the environment.
I always try to tell the complete story of an area even if the main reason for the trip, in this case, was for the Sandhill Cranes and other wildlife of the Bosque del Apache.
Follow the previous posts here. Part One.
Find Part Two here.
Yours in Creative Photography, Bob
Save
Save
by successfulbob | bird photography, Lumix GX85, photography, photography gear, wildlife photography
Bosque del Apache Wildlife Refuge – Part One
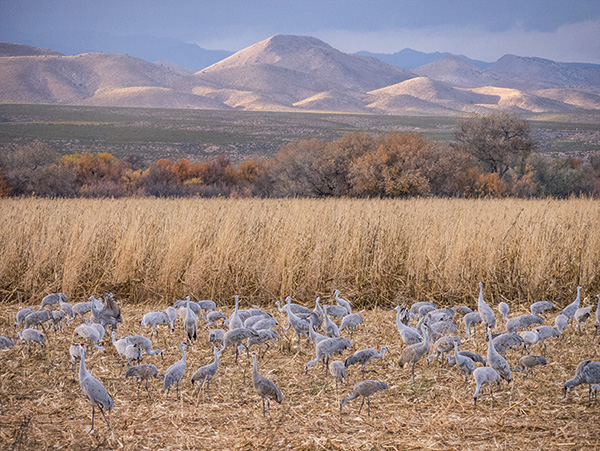
Talk about a target rich environment! Possibilities for incredible wildlife photography abound. The scenery, a variety of birds, and combinations of the two make for a great time photographing in this wildlife preserve about one and a half hours south of Albuquerque, New Mexico near Socorro. Learn more about the Bosque here.
This was my first visit, and I already look forward to returning in the future. Sandhill Cranes are a favorite bird for me to photograph. I have worked with them on the Gulf Coast of Florida. I’ve never seen groups this large. Since they are tanking up from traveling, they are pretty relaxed. They are chomping on rows of corn grown for them. The ponds are just the right depth for them to overnight and makes for interesting photographs as they fly in and out at dawn and sunset.
Let’s take a look at the photos.
This was one of the very first pictures I made when we got to the refuge. I am always trying to show the behavior of the animals when making images to add interest. Because I had previous experience wit the Sandhills, I recognized that this bird was about to leap. The fact that the other two birds are at the end of its wings was serendipity. Not the best time of day for photographing but we were checking out the area.
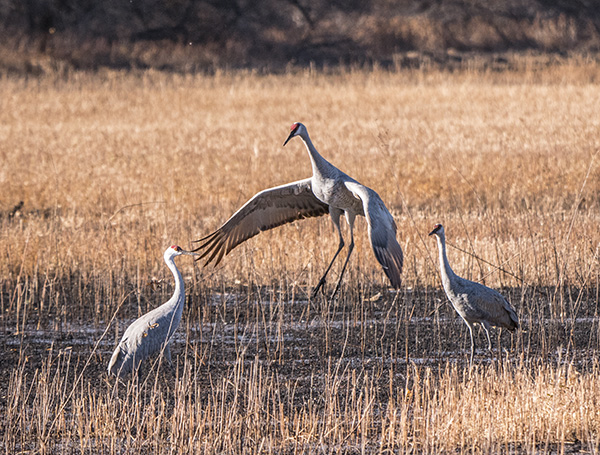 Jumping Sandhill Crane
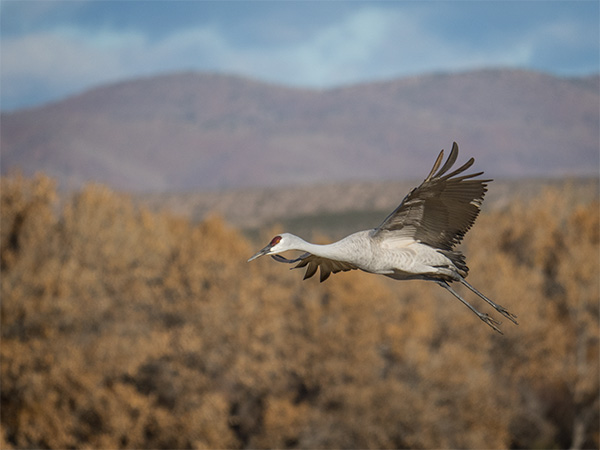 Sandhill Crane on a flyby through the field.
 Sandhill Cranes in the corn field planted for the migration as a feed stop.
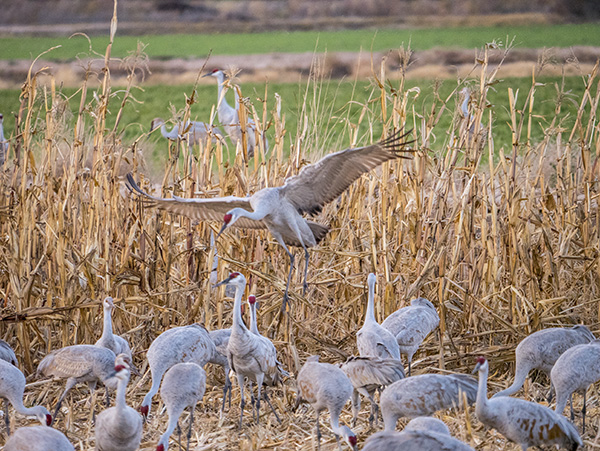 Getting ready for landing in the corn field.
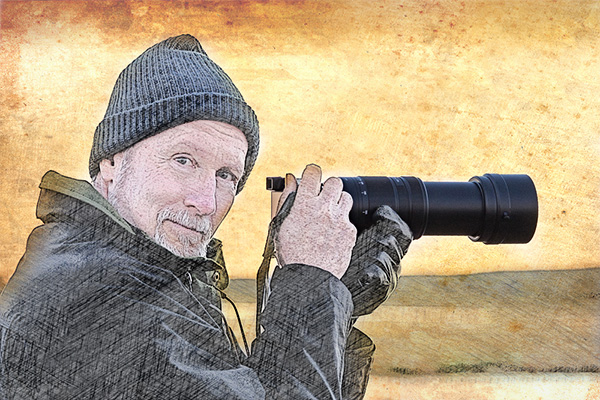 Bob Coates (hey that’s me) Original photo made by my shooting partner on this trip, Dennis Chamberlain. Dennis is an incredible photographic artist. You can see some of his work here. (PS – I arted-up Dennis’s photo so don’t blame him for how it looks!)
Here’s some feedback on the gear that I used. I was testing out the Lumix 100-400mm lens with the Lumix GX85 to see how it would hold up to not being on a tripod. I’ve always tended to photograph birds in flight handheld because I could track their movement better but would often end up with more tossers than keepers due to blur. The dual image stabilization rocks! Total change with this gear. I’m very excited about the number of images I got that were keepers with this rig. You’ll see more of those in the next couple days.
Yours in creative Photography, Bob
by successfulbob | 4K photo mode, 4K video, Lumix GX85, Lumix Lounge, photography creativity, photography gear, video
In-Camera Focus Stacking
Cool beans!
Yep, I said it. Cool beans. This feature is quite handy when you want to photograph with a macro lens and show some incredible depth of field in your image.
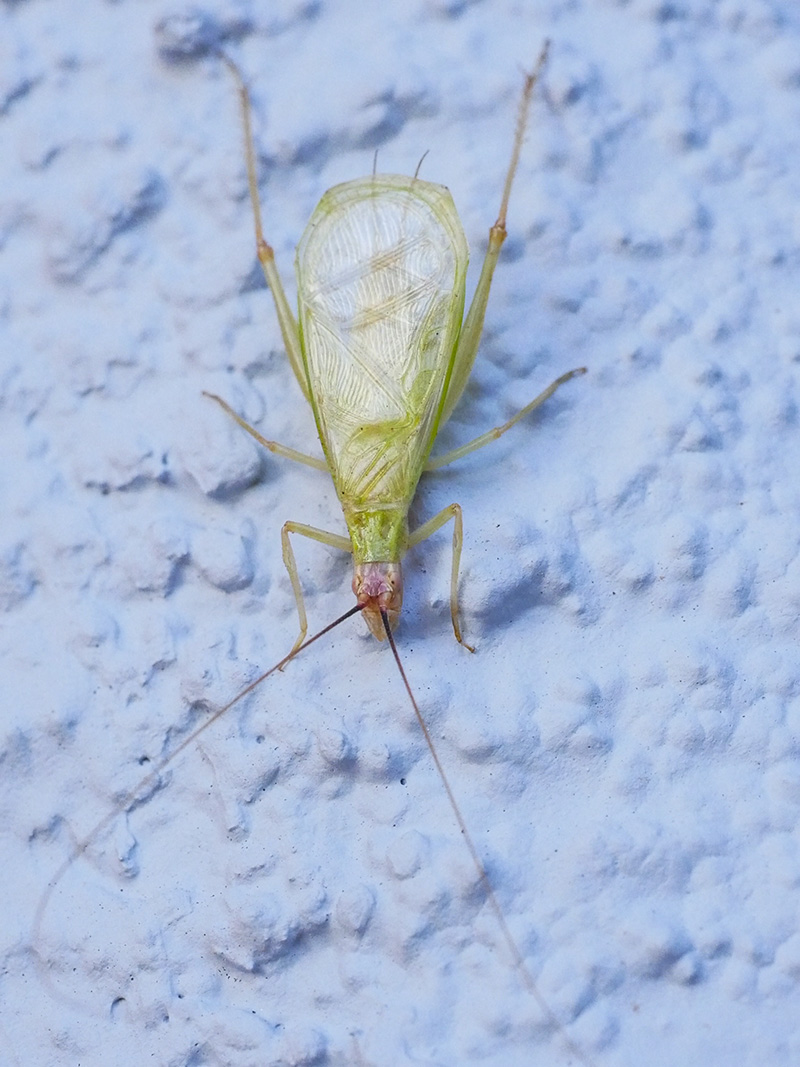
The 4K Photo Mode in the Lumix GX85 and the G85 called Post Focus which allows you to choose the frame with the focus where you want it, after the shot, also allows you to focus stack the images together to enhance the depth of field. One downside to using this method is that we are pulling stills from the video which means there is 8MP worth of file size with which to work. A file of this size will get you to a 20-inch print with no problem, but if you want to go bigger, you’ll need to use a different method. I’ll share that with you in the next day or so.
Let’s take a look.
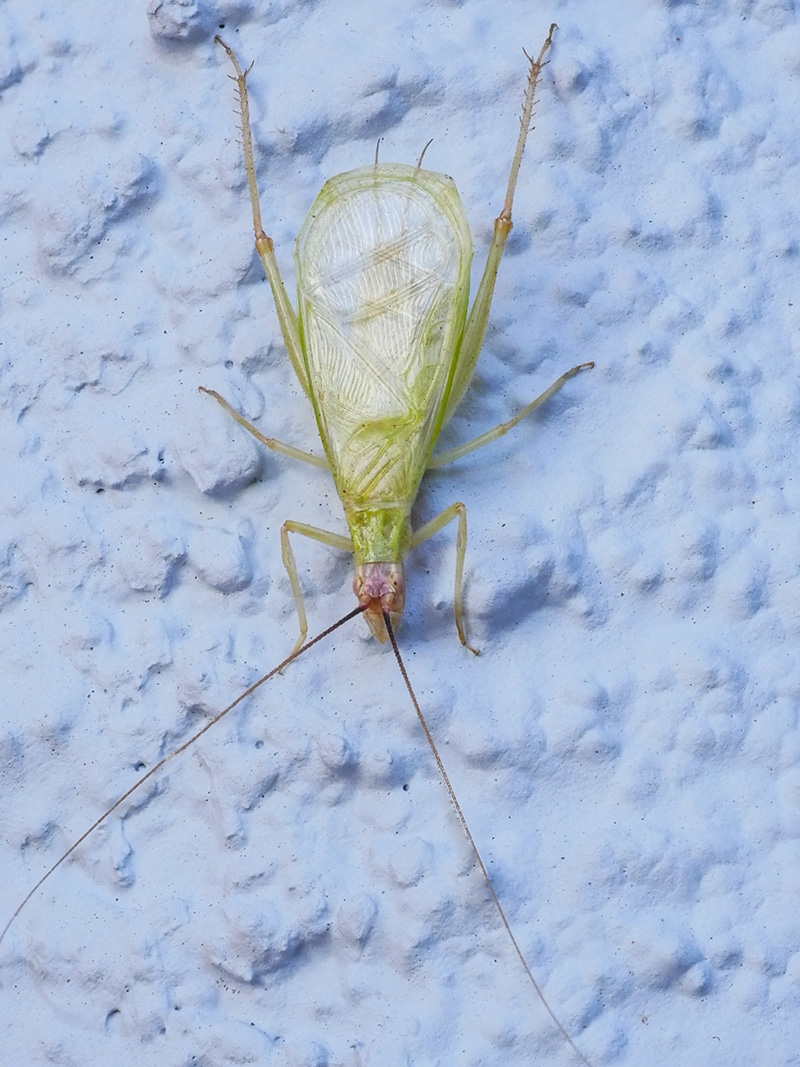
 I call this Green Bug. This image is a single frame grab from the 4K video. Printable and OK. But let’s see something a little better.
Now let’s take a look at the image after all the images in the stack have been combined to show the sharpest parts of each frame in the video.
 Check out the detail throughout the photo now.
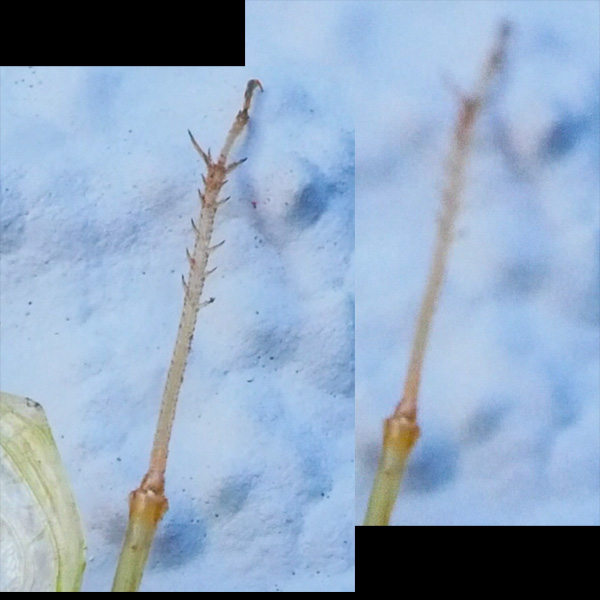 Here’s a little zoom in on the back leg of my friend the Green Bug.
Click Here to see the original video clip
This video image was captured with the Lumix GX85 with a 45mm f2.8 macro lens.
Tomorrow I’ll take a look at the Focus Bracketing feature that allows us to bypass the video and capture full-size images.
Yours in Creative Photography, Bob
by successfulbob | Lumix G7, Lumix Lounge, macro, photography creativity, photography gear, photography lighting resources
Water Splash Photography Setup
Heads-up here! This is my first foray into photographing water droplets. I’m sharing my current setup, and sure it will change as I learn more and experiment. I am taking you along on my adventure showing you the kind of work I’ve been able to create with this setup. Once again I will share I am no expert with this type of photography. If you’ve got some ideas for me, I’d love to hear them!
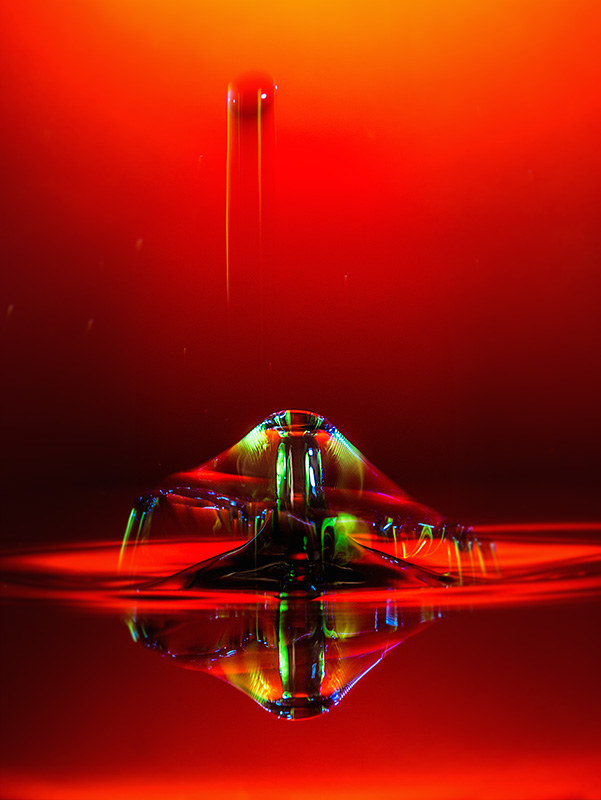
This photography is not for the faint of heart. By the way, you CAN do this photography with a couple of Speedlights and in some ways that may be better for more control of the results. I like the variability with the gear which I’ve been working. OK, with the disclaimers out of the way lets look at a water droplet photo and then the layout of all the stuff.
 Photograph achieved with the equipment setup as seen below. Exposures are made at f14 with @ one second ISO 200.
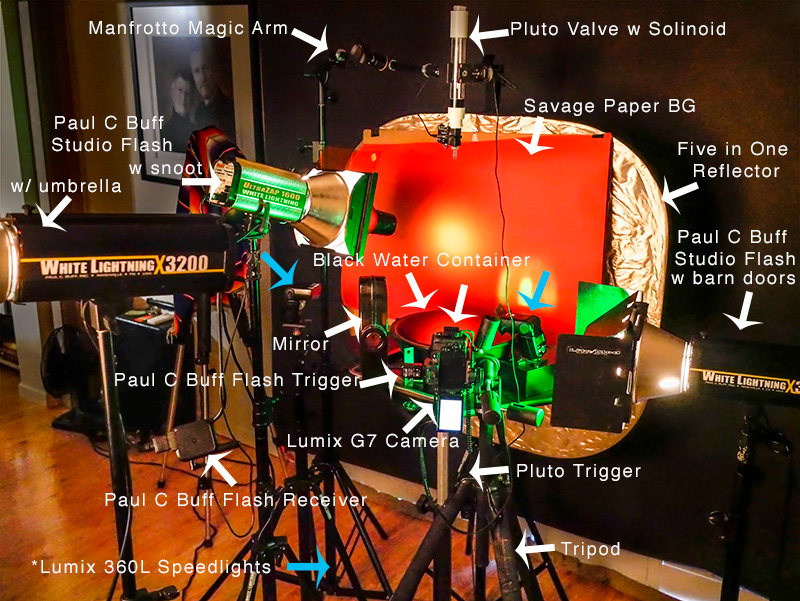 Here’s my gear. I’ll ‘splain below.
I decided to get a little head start on this type of photography by getting some necessary tools. The Pluto Trigger and Pluto Valve can save you a LOT of time. The Trigger is connected to the camera and controls the show. It tells the water drops when to fall. What size they should be and when to trigger the flash. All of these durations are in milliseconds (MS).
Backgrounds are only limited by your imagination. The one showing above is with a colored Savage Paper background. There is a gelled flash with a snoot to vary the light and add interest. With this setup, I have also used a reflective background with a gel over it lit by a flash at various angles and directions. You can use cloth or photos or printed patterns or almost anything you like. As I learn I’m trying to be careful not to overwhelm the waterdrops but we’ll see as I play how that transitions.
I used the Lumix G7 to capture these photos. Lens used was the Vario 35-100mm f2.8 lens with a 10mm or 16mm Vello extension tube. You will need a camera that has a trigger port or can communicate with the Pluto Trigger.
Connected to the camera is a remote flash trigger that fires the flash Paul C Buff flashes from the camera. The Lumix 360L flashes are triggered by the light from the Buff’s because I have them set to Slave Mode. It is the flash that freezes the motion of the water. Adding gels to the flashes adds color and interest to the splashes. In my images, you often see some streaks of color in addition to the frozen droplet. This is because I am using multiple types of flash. The Buff units are not as fast as the Speedlights. And the Speedlights can be of different durations if you change the amount of light you ask them to produce. The lower the power, the shorter the duration of light. Bogen Cine gels Vivid color are juicy. Roscoe gels work well too. You can get gel packs that are just the right size for fitting on your Speedlight. Here’s one from Roscoe holder for the gels.
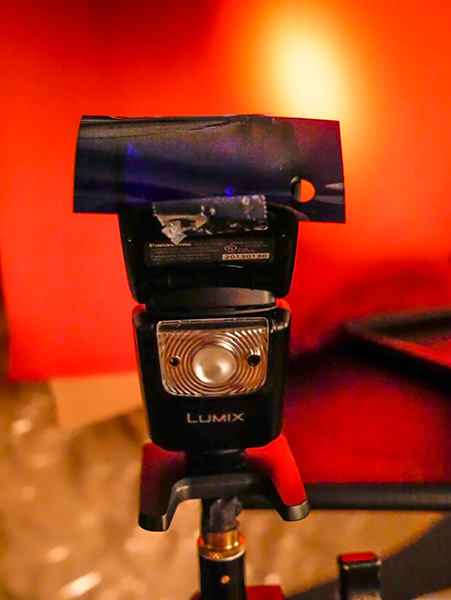 Lumix Speedlight with gel taped in place. Once you see how the gels perform you can also buy larger sheets and cut them to size for larger flashes.
I used a black bowl of water for the reflection. Black allows the color of the background to shine through. Fill the bowl as high as possible, so the edge of it doesn’t show. Science says you can fill a vessel higher than it top because of surface tension. Well, let’s not get into that too far, but as a side note, know that you can put 32 dimes in a shot glass before it overflows after you have filled it with water. Make sure you have a drip tray underneath the bowl or tray to catch any spills as you work.
If you don’t have enough lights, or just want to add another variable, note that you can add a mirror to the set to reflect light back from another direction.
The Manfrotto Magic Arm is extremely helpful in positioning the valve in place over the water. The Manfrotto Super Clamp holds the valve. When you are setting up the position of the water drops, watch where the water drop falls and put something in place to use to set your focus. Remove before shooting.
Working with water droplet photography is like photographing fireworks! You are never quite sure what you are going to get. You get to control the variables but there is never a guarantee and always fun surprises. (well sometimes not so fun but always a learning experience)
If you have any questions, let me know.
Yours in Creative Photography, Bob
Save

 Take a careful look. Every camera is at the photographer’s eye level.
 Taking a lower angle allowed for the reflection with the grassland environment in the background.
 Had to be on my knees to get the composition of the reflection where I wanted it placed.
 Generally, a gimbaled tripod head would be needed to capture solid images of birds in flight. With new gear and in-camera stabilization improvements, more creativity is possible. The Sandhill Crane images were captured handheld with the Lumix GX85 and the Lumix 100-400mm lens (200-800 35mm equivalent) lens fully extended.


