The photography world is changing around you as I write this post! At least it feels that way as new cameras and features are introduced in short order. I’ve never been on the front edge of technology before and it’s fun trying to figure uses for features as they come out. A lot of the new capabilities is driven by possibilities not available before 4K mirrorless cameras came on the scene.
This is a very interesting new feature called Post Focus.
This is for stable non-moving subjects where you might not be sure of the focus point you want and would like to have options to choose later for a totally different look and feel to a subject of a scene.
Here’s how it works. The camera makes a quick video of a scene while moving the focus point throughout the frame. Because the camera is automatically set for Photo Mode each still frame can be extracted from the video as an eight MP file. At the end of processing after a few seconds you can see the individual frames on the back of the camera and choose any that you would like to save out as individual jpeg photos.
Want to be able to choose later? Not a problem. Download the video file and take it in an editing program like Adobe Premiere, Final Cut Pro, or Lightroom. There you can step through each frame and choose at your leisure on a large screen and save out your file.
I decided to see if I could use the system to help with the capture of Macro images and the process of focus stacking to get deep detail in an image.
And guess what ?? It works!
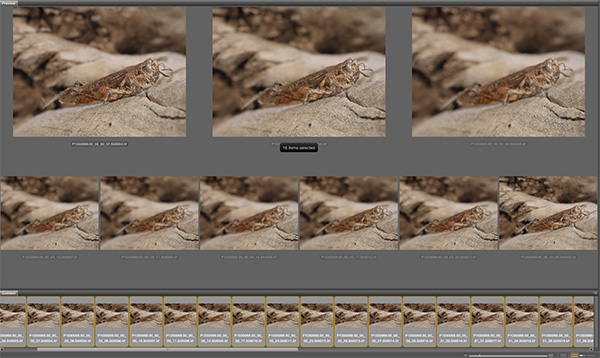
I Imported the MP4 file into Adobe Premiere and used the right arrow to move through each individual frame. Selected the ones I wanted to work with and pushed the save as an image (camera icon) and saved the images out as a TIFF. Then it’s off to Adobe Bridge.
Screen capture of Bridge selections with all 28 files selected with the still captures pulled from the video.
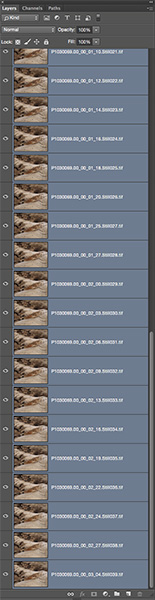
With files selected the next move is Tools > Photoshop > Load Images into Layers
Layers Palette with all layers selected in preparation for Photoshop magic.
Once all layers are selected they need to be put in registration because a change in focus changes the size of the image. Menu Edit > Auto-Align Layers.
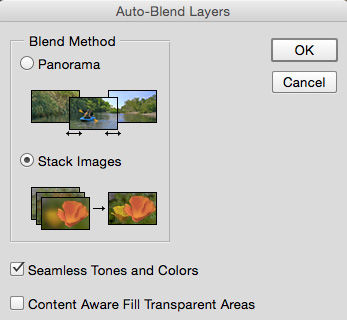
Once layers are aligned Menu Edit > Auto-Blend Layers with the Stack Images and Seemless Tones and Colors checked. Depending on the number and size of your files the the RAM horsepower of your computer this could take a little while but it’s doing all the work you see below masking in all the sharp portions of the images.
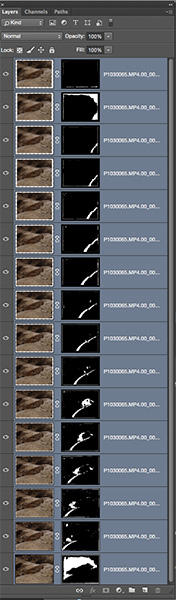
Palette window with proper selections for picking and masking in all the sharp bits it can find in the images. Making all of these masks would be super time intensive. Sometimes the individual masks may need a little tweaking if you didn’t get enough detail or colors and tones are very close.
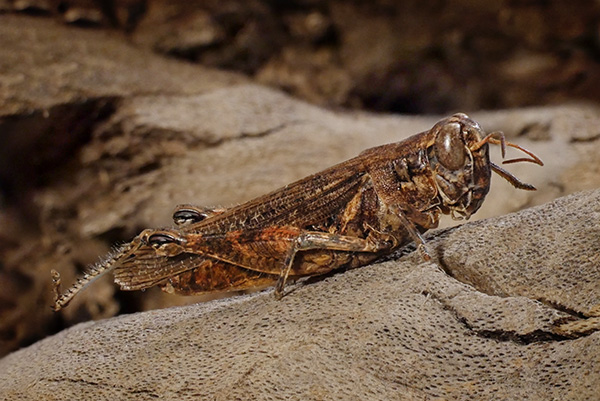
Grasshopper with detail and depth of field exactly where I want it.
The image was captured with the Lumix GX8 and the 45mm f2.8 Macro lens set at f9 in Post Focus Mode. “Why f9 and not f22 and be done with it Bob?” When photographing close-up Macro subjects the DOF is very shallow even at f22. In addition as the aperture gets smaller diffraction is introduced starting to blur details. (learn more about diffraction and check out your camera lens combo to find the sweet spot here)
Yours in Creative Photography, Bob
PS – No grasshoppers were harmed in the making of this tutorial. The grasshopper was already mummified when I found it on my porch.
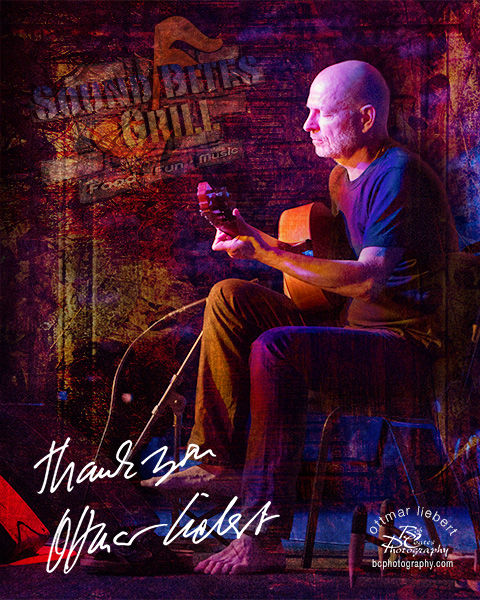
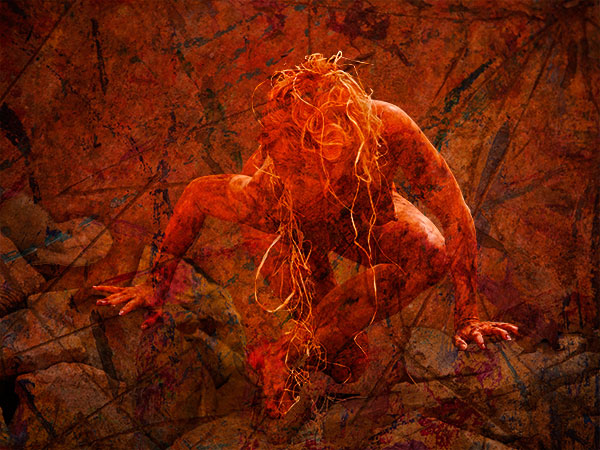
Let’s go into a little more detail on the creation of the photo art for the Sound Bites Grill ‘Wall of Fame’ with guitarist Ottmar Liebert as the subject.
The process is one I’ve dubbed Photo-Synthesis taking multiple images and using Blend Modes, Layers, Masks, Fx, Adjustment Layers and more to create the final piece. First here is the final piece as it now hangs at Sound Bites…
Finished ‘Wall of Fame’ image featuring Ottmar Liebert
Raw materials for the final photo art.
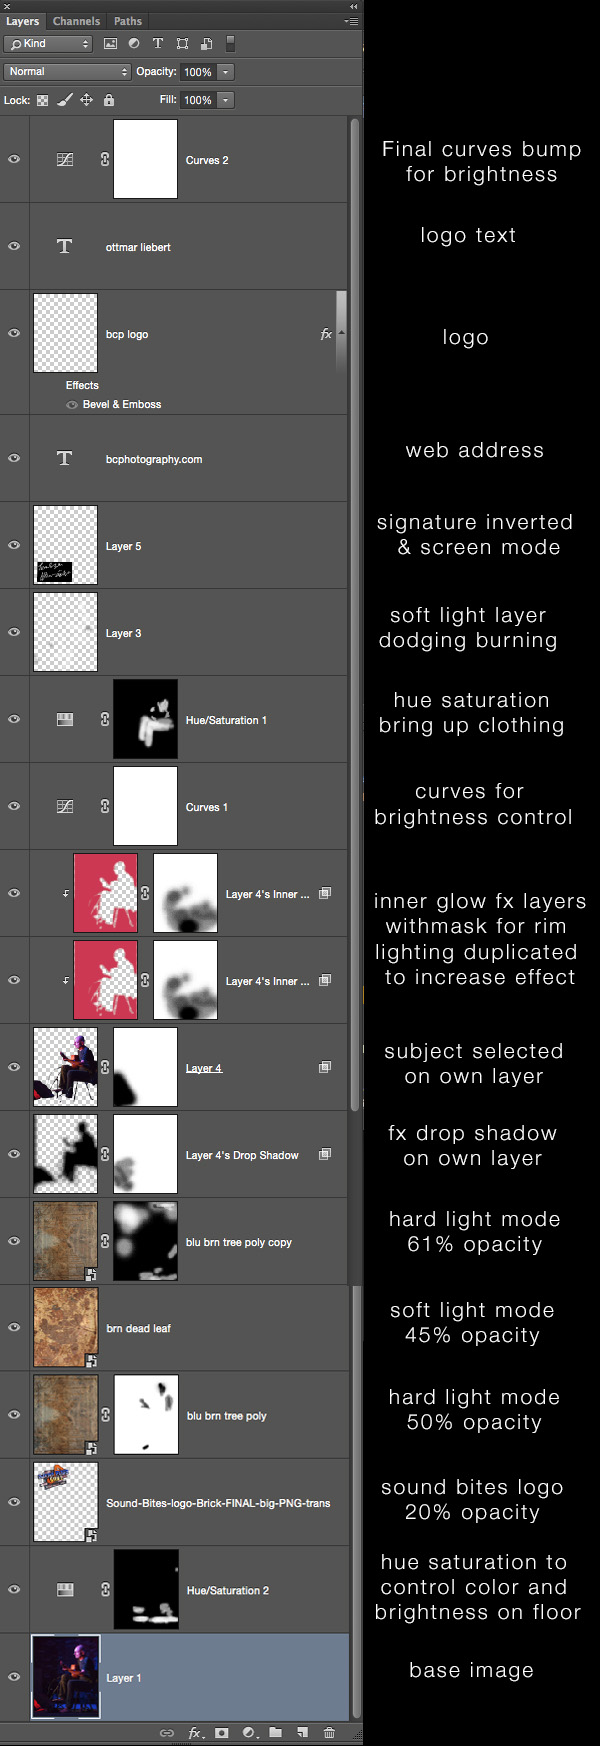
Here’s the Layers Palette with Layer Modes and Opacity Levels indicated. I recommend reading from the bottom to the top to get a better feel of my process.
I usually start with the base Layer and add a texture I feel will blend well. Then I experiment with different Blend Modes and Opacities to get the effect for which I am looking. On the MAC if the Move Tool is highlighted then holding the Shift key and hitting the + & – keys you can scroll through the various Blend Modes seeing their effects in real time.
This should give you an idea how I work with Adobe Photoshop in creating photo art projects.
Have any questions?? Let me know.
Yours in Creative Photography, Bob
PS – Textures are available everywhere. Even from fellow photographers. I have a large library of different kinds of texture but for some reason I found myself attracted to two textures from one of the people who inspire me, Thom Rouse. That’s a link to some amazingly fantastic images. Thanks Thom!! BTW if you ever get the oppourtunity to see Thom speak don’t miss it. It’s a fabulous walk through the art world
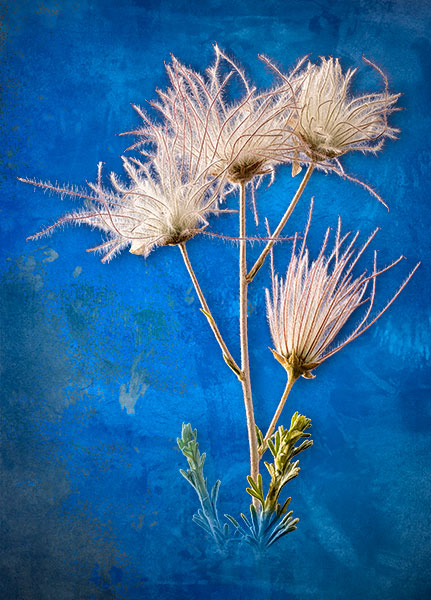
Here’s the image from yesterday that started with multiple exposures captured with the Lumix G7 and Layer Stacking in Photoshop. Adding a little artwork using blend modes in Adobe Photoshop.
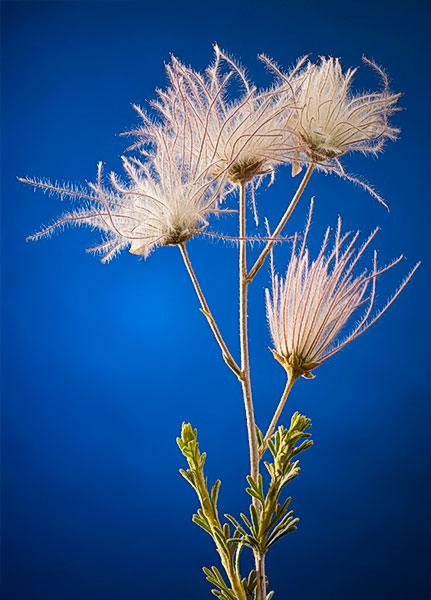
Apache Plume Bloom
Once the original capture is assembled then it’s time to select the plant image in order to separate it from the background. This allows the addition of a drop shadow which creates more depth. Then adding some textures in various blend modes I built a background to give the image a more painterly feel. I always encourage people to play with images and ideas.
Just got my hands on the new Panasonic Lumix G7 – Lumix G7 w 14-140mm lens ($1098) or G7 w 14-42 ($798) – and have been putting it through some paces.
There are some beautiful desert plants that my wife has been landscaping the yard with vs having water-sucking plants since we live in the super dry climate of Sedona, Arizona. This is the bloom of the Apache Plume plant.
Apache Plume Bloom
Capture info
I used the 45mm f2.8 Macro to make the details of the ‘plume’ feathering jump. In order to get the most detail I set the aperture to f8 and used studio flash. Shoot through umbrella to the side and just behind the plant with soft reflector fill opposite. Black background paper lit with flash with snoot and 2 layers of blue gel. Used the Wifi from the camera to allow the Ipad to run the camera changing focus using the free Panasonic Image APP. Never having to touch the camera makes for better, easier blending because there’s no camera shake or movement.
Here’s How to Focus Stack
I captured fifteen exposures with focus through the image and used Photoshop to stack them together and achieve sharpness from front to back. Take the images into Adobe Camera RAW and tweak any color or shadow/highlight settings. From the Tools menu ask Bridge to Load Files into Photoshop Layers. Highlight all Layers in the Layers Palette. Under the Edit Menu > Auto-Align Layers. With all Layers still selected, Edit > Auto-Blend Layers with the Radio Button Stack Images Selected with Seamless Tones and Colors checked. Then go through your image and look for areas that might not have been blended perfectly by Shift clicking on the individual Layer Masks to see if there is a sharp image that might be blended better. **Note – Subjects that contain a lot of white will have more issues with Blending the Sharpness in this process than others with more color and contrast.
Initial Thoughts on the G7 (more to come in future posts)
This camera would make a great back-up to the GH4 if you are a pro on a budget. Controls are slightly different but not so much you would have a problem switching in the middle of a job or if you are doing a two camera shoot. Pros – VERY light weight, super-easy 4K Photo Mode, interchangeable lenses, image quality on par with GH4. Cons – Tripod plate needs to be undone to get to battery and SD card compartment, smaller battery, built on plastic body vs magnesium.
If you are really on a budget two or three of these cameras would make great kit to have pro backup capabilities.
A couple days ago I shared some images from working with Pash Galbavy when she was doing a model posing for a life drawing class. She was posing in the Butoh style, something I had never heard of before documenting this class. See the post here.
One of the great features of the Lumix cameras that doesn’t get spoken about too often is the ability to shoot time lapse sequences. I mounted the Lumix FZ-1000 on a tripod and set it to capture an image every 30 seconds. I was looking to tell the story of the life drawing class and how this particular session of Butoh posing was done.
Pash and the artists at work in the Life Drawing Class over a couple hour period.
These images were given a quick process to control color and contrast and saved to 600 pixel jpegs. For the time lapse 94 images were used at 7 frames a second giving a 13 second film output as an H.264 codec which produces a .MOV file. They were assembled using Time Lapse Assembler a free program for MAC or PC. One thing to remember when creating a time lapse movie that a normal playback speed is using 24 frames per second. which means you often need to capture images about every 1-3 seconds over a long period of time to have a longer final film.
For infrared conversion of my cameras I use LifePixel. Infrared allows you to put an older camera to use and opens up a new time time of day for productive image creation.
Learn Photoshop in a fun environment. Aaron Nace applies the right amount of fun with easy to understand and follow tutorials. Actions and brushes are included with lessons!
Best embroidery ever. Give Queensboro a try, get a $20 instant credit to get started by clicking on the logo! They specialize in great quality custom logo apparel and promotional products with the best customer service.
Platypod has become a great resource for being creative in getting your camera gear easily into unusual places. As an Platypod Pro I get to work/play with the gear even before it comes out. Head over to Platypod, subscribe to the newsletter and you will get special discounts reserved only for subscribers.