by successfulbob | landscape photography, Lumix Lounge, Lumix LX100, panorama, photography creativity, photography education, photography gear, photography software
Panoramic Photography – One More Time
Here’s one more use of panoramic photography that I haven’t mentioned in previous posts. Change the number of Mega-Pixels in your camera.
“Say what?” You ask? “And once you explain, tell me why I want to try that?”
Ok, here goes.
You can expand the number of pixels in an image in order to be able to make a larger print by making multiple images and overlapping the capture. After you get back to the studio move those images into your favorite photo stitching programs like Adobe’s Photoshop or AutopanoPro and put the images together. Photoshop has gotten very good at merging images together including a new feature called Content-Aware Fill that can automatically clean up the blank space that can sometimes surround your image.
This morning I had my Lumix LX100 with me. I call this the professional’s point and shoot because it has fast glass and is quite versatile with all important controls on dials just like the old days. No need to move into electronic menus to access your settings. All of this is in a quite small package. But the camera is only 12.1MP which yields a 36-megabyte file. In today’s example, I shot five exposures overlapping each by 30-40 percent. After merging the photos I ended up with a 97-megabite file. 97 divided by 3 equals a 32MP capture.
 Here is a screen capture of the five images when highlighted in Adobe Bridge.
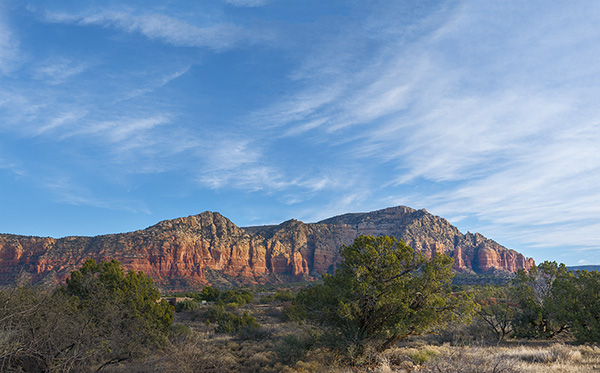
 After the images above were assembled in Photoshop and massaged with Luminar from MacPhun.*
With this technique, you can get file sizes you have only dreamed about with a little extra work. Remember if you want to really make a huge file you can use a long lens and do row after row of images and blend them all together. Make sure you capture each row the same way. I always go left to right and top to bottom during my captures.
Yours in creative Photography, Bob
PS – * Luminar software is currently only available for the MAC platform but from what I understand they will be releasing a PC version later this year. Luminar can be used as a stand-alone processing program or as a Plug-in. There’s a sale on ’til the end of the year the link above will take you there.
PPS – The MacPhun software Aurora 2017 HDR is also on special until the end of the year. I’m enjoying the creative processing from MacPhun products.

by successfulbob | landscape photography, Lumix GX7, Lumix Lounge, panorama, photography, photography creativity
Let’s Talk Panoramic Photography – Part 2
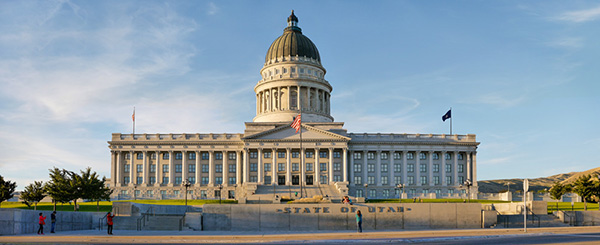
In looking through my files for some examples of in-camera panoramic photos I came across some more examples I wanted to share. I feel the format adds another arrow to the creativity quiver. Here’s a few made with the Lumix GX7.
 Outside Salt Lake City – Panorama format is perfect for telling the dramatic landscape story.
 Another from the Salt Lake City Trip.
 A different way to share a scene.
As I was going through my photos, I realized I didn’t share a slightly different idea to leverage the in-camera panorama feature. Sometimes the resulting photo just doesn’t quite cut it as far as capturing the scene. Or you want a file that will have a different aspect ratio but is still a panoramic image. Or, you need more pixels but don’t have time to create a full set of images for future stitching. So here’s two rows followed by the final.
 Showing the dome.
 Showing the base.
 Here’s the final with the two stitched in-camera panorama images using Adobe Photoshop.
 From the Red Butte Arboretum in Salt Lake City.
 One more.
Think about the ways you can use the panorama feature. I don’t have one at my fingertips, but you can also make the panorama vertical.
Yours in creative Photography, Bob

by successfulbob | inspiration
Writing for Successful-Photographer
354,115. That’s a shitpot of words. Just received a year-end review from Grammarly which is a service I subscribe to check my work before I publish my posts and information on the Internet. Hopefully, it makes it a bit more readable for you. They tell me they also helped me find, and fix, about 1,200 writing errors of one type or another. That’s 0.21 percent of mistakes per written word.
 Grammarly Graphic Report
They tell me they also helped me find, and fix, about 1,200 writing errors of one type or another. That’s 0.21 percent of mistakes per written word
That’s 0.21 percent of mistakes per written word. Not bad for someone who needed some serious tutoring in English when he started writing books.
As a reference to how much writing this is a typical magazine article is between 1,500 and 2,500 words. Books average between 25,000 and 50,000 words.
All the words written leads me to a question.
Who’s reading? And, does it help you?
Yours in Creative Photography, Bob

by successfulbob | Lumix G7, Lumix GX7, Lumix Lounge, panorama, photography
Possibilities of Panoramic Photography
Let me put this out there if you don’t already know. I love the panoramic format!
 Red Butte Arboretum – Salt Lake City Utah. In-Camera Panorama Lumix GX7 Shot a few years ago.
Panorama images are not the be all and end all they are there to tell a story that can’t be told in the two by three or three by four ratio. Sixteen by nine is becoming a more ‘standard’ image size to our eyes because we see it more often in movies, television, and our phones.
This post was triggered by a question about the in-camera panoramic photos vs. shooting individual images and stitching photos in post production. Here was the question, “When I use the Lumix G7 it does a Gatling gun shoot as I shift the camera left to right and we all know you shouldn’t be moving a camera when shooting a landscape. I’m curious the quality difference between one shot at a time and stitched in an editor vs. the G7 spray technique.”
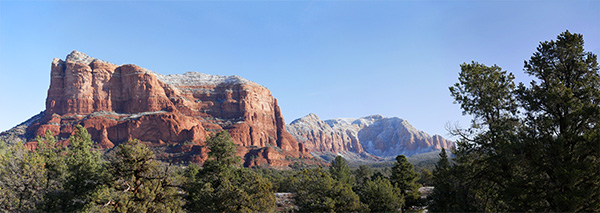
 Courthouse Butte in Sedona – In-Camera Panorama. Print to about 27 inches.
Great question. We have different tools for different jobs. The in-camera panorama feature is a tool for the convenience of capturing a scene quickly and being processed for output immediately. For example, you want to share a scene on social media that is panoramic in nature. The camera will produce a completed image that can instantly be uploaded via the camera’s built-in Wifi. It is also a fine way to capture a scene as a memory that will only live in the digital world where higher resolution is not a necessity. That’s not to say you can’t make a beautiful print from the in-camera pano, I’ve made some beauties.
Advantages of in-camera panoramic photos. Immediate gratification. Ideal for web presentation and medium sized prints.
Now to the advantages and drawbacks of a stitched image.
In the capture of individual images to create a panoramic in post-production, you can shoot in the RAW format which will give you a larger file and the ability to finesse the most quality from the file. The larger size files when combined allow for printing very large size images. The only down-side is that post-processing is necessary before you can share the picture as a panoramic.
 Same scene as above. Ten frames stitched in Adobe Photoshop. Easily print to about Seventy-eight inches. Note the details and color were more available from the RAW file information.
Final thoughts. Use the best of both worlds. Make an in-camera pano to make a quick record of your scene. It can be utilized as a reference for the future building of your panorama or quick sharing of your view in social media. Make your individual images for large format printing.
Yours in creative Photography, Bob

by successfulbob | photography
Happy Holidays 2016
Hope that the end of this year launches you into a great 2017!
 Yours in Creative Photography, Bob

 Here is a screen capture of the five images when highlighted in Adobe Bridge.
 After the images above were assembled in Photoshop and massaged with Luminar from MacPhun.*


