by successfulbob | Lumix GH4, Lumix GX8, Lumix Lounge, musician photography, photographer of musicians, photography education
Miller and the Other Sinners Band
Take an electric guitar. Acoustic guitar. A bass guitar. A small sax… and a large one. Throw in someone who knows how to play the drums. Add in a voice that is pure magic and the namesake of the band. And what do you get?
A really good time listening to Southern Soul!
What is SOUTHERN SOUL?
A sweet blend of blues/gospel/americana/r&b with a splash a cayenne pepper.
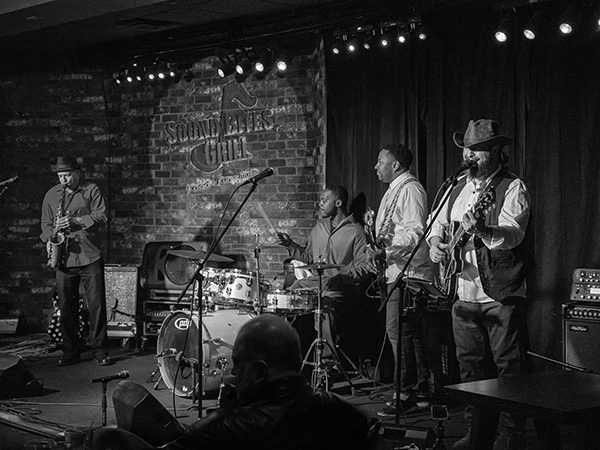
Saturday night Miller and the Other Sinners performed at Sound Bites Grill and I had the fun job of photographing them for the ‘SBG Wall of Fame’. This group really rocked the house with a bluesy sound that had everyone bouncing in their seats.
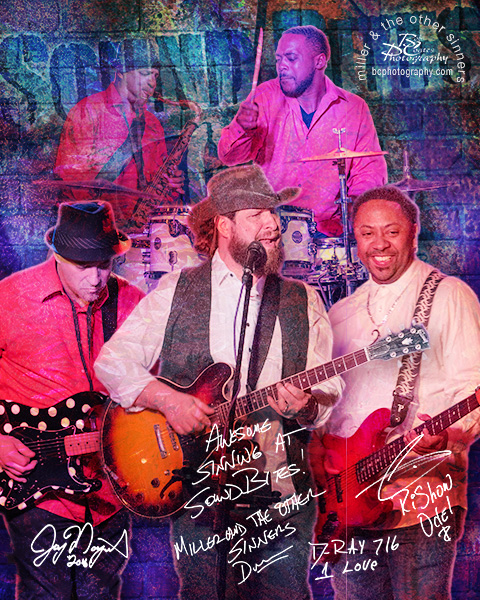 Sound Bites Grill Wall of Fame image for Miller and the Other Sinners
I used two cameras for the event.
I used the Lumix GH4 with a 35-100mm Vario f2.8 lens for the individual band member captures. I generally shoot at ISO 3200 in aperture priority with a minus 2/3rds of a stop exposure compensation in RAW. This will generally get me an exposure between 1/60th & 1/100 of a second. Taking the images into Adobe Camera Raw with just a little push up of the shadows slider and a reduction of the highlights I am able to get the entire dynamic range of the scene.
The second camera is the Lumix GX8 with a wide f2.8 12-35mm Vario zoom. These images are of the whole band and used for press releases and marketing. Same basic settings on the camera. A great feature of shooting with these cameras is the Live View function as you are seeing the image as it is being captured so it’s easy to make tweaks to the settings before firing the shutter.

Marketing images are created in color but I specifically do the BW conversion myself so the best quality will be printed rather than someone at the publication just pushing the greyscale button. NIK Silver FX Pro 2 is the go-to software plug-in.
Knowing how the images are going to be used dictates how images are processed. I always try to create the best image file for the job at hand. Remember to ask questions in order to be able to provide the best product.
Yours in Creative Photography, Bob
by successfulbob | architectural photography, HDR photography, Lumix GH4, Lumix Lounge, photography education, photography software
HDR Software
HDR. High Dynamic Range. AKA how to jam a whole lot of light into an image the way our eye would see the scene. I’ve always been a fan. As a matter of fact I was one of the first authors to teach this when I was making videos for Software Cinema. I showed how to use this process to make landscapes and real estate scenes look their best.
Unfortunately, I didn’t have a catchy name for it. Nor did I design a software program or cause others to do so on my behalf that did most of the heavy lifting for the HDR process either… Oh well.
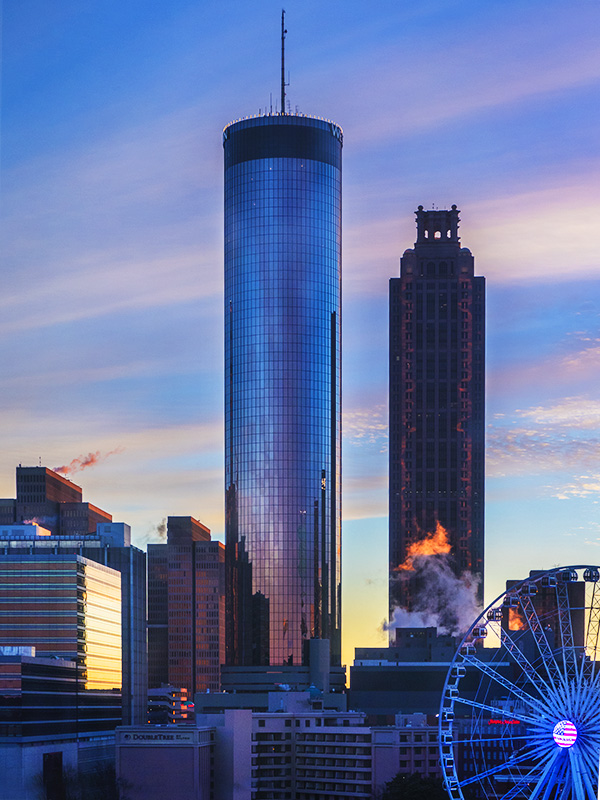
 Five image sequence, handheld, processed in Aurora HDR software.
Even though there have been many iterations of HDR software it’s been a while since there was a new player with a different interface that included many new possible settings in and easy to understand interface and, wait for it, layers too! The new software is called Aurora and was designed by HDR travel image specialist Trey working in conjunction with Mcphun Software.
I was given the software to play with… And, I like it!
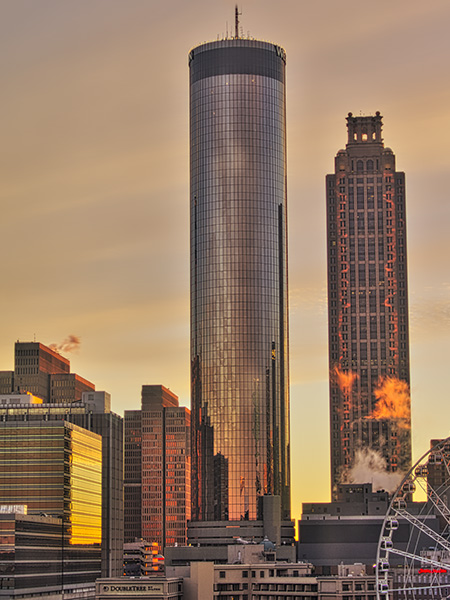
 Another 5 image handheld bracket using Aurora HDR software
 Same image as above processed differently from same exposures.
It gives you the ability to totally go HDR berserkers! Or, create a very natural scene with full dynamic range. Or somewhere in between so you can have the best of all worlds. An artistic, realistic representation of a scene that DOESN’T SCREAM HDR!!
All images were captured with the Panasonic Lumix GH4
Yours in Creative Photography, Bob
PS – At this time Aurora is only available for the MAC platform at the moment
by successfulbob | Lumix FZ 1000, Lumix G7, Lumix GH4, Lumix Lounge, photography education
Nighttime Photography
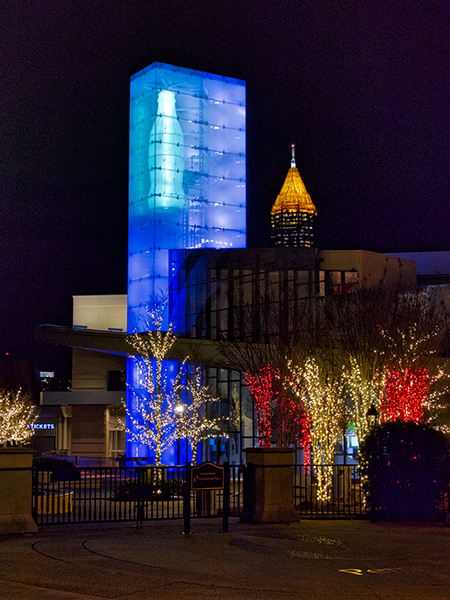
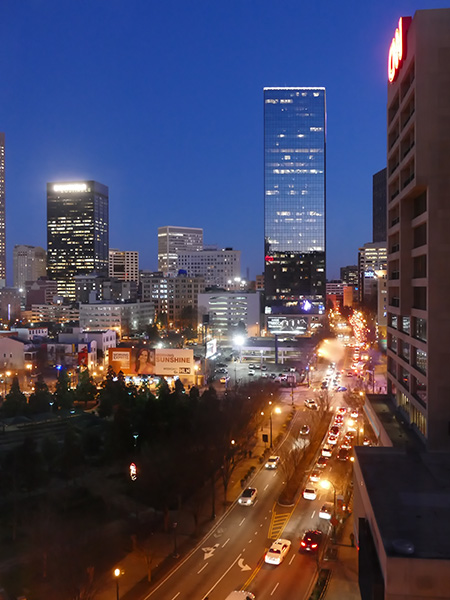
Photographing at night can be a challenge. The dynamic range of any camera can be challenged by bright lights in a darkened scene. Trying to make that read properly usually takes some work with and HDR program but sometimes you don’t want to work quite that hard and want to just get a decent grab of a scene.
Before switching to the micro 4/3rds system by Panasonic I was never a fan of any presets on a camera. But after playing with some the results have been impressive. Several Lumix Cameras have presets that can help you with extreme situations. For example, the GH4 has an artistic setting called High Dynamic which can be helpful. The new G7 and the FZ1000 have a setting in the scenic menu called Handheld Night Shot where the camera is basically making multiple exposures and blending them together quickly for you.
Strangely enough I hadn’t tried the Handheld Night Shot preset until a fellow photographer I had recommend the FZ1000 to asked me if I had tried it. When I did I was quite happy with the results. Always fun when others share features that work really well with you. Considering I was shooting this through the window glass and doing a quick test this works. I’ll be trying it under better conditions soon.
 This was captured from my hotel room at the Omni in Atlanta during the PPA Imaging USA convention using Handheld NIght Shot setting on camera. Lumix FZ1000
In future posts I’ll be looking at leveraging other presets from the Lumix cameras as well as exploring some new HDR software from Macphun called Aurora…
Yours in Creative Photography, Bob
by successfulbob | 4K video, landscape photography, Lumix GH4, Lumix Lounge, photography, photography creativity, photography education, photography gear
Using Still Frames from Time Lapse
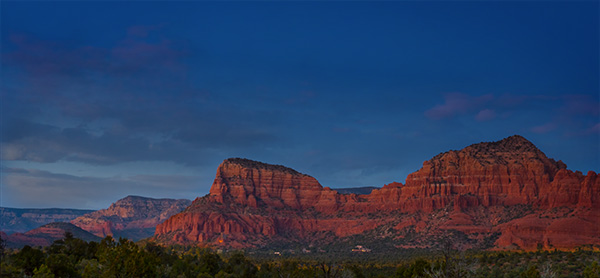
When making a time lapse (view time lapse video here) image you can leverage a thing I often do to create a solid look of a scene by using images captured over a time period to get the best of all worlds. As our eye can change the size of the pupil in any scene when looking into the shadow or highlight area we sometimes need to arrest time and blend it into a single image to represent what the eye would actually see. I call this an advanced form of HDR imagery as the images are not captured in one go but with the camera on a tripod blend images that were made while the sun was up, as it was going down, and long after it had crept below the horizon.
 Here’s the final image.
 Here are the images combined and used to create the final. The photo on the left was used for the treeline across the bottom. Next image was used for the cloud formations. The third image was used for the red rocks. and the final image was blended for the deep colbalt-blue sky.
Why use Multiple Images?
I went back and selected images based on the subject matter that was exposed exactly for the area of the scene and using masks blended them together for the final look.
The use of images captured over time verses capturing all the images in a single HDR capture is the quality of the information in the highlight areas and shadow areas as they are captured exactly as they should. This will give you less noise in shadows and cleaner highlights, allow the glow of light in a scene and more.
Gear
A Lumix GH4 was mounted on a tripod with the 7-14mm f4 Vario lens. Images were captured every three seconds over a long time period for the time lapse video. If I was using this for the ultimate capture of a scene verses also for a time lapse I would set the interval for more like an image every five minutes or so.
Yours in Creative Photography, Bob
PS – this technique can also lead to multiple iterations and mood of a scene… Try it you’ll like it!
by successfulbob | Lumix GH4, Lumix Lounge, musician photography, people photography
‘Wall of Fame’
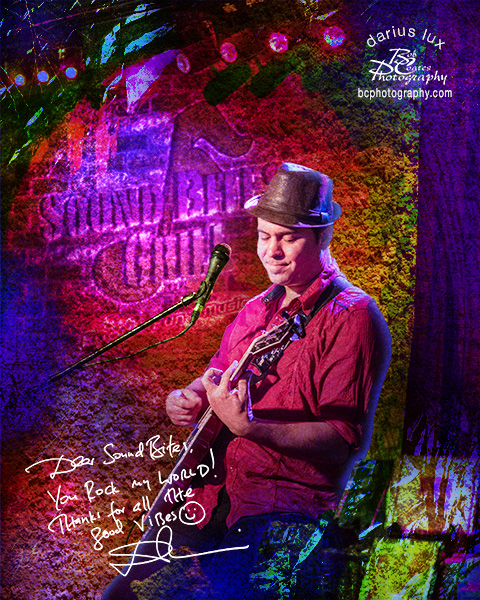
A new member for the Sound Bites Grill ‘Wall of Fame’ in Sedona, Arizona. Sound Bites is the largest live entertainment restaurant in Sedona and over the years have brought in some great entertainment. I have been fortunate to record many of the fine musicians and entertainers and create photographic art to celebrate their performances. Here’s one of the latest, guitarist Darius Lux.
 Darius Lux ‘Wall of Fame’ Art
For the curious, here’s how I create the images for the ‘Wall’.
Capture live performance while trying to get good poses that tell the story of the artist. For example, Darius bill himself as ‘Acoustic Spirit & Soul’. That’s why I choose a shot of his eyes down in a thoughtful position. To capture the stage show I use the Lumix GH4 usually mounted with the 35-100mm f2.8 Lumix Vario lens. This makes it possible to capture the action with no flash and from low profile so I don’t disturb guests who enjoying the show.
The artist signs his or her autograph on a blank white sheet of paper with marker that is then scanned into the computer. Using Adobe Photoshop I invert the color so the words and signature are white and the paper black. Then the signature is moved to the file and changed to Screen Mode. This has the effect of making the paper ‘disappear’ and the text remain. This is resized to represent a regular autograph. This would not be possible after the fact as many of the musicians are from out of town. At the very least even of they are from Sedona getting up with them for the signature would take quite a bit of time.
The artwork is accomplished in Photoshop by selecting other images that contain textures and using more Blend Modes, color layers and masks to get the final look. While there is a unifying feel to all the images no two are created in the same way.
Yours in Creative Photography, Bob
by successfulbob | Lumix GH4, Lumix Lounge, people photography, photography creativity, photography education, photography gear, photoshop tutorial
Anatomy of a self portrait
Sometimes it’s good to push yourself.
I had an assignment from a game of Survivor we are playing in the Arcanum (a place of growing your photography skills at your own pace with a group of like minded folks. Click the link for a peek under the Arcanum’s hood)
The assignment was to shoot a self portrait to help share a bit of who you are. So I decided to make it a learning experience. Here’s the thought process I went though.
First I wanted to give people an idea of how busy it can be in my head. So the title became ‘Under the Hood’.

Let’s see what’s under the hood in Bob’s Brain…
Set up the photo
Start with a solid head and shoulders studio self portrait. Main light forward and bounced off the wall to get a large source with medium contrast. Two strip light soft boxes with egg-crate grids attached were set to camera left and right slightly behind pointing to skim and add separation and spice to the look. Lumix GH4 camera with the 42.5mm 1.2 Nocticron lens mounted on a tripod with the Wifi activated allowing camera control from my IPhone. I use Paul C Buff lights and modifiers because of the good value, selection and great service when needed.
On to the Photo Art
Original concept was to have a zipper peeling back from my forehead to allow the reveal. After some experimentation that didn’t feel like it was going in the direction I wanted. Next thought was to cut off the top of the head and tilt it back but that made it difficult to show what was coming out of the head. Finally, on the third try I took the top of the head and tilted it to the left and got the base image for which I was looking.
Adding Photo Elements to Tell the Story
Then the search was on to search for and create elements that were to tell the story. Inverse square law. Brain. Smoke brushes. Neon signage. “Wait I’ve got an idea, a light bulb went on in my head.” Textures for blending element together. All images were layered in Adobe Photoshop using various blend modes. You can see the Layers and their Masks used to put this together. Got a question? Give me a shout…

Photoshop Layer stack showing Layers and masks…
Hope this inspires you to take a project and push yourself to a new limit.
Yours in Creative Photography, Bob
 Sound Bites Grill Wall of Fame image for Miller and the Other Sinners
