
by successfulbob | cityscape photography, landscape photography, panorama, photography, photography competition
Professional Photographers of America
Southwest District Competition – Photographic Open Results
Professional Photographers of America supports photographic education in many ways. One of those is through the Merit and Degree program. Two of the degrees are image based on that you need to earn thirteen Merits plus another twelve Merits for service or education in the industry.
On the way to International Photographic Competition (IPC) is a proving ground called the Districts. The country is divided into five different Districts of which I am a member of the Southwest District. They recently completed the judging, and I earned Merits for all eight of my entries. Additionally, I received an automatic Loan Collection image for scoring 95 or above. Another image will be judged for Loan when IPC commences August 5th through 8th at Gwinett Technical School just outside Atlanta in Georgia.
I’ll share my images here except for one that will be judged for Loan Collection as the judges are not to have access to any unjuged photos.
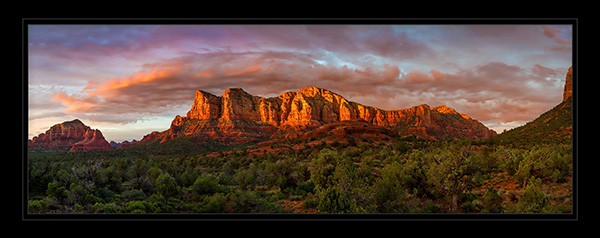 ‘Days End’ – A spectacular sunset on the red rocks in Sedona viewed from Hwy 179.
A slightly different version of this image is available for sale through the Gallery of Modern Masters in the Hillside Shopping area. Day’s End will be automatically accepted into the PPA Loan Collection at the final judging in August because it scored above a 95.
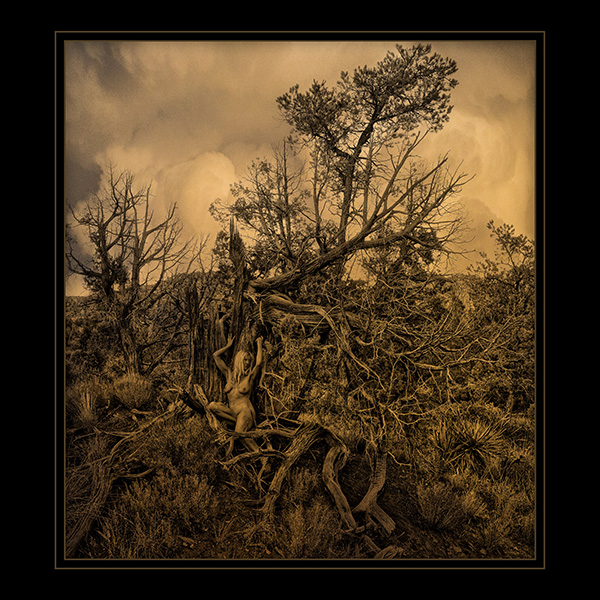 A capture of my Muse Pash Galbavy who is an incredible artist who is in love with nature. She is a life model, mask maker, performance artist and so much more. Other images from this series with Pash are also available through Gallery of Modern Masters. This image earned a Merit score
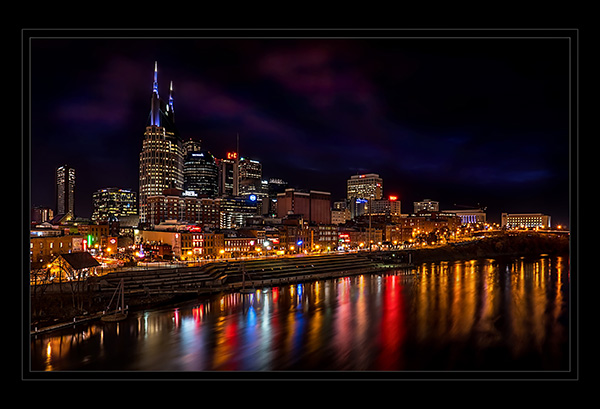 While in Nashville at last year’s PPA convention I hoofed it out to the bridge to capture a night shot of the skyline along the river. This image also earned a Merit score.
 This image will represent the Non-Event album which scored a 92. I can’t share the images from this until after judging for the Loan Collection in August. It scored second place in the category.
These are the Photographic Open Category images. In the next couple days, I’ll share my Artist entries with you.
Yours in Creative Photography, Bob
by successfulbob | landscape photography, Lumix G9, photography gear
Lumix G9 and Mega Files
Panasonic recently released the Lumix G9 as the stills flagship camera. Just received mine and I am exploring new features. Here is an exciting treat that will get you some serious megapixels. It’s called High-Resolution Mode. You can double or quadruple the 20 MP files size. That is correct. The G9 can serve up an eighty Megapixel file.
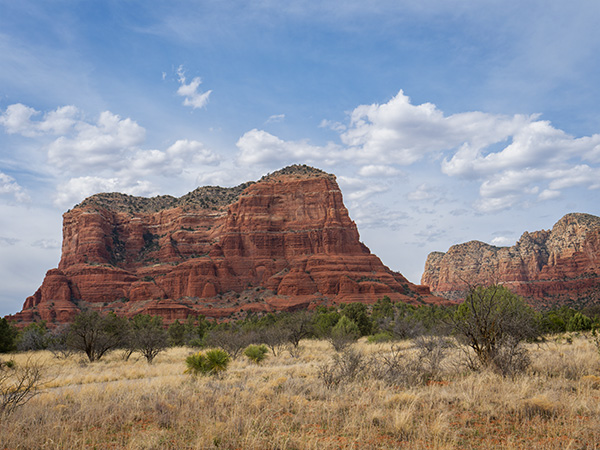
Below you’ll see my first test shot using the red rocks of Sedona. It doesn’t hurt to live in a place with some beautiful scenery. ; )>
Pictured below is Courthouse Butte in the Village of Oak Creek where the red rocks begin.
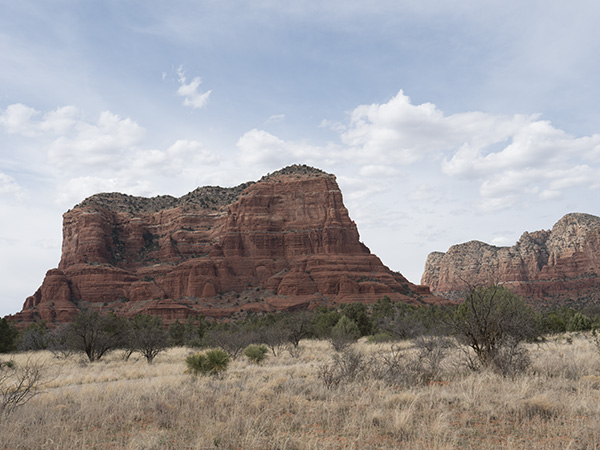 Above a RAW file straight out of the camera (SOOC) with no processing in Adobe Camera RAW. (ACR)
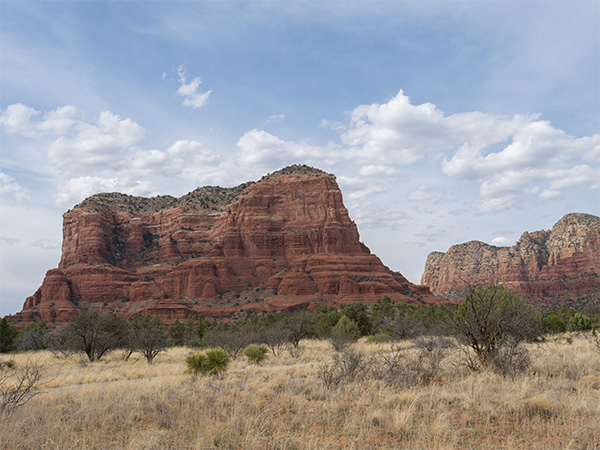 The image after a little massaging in ACR. Adjustment were made of highlights, shadows, blacks and whites, saturation and vibrance. All settings were changed sparingly, but that led to quite an excellent rendering of the scene.
 Here is the final image after a trip into Luminar 2018 software for a little image enhancement. Settings were adjusted (gently) for clarity, saturation, contrast, highlights, shadows and polarizing filter.
I wasn’t sure how much of much of a difference there would be with the added megapixels. There was a huge difference. With that number of pixels to work with, there is a lot of ‘headroom’ when making adjustments. The base file opens with an approximately 235 MB. That is twenty-six by thirty-six-inch file at 300ppi native. And it looks gorgeous.
You might ask, “How is this possible, Bob?” Here’s how. The camera makes eight exposures while off-setting each capture by one-half pixel then uses that info to render the larger file. Of course, that can be a drawback. You won’t be photographing moving subjects with an 80 MP files size. But… I will be trying that. I see possibilties of artistic captures with moving water, trees in the wind, people moving, or disappearing, in a scene.
I’ll report back with my testing in future posts.
Yours in Creative Photography, Bob
Photographed with the Lumix G9 and the Leica12-60mm f2.8-4 lens

by successfulbob | Guest Post, landscape photography, Lumix G85, photography
G85 Travels to New Zealand
My Professional Photographers of America friend Ken MacAdams has been traveling the world and offered to share some of his insights on the Successful-Photographer blog. Ken need to travel light and has been using the miriorless systems from Panasonic. He used the G85 on this last trip.
Here’s Ken with a little history and info about a land down under.
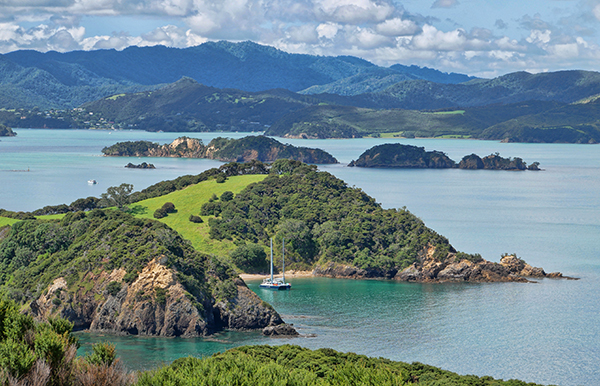
Paradise, some would call it. Can’t say I’d argue, standing there while the sea breeze rustled through my hair. The puffy clouds graced the skies, while azure waters lazed below. Watercraft of varying description lay at anchor. This is the stuff dreams are made of!
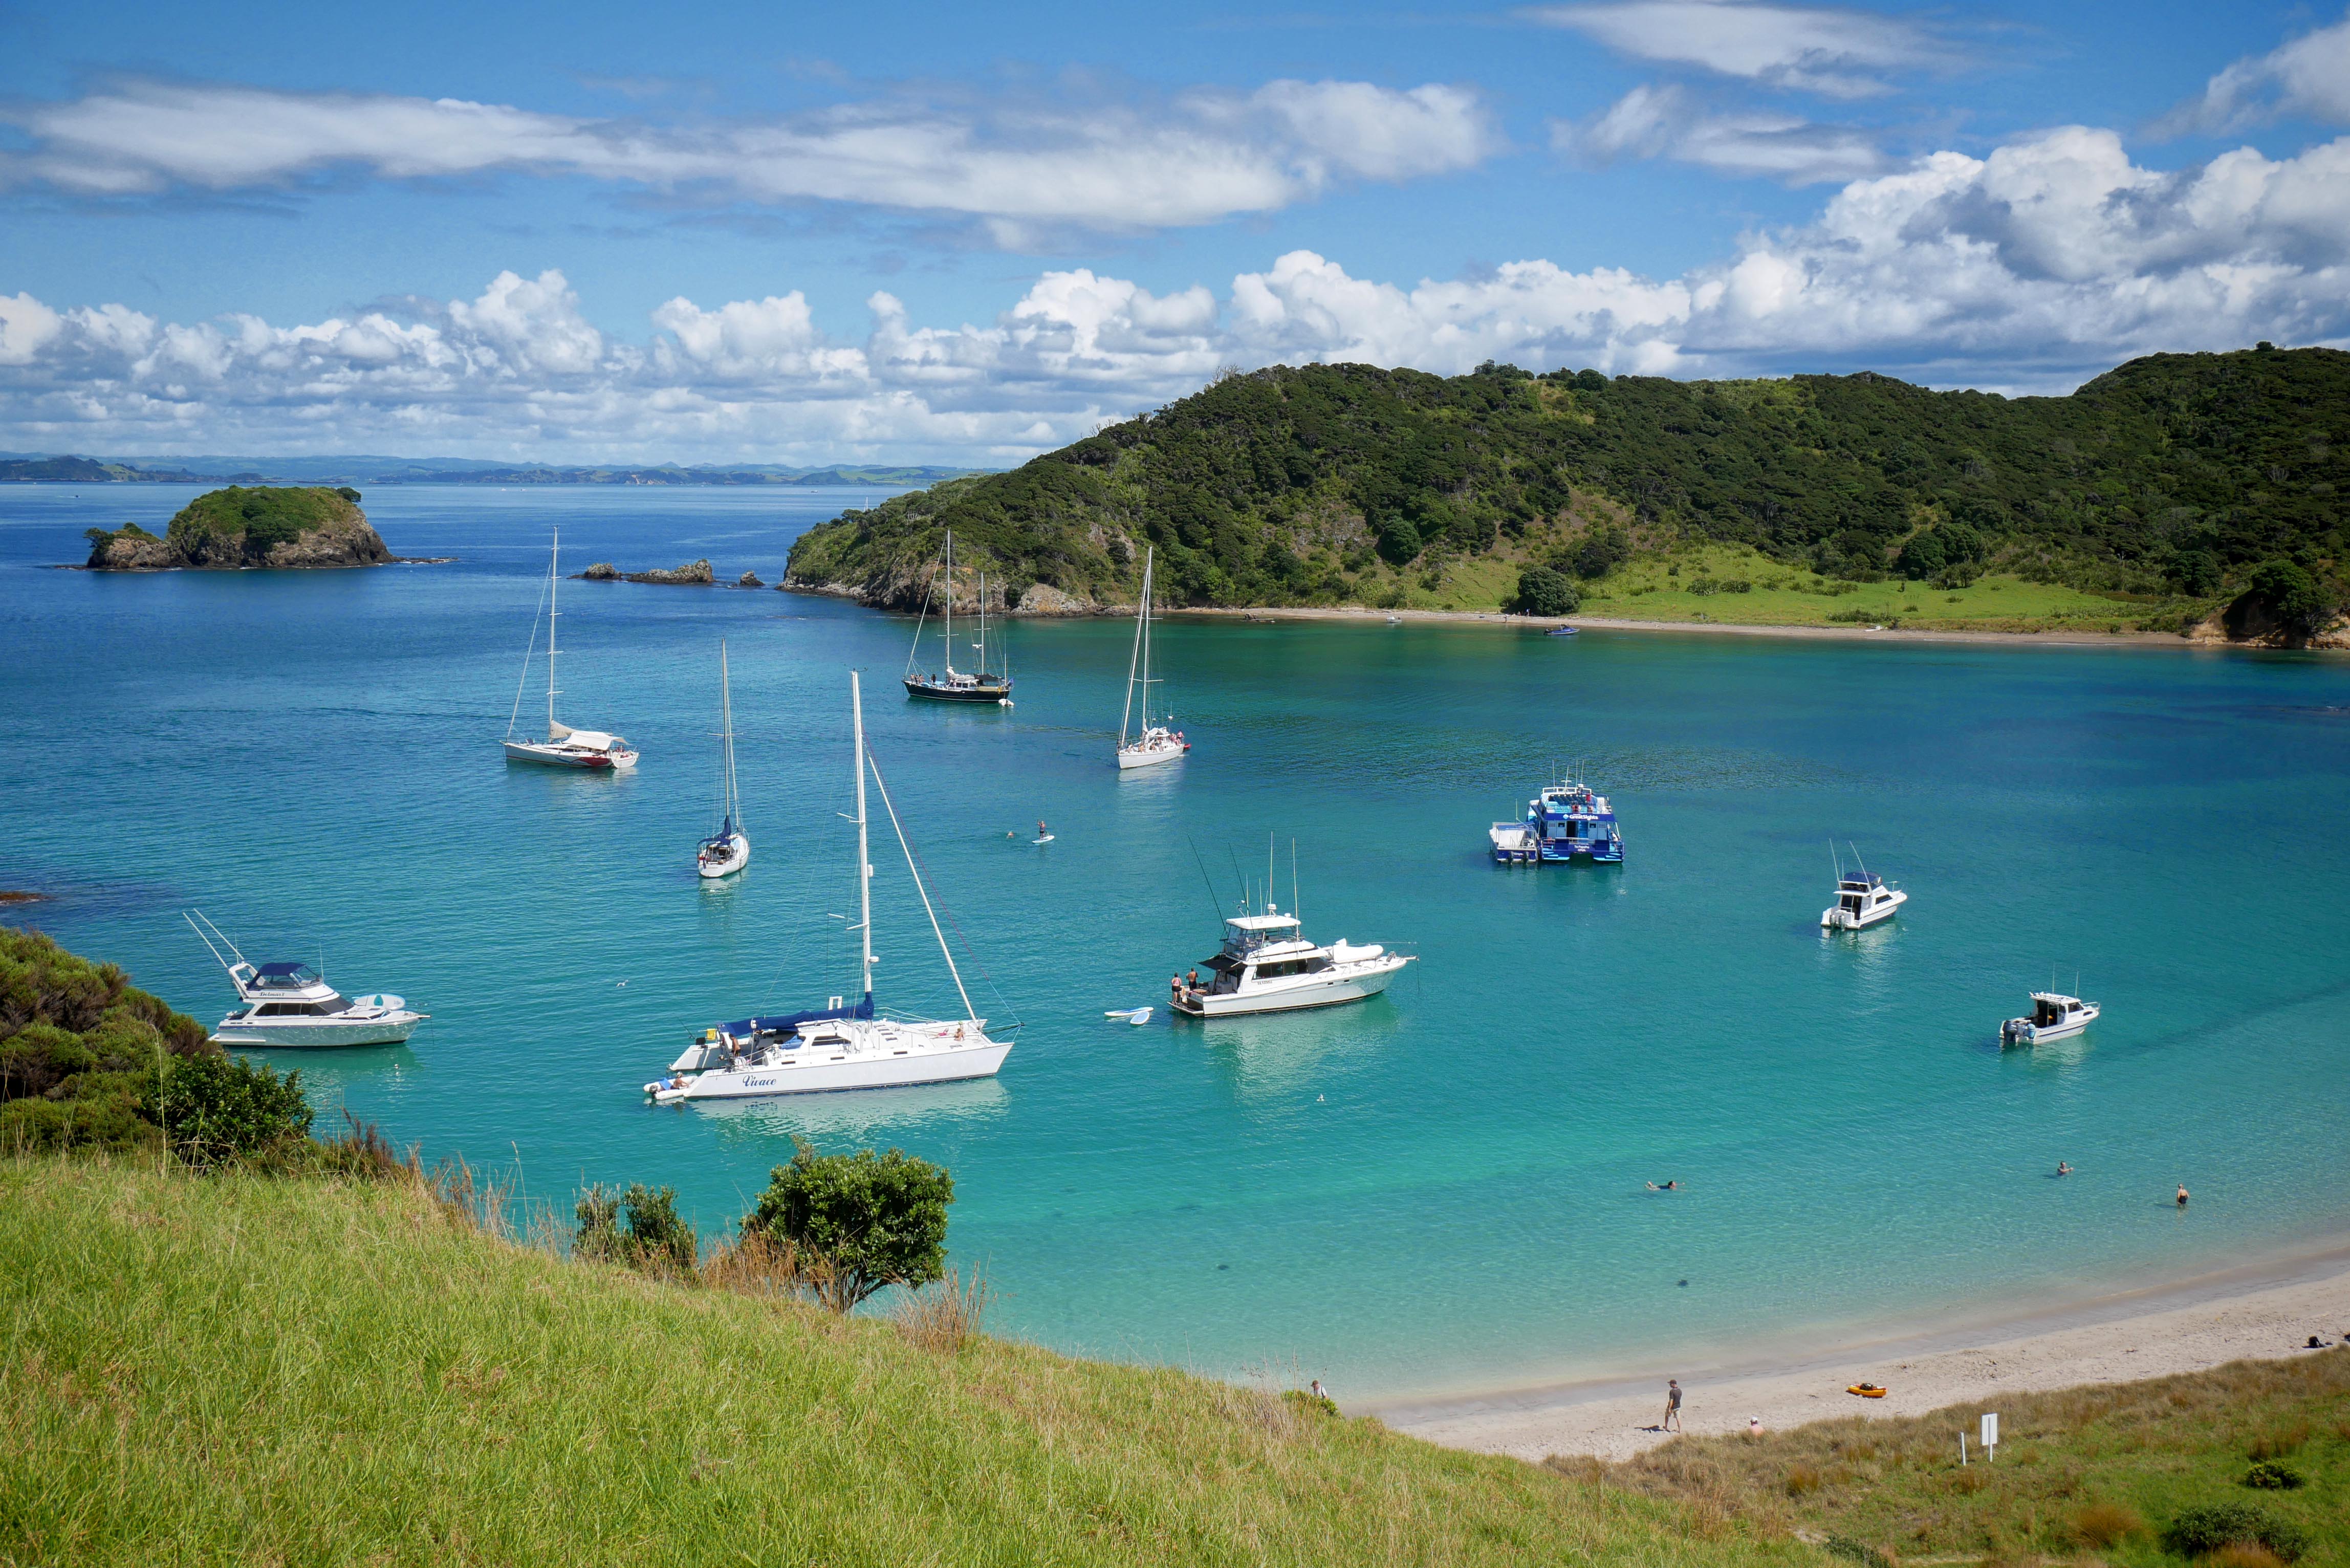 Image © Ken MacAdams
This little slice of heaven is called the Bay of Islands, on the north eastern reaches of the North Island, of New Zealand. The waters here belong to an island called Waewaetorea. Sheltered from the large swells of the Pacific Ocean, this little piece of paradise is one the few islands among the multitude of islands here in the Bay of Islands, that is open to public access. Often you’ll see an array of sailboats and yachts anchored here, as revilers swim in the calm waters, and bask in the sun. It’s one of those incredible panoramas that is permanently etched into my memory!
In 1769 Captain James Cook anchored his ship Endeavor in a nearby bay as he explored the area. A nearby historic seaside village called Russell, has been a haven for visitors since the 1700’s, and was a base for the whaling industry in the 1830’s. The rowdy behavior of its inhabitants during the whaling years earned in the nickname “Hellhole of the Pacific”. Today Russell is a sleepy tourist destination.
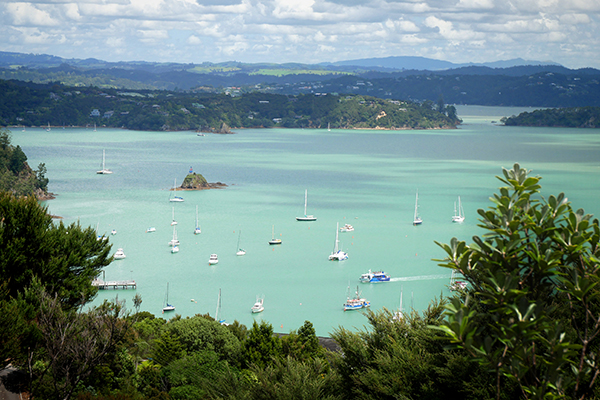 Russell Bay. Where once whaling vessels lay at anchor, pleasure yachts visit today. Once the “Hellhole of the Pacific”, Russell now finds its niche as a sleepy tourist destination. Image © Ken MacAdams
Other islands in the bay range from unusual volcanic basalt rock formations to wildlife reserves. American author Zane Grey lived in Othehei Bay in the 1920’s, while he wrote his popular book, “Tales of The Angler’s Eldorado” – which made the Bay of Islands world famous as a game fishing destination.
The friendly resort town of Paihai, which means ‘good here’ in Maori, says it like it is! From the furthermost out island, Motukokako, or Hole in the Rock, (which can be navigated through if the waves aren’t too aggressive!) to the smallest of islands, there’s history around each corner, and beauty along each cove. It truly is good here!
 Bay of Islands. Islands from large to small dot this body of water. Yachts and pleasure craft ply these vibrant azure waters. Image © Ken MacAdams
My go-to camera was the Panasonic Lumix G85, with the Lumix 12 – 60mm OIS lens affixed. This combination proved both lightweight and compact to pack whether exploring on land or sea.
Ken’s Bio: Ken MacAdams makes Farmington NM his home, when not on the road. Growing up with a darkroom in his basement, Ken learned film skills early on. In 2005 Ken switched to digital, and never looked back! Ken has shot architectural, weddings and portraits, but today concentrates on world travel photography. Ken and his wife have been spending two months a year in China, while he concentrates on building a stock library from that rapidly changing nation.
I look forward to more of Kens travels being shared here on the blog.
Yours in Creative Photography, Bob

by successfulbob | cloud photography, landscape photography, Lumix GX85, photography creativity, photography gear
When the Elements Come Together
I’ve heard it called shooting on the edge. Edge of what you ask? Edge of everything. Edge of the weather. Edge of day and night. Any time there is a contrast from the norm it’s a great time to be creating images.
Case in point.
Here’s an excellent argument for always having a camera handy as Jay Maisel always coaches. I walked out of one of the galleries where my art is sold and came across this moment that was there for maybe three minutes.
 The golden light of sunset sneaking through a hole in the clouds
It was the confluence of the elements that I think makes for an interesting photograph. A small shaft of light appeared and highlighted the flag which was lowing in the wind. The background to the flag was enhanced by the darkened and scattered storm clouds.
There is a tendency to go to ground when the weather is not sunny. Most dramatic photography occurs when the weather moves toward the inclement. Next time you see the clouds starting to form head out and see what you can see.
This image was made with the Lumix GX85 ** and the G Vario 12-35mm f2.8 lens. ***
Yours in Creative Photography, Bob
PS – ** I linked to what I consider a geat vacation and always have camera and lenses. Bang for the buck as far as quality. *** Pro level quality lens
by successfulbob | bird photography, landscape photography, LumixGH5, photography, photography gear, photography software, wildlife photography
Salt River Wildlife – Part Two
As I mentioned in the previous post using the new gear from Panasonic with five-axis image stabilization such as in the Lumix GH5 and the long reach of the Leica 100-400mm lens makes photographing wildlife a new joy. Here are a few more examples from a photo shoot in the Salt River Wildlife basin near Fort McDowell, AZ.
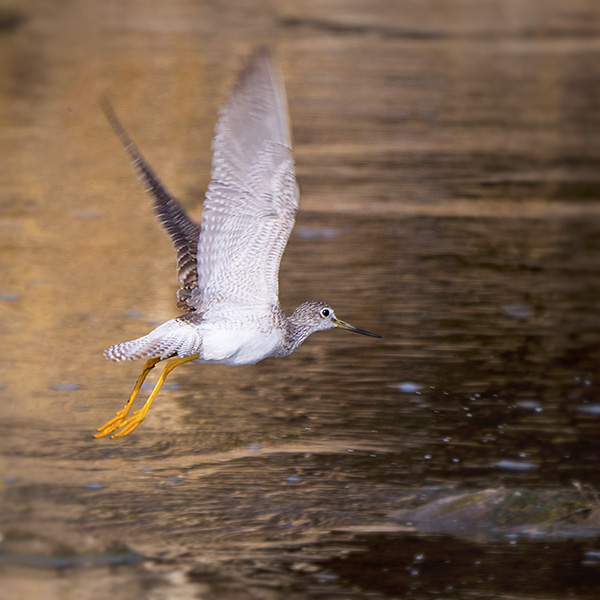
 The avian population on the Salt River is diverse. This is a Yellowlegs Sandpiper.
The 800mm equivalent reach of the Leica lens makes acquiring action photos such as this possible. The stabilization allows for handholding even though the lens is extended to its fullest range. I enjoy making images that include behavior such as birds in flight. Got just the right shutter speed in this case as the body of the bird is tack sharp while the wing tips are slightly blurred showing motion.
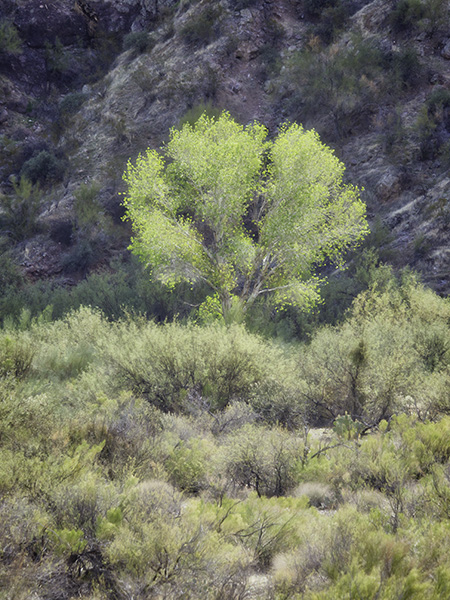 Isolated tree along the banks of the Salt River.
I like how the tree is highlighted against the darker background of the hillside behind. Processed with Adobe Camera RAW, Photoshop and finished with Luminar as a plug-in.
Capturing the image is only the beginning of photography in my opinion. Images are massaged, and the vision is completed in post-production. The tools are quite varied, but I try to settle on specific software so I can use it to its fullest. Below are my current most used software options.
Adobe Bridge, Adobe Camera RAW, and Photoshop – Learn more here
Skylum software including Luminar, Aurora HDR 2018 and the Creative Kit – Learn more here Use the code COATES to receive $10 off your purchase. You can try the software for free for 30 days.
NIK filters – Formerly free from Google DXO has purchased NIK and still makes the plug-ins available for free. They are working on a new release scheduled around the middle of 2018. In the meantime, with a few workarounds, the software still works (mostly) with the current MAC OS system. Learn more here and download for free.
Yours in Creative Photography, Bob
by successfulbob | cloud photography, landscape photography, photography creativity, photography software
Software from Skylum (formerly MacPhun)
Until December 31st some deals are going on with the number one software program for photographers. I’ll hit you with the details below. I will often use Luminar as a plug-in to Photoshop for finishing work. Here’s an image I processed in the Luminar standalone version.
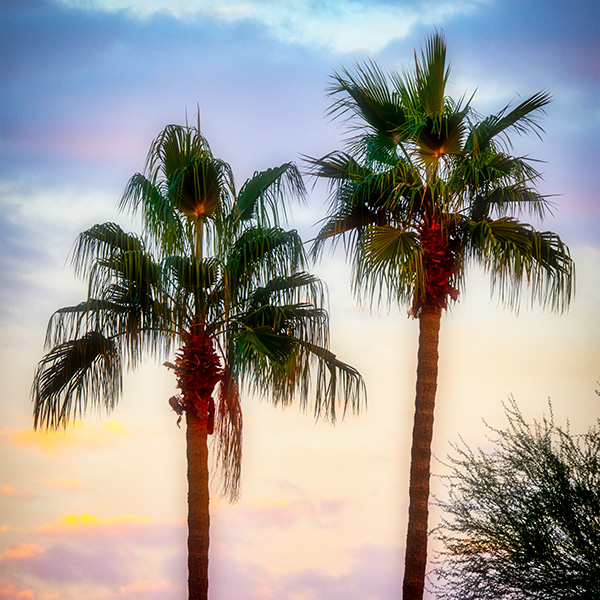
The things that impress me include the ability to pull detail out of a file that is very close to a silhouette. Color rendering. And the ability to make some artistic choices along the way. I would never have thought when I grabbed the silhouette that I could create an image as you see below.
 Here’s a processed file from Luminar. Palm trees in Phoenix.
 Straight out of camera file. (SOOC)
 About Luminar: Luminar 2018 offers everything a modern photographer needs for photo editing, including new filters powered by artificial intelligence, major speed improvements, a dedicated RAW develop module and a forthcoming in 2018; digital asset management platform.
Users will also benefit from the new intelligent Sun Rays filter, LUT support, and real-time noise removal. With workspaces that match different styles of editing, Luminar adapts to deliver a complete experience that avoids clutter and complexity.
Luminar 2018 has been re-built from the ground up for dramatic performance boosts. Existing filters deliver more vibrant colors and depth in less time. A brand new streamlined user interface speeds up working with presets, filters, and masks. With the full support of pro options like layers, masks, and blending modes, complex repairs and photo composites can be easily accomplished.
Offer Availability: The Luminar 2018 Holiday offer is now live and available until December 31
Pricing: Current users of Luminar may upgrade at a Black Friday price of $49 ($39 with coupon COATES)
New users can purchase Luminar 2018 for $69 ($59 with coupon code COATES)
A collection of bonuses will also be included with every purchase.
Bonuses:
The Shootkit ebook
Preset pack: 20 Festive Texture Presets
500+ Sky overlays for Sky replacement
Video tutorial “How to replace Sky in Luminar.”
EXTRA Bonus
“Capture: Adventures in Photography” ebook by Simon & Lisa Thomas, the world’s foremost adventure motorcyclists
Yours in Creative Photography, Bob