by successfulbob | photography creativity, photography software
MacPhun is Skylum
In a nod to no longer being a Mac only product, MacPhun has officially changed its name to Skylum. This software for processing photographic images is being produced by some of the engineers who initially put together the popular NIK filters. I’ll detail some deals below. As an affiliate, I can offer you an extra $10 off any of the deals you see below by adding the name COATES to your order as a coupon code.
The programs can be used as stand alone applications or, as I often do, use them as a plug-in for additional processing power in Adobe Photoshop.
 LUMINAR 2018
Luminar 2018 Trial page – Try it out
Luminar 2018 Facts and Features information can be downloaded here.
-
Already have Luminar? Upgrade for $49 ($39 with my coupon code)
-
New users can purchase Luminar 2018 for $69 ($59 with my coupon code)
-
A collection of bonuses will also be included with every purchase.
Bonuses:
-
2 E-books from Andrew Gibson: “The Creative Photographer” and “Mastering Exposure”
-
Ultra Violet LUTs by Richard Harrington
-
Ultra Violet Preset Pack by Richard Harrington
-
“Accelerate Your Photography” Ebook by Anne McKinnell
-
In-depth Video Tutorial from Trey Ratcliff
• Warm & Beautiful Preset Pack (15 presets)
• Futuristic Preset Pack
AURORA HDR 2018

Aurora HDR 2018 Trial Page – Give it a whirl
Available through February 26
-
Current users of Aurora HDR may upgrade for $59 ($49 with my coupon code)
-
New users can purchase Aurora HDR 2018 for $99 ($89 with my coupon code)
-
A collection of bonuses will also be included with every purchase.
Bonuses:
-
“Accelerate Your Photography” Ebook by Anne McKinnell
-
Deep dive Video Tutorial from Trey Ratcliff
-
Warm & Beautiful Preset Pack (15 presets)
- PS – Remember to add COATES to your coupon code to get an additional $10 off

by successfulbob | cloud photography, landscape photography, photography creativity, photography software
Software from Skylum (formerly MacPhun)
Until December 31st some deals are going on with the number one software program for photographers. I’ll hit you with the details below. I will often use Luminar as a plug-in to Photoshop for finishing work. Here’s an image I processed in the Luminar standalone version.
The things that impress me include the ability to pull detail out of a file that is very close to a silhouette. Color rendering. And the ability to make some artistic choices along the way. I would never have thought when I grabbed the silhouette that I could create an image as you see below.
 Here’s a processed file from Luminar. Palm trees in Phoenix.
 Straight out of camera file. (SOOC)
 About Luminar: Luminar 2018 offers everything a modern photographer needs for photo editing, including new filters powered by artificial intelligence, major speed improvements, a dedicated RAW develop module and a forthcoming in 2018; digital asset management platform.
Users will also benefit from the new intelligent Sun Rays filter, LUT support, and real-time noise removal. With workspaces that match different styles of editing, Luminar adapts to deliver a complete experience that avoids clutter and complexity.
Luminar 2018 has been re-built from the ground up for dramatic performance boosts. Existing filters deliver more vibrant colors and depth in less time. A brand new streamlined user interface speeds up working with presets, filters, and masks. With the full support of pro options like layers, masks, and blending modes, complex repairs and photo composites can be easily accomplished.
Offer Availability: The Luminar 2018 Holiday offer is now live and available until December 31
Pricing: Current users of Luminar may upgrade at a Black Friday price of $49 ($39 with coupon COATES)
New users can purchase Luminar 2018 for $69 ($59 with coupon code COATES)
A collection of bonuses will also be included with every purchase.
Bonuses:
The Shootkit ebook
Preset pack: 20 Festive Texture Presets
500+ Sky overlays for Sky replacement
Video tutorial “How to replace Sky in Luminar.”
EXTRA Bonus
“Capture: Adventures in Photography” ebook by Simon & Lisa Thomas, the world’s foremost adventure motorcyclists
Yours in Creative Photography, Bob

by successfulbob | HDR photography, landscape photography, photography software
Software from MacPhun (now Skylum)
The holidays are fabulous as software companies roll out deals for Christmas and the holiday season. I have been playing the software from MacPhun for a while. It was only MAC-based, and they have now made the software available for Windows PCs as well. This is excellent news for those who were using NIK filters as the people who designed initially that software formed to create some new software that can help creatives get their vision out of their heads and into their imagery.
The first software I want to share with you is Aurora HDR 2018. This is the first HDR software that I found to be able to give me reliable results in density over the image without that ‘HDR!!’ look. Very clean and easy to use with a WYSIWYG system. Here’s an example.
 RAW files capture sequence
 Processed in Aurora HDR 2018 software from images above.
I like how I can add life and dynamic range to the photo without dialing in HDR noise and artifacts that seemed to be prevalent in other HDR software processing programs. And, no hoops to jump through.
AURORA HDR
AURORA HDR 2018 Special Offer
Aurora HDR is not just a tool for merging bracketed images; it also provides numerous tools and countless options to create perfect HDR photos for every taste – from one-click presets and advanced tone-mapping, to layers, noise reduction, and robust luminosity masking controls. It was named as the Best Mac App of 2017 by Apple.
Offer Availability: The Aurora HDR Special offer is already live and continues until December 31.
-
Current users of Aurora HDR may upgrade at a Special price of $39 ($29 using my coupon code COATES)
-
New users can purchase Aurora HDR 2018 for $79 ($69 with my coupon code COATES)
-
A collection of bonuses will also be included with every purchase.
Bonuses:
-
Deep Dive video tutorial from Trey Ratcliff
-
“How to create realistic HDR images” Ebook
-
2 Preset Packs – 40 presets! Preset Pack 1 – Winter Vibes. Preset Pack 2 – Wonderland.
Yours In Creative Photography, Bob
PS – There’s a deal on Luminar I’ll outline tomorrow!

by successfulbob | architectural photography, infrared photography, landscape photography, Lumix G6, LumixGH5, photography creativity
Infrared Capture for Photographing Architecture
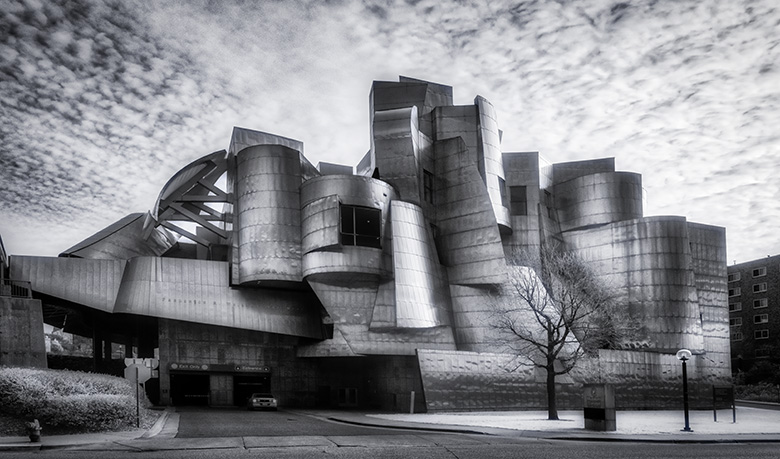
We don’t necessarily think about using IR capture when taking everyday images of architecture. It can give you a different look. And I like it.
Always the difference will be dependent upon what the final image use will be. Since I am my client when doing architecture images for art presentation, I get to choose. I’ll show you a couple of different captures and let you decide. Let me know what you think.
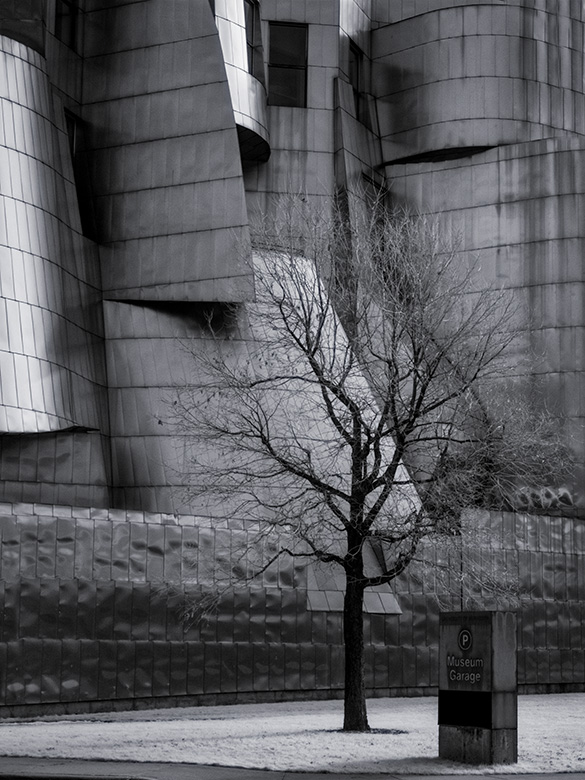
 Weisman Museum IR capture Lumix G6 Camera converted to Infrared Capture by LifePixel Processed in Adobe Camera RAW and Skylum (AKA MacPhun’s) Luminar
I think the infrared gave this image a bit of an otherworld feeling complementing otherworld style architecture.
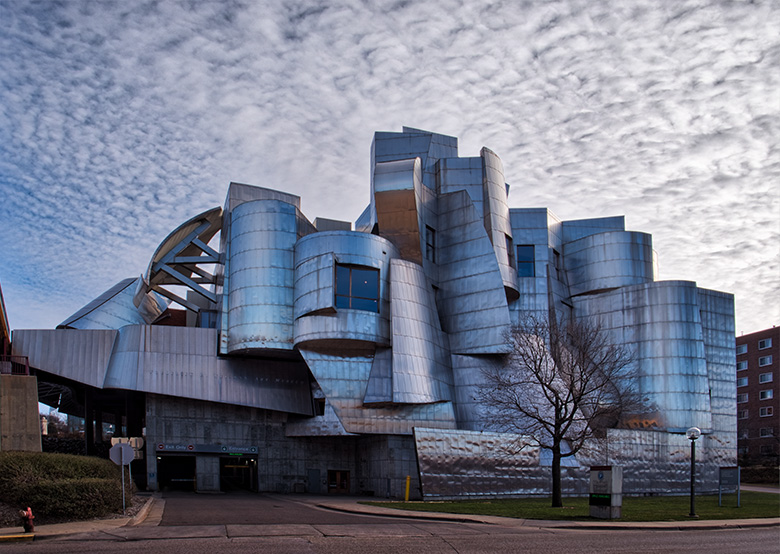
 Here’s a color capture made with the Lumix GH5. Processed in Adobe Camera RAW and Skylum (AKA MacPhun’s) Luminar
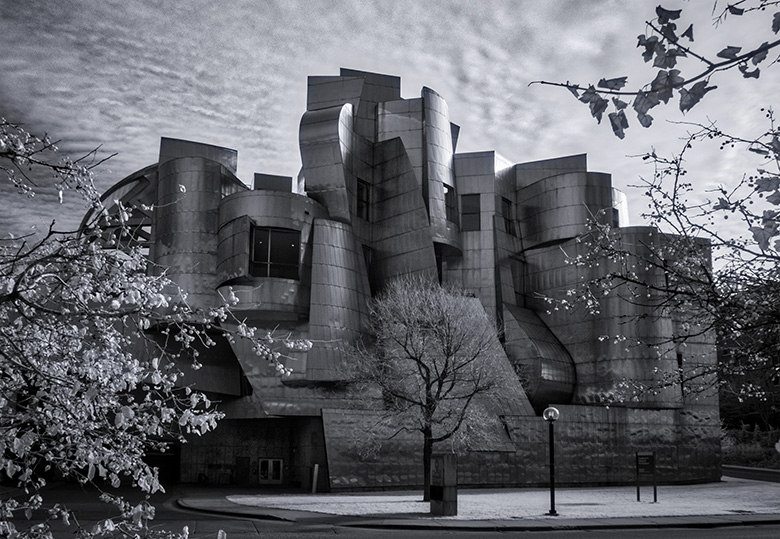
I always try to work a subject over and above a straight-forward rendition. This includes different angles, framing, and processing. See a couple of images below for examples. I would have tried quite a few different ideas, but I stopped on my way to the airport and didn’t want to miss my flight. Art suffers from a tight schedule!
 While not showing off the architecture quite as much I feel the framing made for a more interesting photo.
 Details can always add to the story. I liked the barren tree against the architecture in this image.

by successfulbob | photography
Wetlands and Creek Photography – Infrared Capture
I’m a fan of the look and feel of infrared photography. Part of the beauty is that you can take the time of day that is usually dead for photography as far as making interesting images that have the light that helps highlight your subject. Most photographers will tell you midday is not a great time for photography.
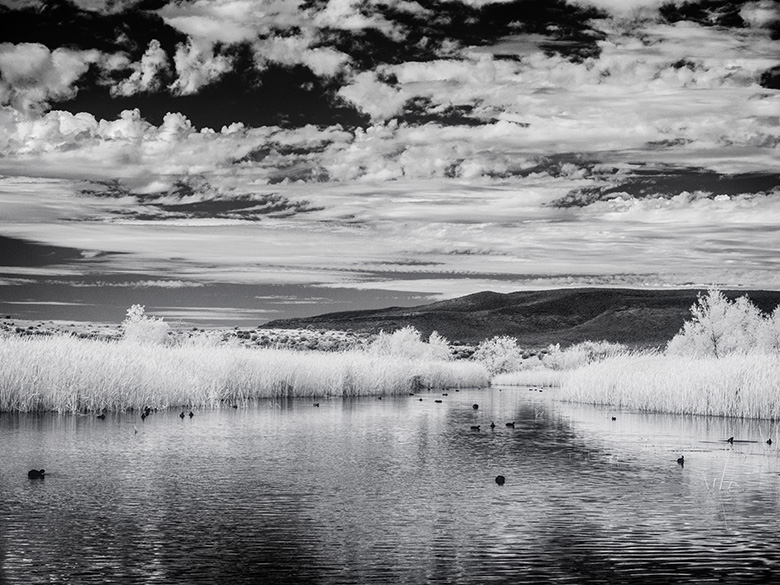
I’ve found that using an IR converted camera can take that flat light and give us a different feel for the scene. Things that seem to work best with infrared image capture include skies with clouds and greenery. The best time for infrared photography? 10 AM to 2 PM under full sun. Here are a couple of images from the local wetlands area between Sedona and Cottonwood.
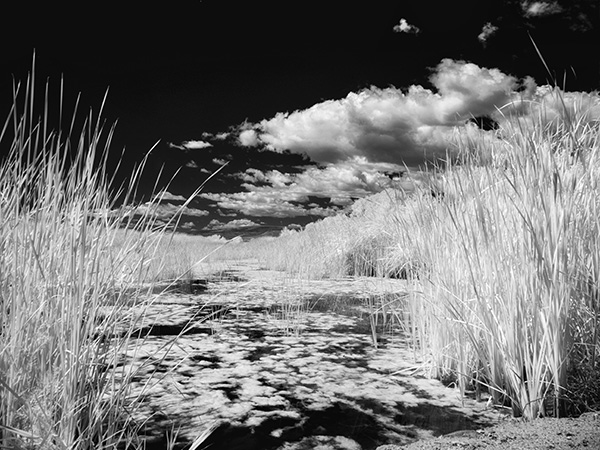
 Reeds, water, and clouds make for an image with lots of contrast options. Lumix G6 (This link is to the Lumix G7 as the G6 is no longer avaiable. Remember, almost any camera you have in your quiver can be converted. Usually, it’s whatever you have moved on from to get more use) with 14-140mm lens converted to infrared by LifePixel
 Captured last year with the same gear as above
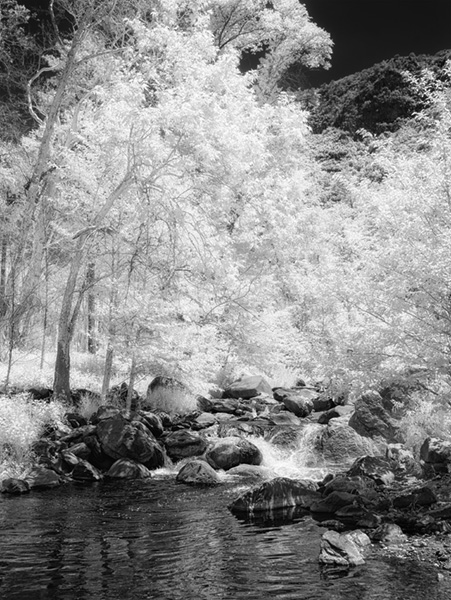
 From Oak Creek in the canyon between Sedona and Flagstaff
Now, as with all image making, there are exceptions to every rule. Many images of destinations can be made at that very flat light time between 10 AM and 2 PM in full sun. Usually, it is a time to show deep blue skies and white puffy clouds with either palm trees and beaches or red rock vistas from out west.

by successfulbob | landscape photography, LumixGH5, photography, photography education
Photography “Exposure Rules”
This post was inspired by questions about getting a solid exposure of the moon with detail. Many photographers have issues with this. We’ll start with the ‘Sunny 16 Rule’. Note that I put the exposure rules in quotes in the title of this post. That’s because technically there are no rules because any exposure is the correct exposure if it helps to tell the story you are trying to share.
No matter who tells you something it is always important to test for yourself. ALWAYS! (example below)
The exposure rules I’m going to share here can get you to a place where you can start your journey and attain an exposure that will render highlights and shadows visible within an acceptable range without losing detail in either one. Once you know this happy place, it can be a handy starting place and to check your metering equipment in your camera and light meter.
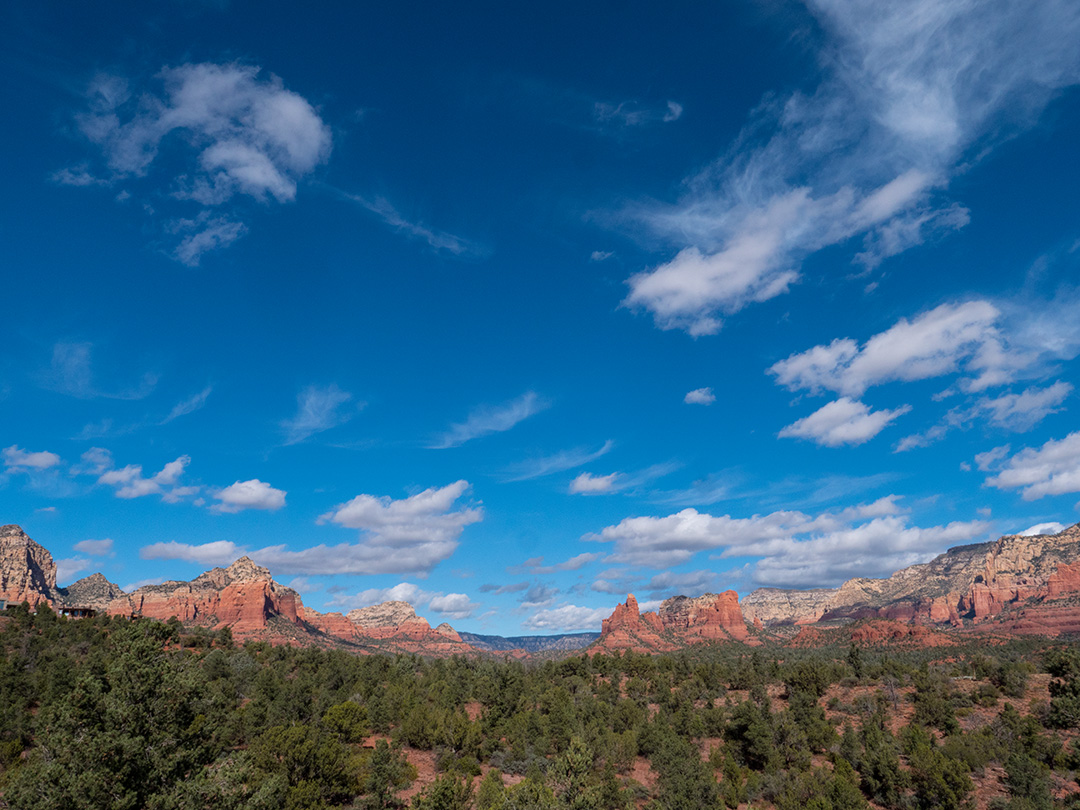
 The Sunny 16 Rule in action with Sedona’s red rocks. Lumix GH5 with 12-60mm Leica
Exposure settings f16 1/400th second at ISO 400
The first rule is the Sunny 16 Rule. On a sunny, cloudless day scene, this rule states that if you set your camera to f16 and your shutter speed to 1 over your ISO setting you will get a proper exposure. If your ISO is set to 400, your settings would be f16 at 1/400th of a second. It will be correct. For additional creative control within the rule just keep the ratios between shutter speed and f-stop. If you want a shallower depth of field, for each change in aperture change the shutter speed. f8 is two stops different from f16, so the shutter speed would need to be 1/1600th second with our 400 ISO setting. Be aware that small tweaks in 1/3rd of a stop can make quite a difference in how the scene renders. A slight underexposure
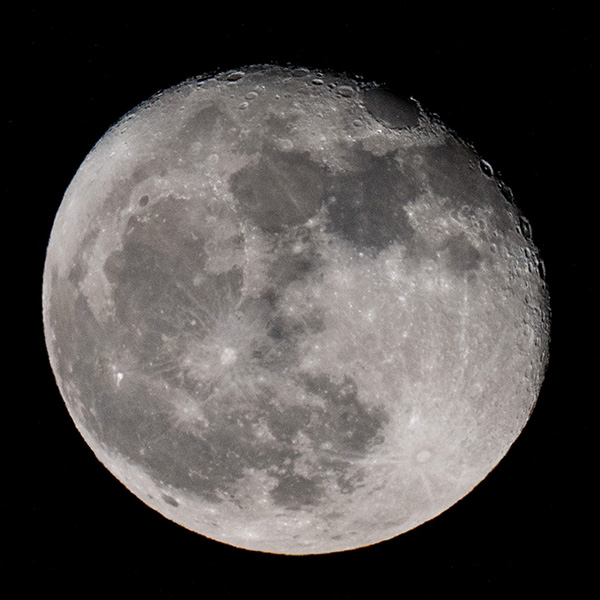
 The Moony 8 rule for the lunar surface low in the sky. Lumix GH5 with the Lumix G Leica DG VARIO-ELMAR 100-400mm f4-6.3 LENS
Let’s move to the moon. I shared a piece of info I was told without testing. (sorry about that! working to rectify it ASAP) I was told we could use the ‘Moony 11’ the same way we use the Sunny 16 rule. I apologize for passing that info on without testing first. After testing, I found that the reality for getting a nice exposure of the moon was the ‘Moony 8 Rule’. Set your aperture for f8 and use the reciprocal of your ISO for your settings. Even though the moon is a reflection of the sun, it is traveling through a couple of layers of atmosphere and absorbing some of the light itself. It turns out Moony 8 seems to be the way to go.
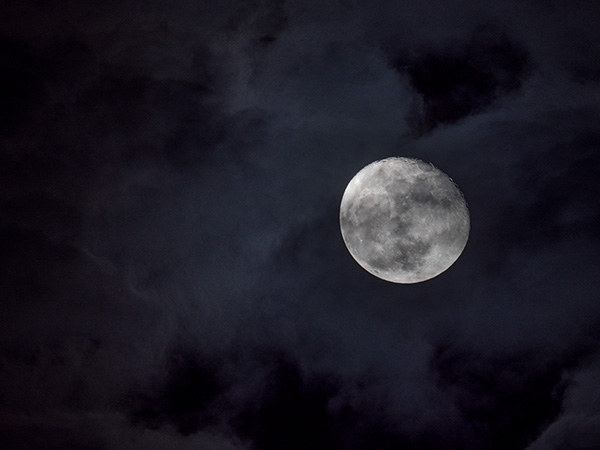
 Light clouds crossed the moon and changed the exposure to 1/60th of a second still at ISO 400
While the Sunny 16 rule is for the exposure of the scene lit by the sun. The Moony 8 is to achieve texture on the moon itself.
Yours in Creative Photography, Bob

by successfulbob | LumixGH5, photography, photography gear, photography software
Football and the Lumix GH5 – Part Two
Check the previous post on my first trial photographing sports with the Lumix GH5 and the Lumix G Leica DG Vario-Elmarit 100-400mm lens. This is an incredible combination. In the images shown yesterday, the ISO was set to 6400, and I found some of the photos didn’t quite have the stopping power for which I was looking.
I cranked up the ISO to 12,800. WOW for stopping power, but there was added noise. The great thing is the noise can be handled in post-production pretty easily with reliable results.
 Image photographed at ISO 12,800! Lumix GH5 with Lumix G Leica DG Vario-Elmarit 100-400mm lens (200-800mm 35mm full-frame equivalent)
 Image photographed at ISO 12,800! Lumix GH5 with Lumix G Leica DG Vario-Elmarit 100-400mm lens
Setting the camera to IS) 12,800 gave me enough shutter speed to stop the action. The noise was heavy, but I didn’t find it objectionable because of the lack of anti-alias filter. This makes the noise more like the days of film. It’s a very organic feel.
 Here’s a small section with the noise from 12,800 ISO. Very organic but possible a little distracting for some.
 Here is the same section of the image with MacPhun’s Noiseless CK filter applied. Either image prints well but many prefer the noise reduction version.
MacPhun has changed their name to SkyLux as they are putting together versions of their software for the PC world as well as MAC machines. Here’s a link to pre-order LUMINAR with a discount. See more info below.
Yours in creative Photography, Bob
Luminar 2018 offers everything a modern photographer needs for photo editing, including new filters powered by artificial intelligence, significant speed improvements, a dedicated RAW develop module and a forthcoming in 2018; digital asset management platform.
Users will also benefit from the new intelligent Sun Rays filter, LUT support, and real-time noise removal. With workspaces that match different styles of editing, Luminar adapts to deliver a complete experience that avoids clutter and complexity.
Luminar 2018 has been re-built from the ground up for dramatic performance boosts. Existing filters deliver more vibrant colors and depth in less time. A brand new streamlined user interface speeds up working with presets, filters, and masks. With the full support of pro options like layers, masks, and blending modes, complex repairs and photo composites can be easily accomplished.
Luminar 2018 will be available for pre-order November 1-15, and released on November 16.
Pre-Order Pricing:
Current users of Luminar may upgrade at a special pre-order price of $39 ($49 MSRP)
New users can purchase Luminar 2018 at a special pre-order price of $59 ($69 MSRP)
A collection of bonuses will also be included with every purchase.
Beta testers are eligible to receive an additional $10 discount
Pre-Order Bonuses:
A Pack of signature presets and textures fro pro photography Nicolesy
An Exclusive pack of LUTs
1-Year Power plan from SmugMug ($72 value). For new accounts only

by successfulbob | Lumix Lounge, LumixGH5, people photography, photography gear
Photographing Sports and the Lumix GH5
First, let me start this post with the fact that I do not shoot sports on a regular basis. The best photography in any genre, especially fast-moving subjects, comes from practice. Knowing the game and anticipating where the peak action will occur makes a considerable difference in the quality of the images.
On with the post.
With that disclaimer out of the way, I felt that it would be an interesting exercise to photograph a football game under the lights. Karl Mullings (find Karl’s work here), a photographer friend from Flagstaff among others, had been asking me how the GH5 camera would do under the lights with fast-moving action. I only had experience with the camera in low light shooting wildlife so I couldn’t give him a qualified answer. He asked if I would bring the camera and photograph a football game with him.
Off to Flagstaff where there were a couple of surprises in store. Lighting was lower than I thought it would be Due to my inexperience there was a challenge in finding the action. During the first quarter, I found myself missing a lot of shots cutting off the players as they ran out of the frame. I started to get the hang of it a couple of quarters later and here are some results.
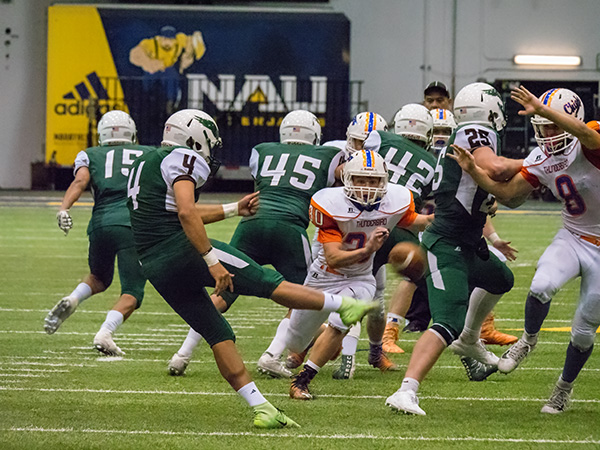
 Image photographed at ISO 6400 Lumix GH5 with Lumix G Leica DG Vario-Elmarit 100-400mm lens (200-800mm 35mm full-frame equivalent)
I was surprised by the reach and handhold-ability of the camera and lens combination. The five-axis in body stabilization, plus the lens stabilization was pretty amazing in allowing a reasonably slow shutter speed while almost stopping action with no camera blur.
 Image photographed at ISO 6400 Lumix GH5 with Lumix G Leica DG Vario-Elmarit 100-400mm lens
 Image shot at ISO 6400 Lumix GH5 with Lumix G Leica DG Vario-Elmarit 100-400mm lens
 My buddy Karl, hard at work on the sidelines.
Tomorrow we’ll talk about freezing action even more using an ISO of 12,800 and post processing of images.
Yours in creative Photography, Bob

by successfulbob | LumixGH5, photography creativity, photography gear, wildlife photography
A Trip to the Zoo in Phoenix
The zoo can be a great place to begin to study animal behavior to help make you a better wildlife photographer.
When I photograph wildlife, I try to get behavior images that I believe have a bit more impact than capturing the animals while they are stock still. The secret to making that work is learning and knowing an animal’s micro-movements that occur just before they are about to do something different. Often you will see a small twitch. A turn of the head or some other indication they are about to move. The only way to see that is to watch intently over long periods of time and patterns will begin to emerge.
 Primates in the Phoenix Zoo. I had to be exceptionally patient in waiting for eye contact with these Gibbon (buff cheeked?) monkeys.
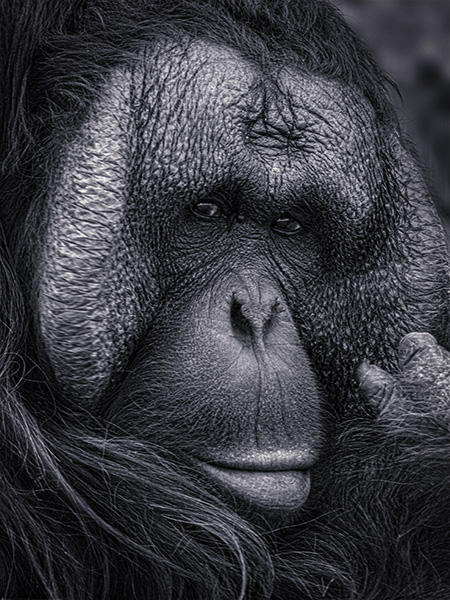
 Again, I was waiting for eye position helped make this a more moving portrait of the orangutan. This image was captured at 1/30th of a second handheld with an 800mm equivalent lens. (see my camera notes below)
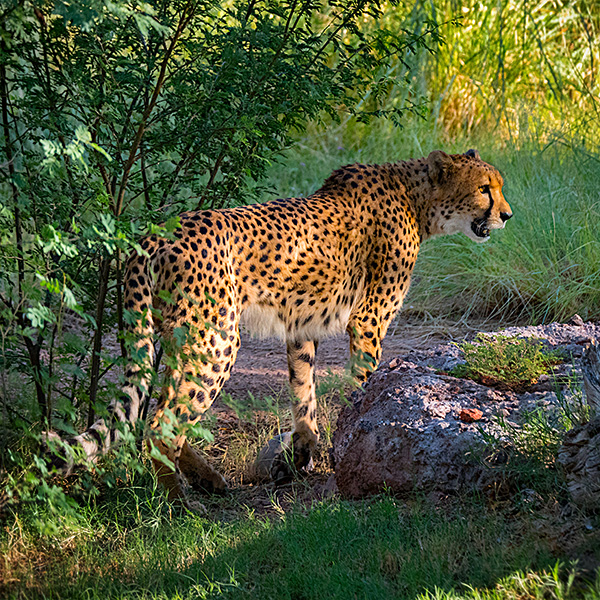
 A beautiful animal, the jaguar, looks to another across the pen.
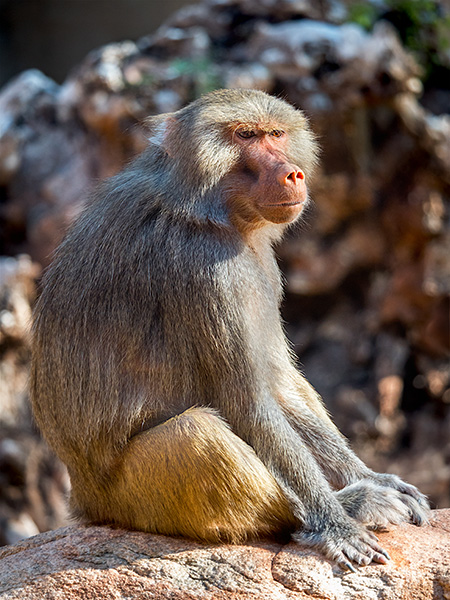
 This baboon appears lost in thought. Primates being as close to human expression as you can get in the animal kingdom keep me interested for long periods of time.
One of the things I find extremely helpful in photographing wildlife is a lens with a long reach. This can allow you to fill the frame with your subject. All of these images were made with the Lumix GH5 and the Leica 100-400mm DG Vario-Elmar f4.0-6.3 lens. The five-axis image stabilization and the lens stabilizer working together allow for hand-holding and getting sharp images. The jaguar was at 1/800th of a second. The Gibbons were at 1/320th of a second. If an animal is still such as the baboon, the 1/160th of a second is no problem at all.
The tools we have at our beck and call are kinda amazing and allow us to capture photos that were virtually impossible only a few years ago.
Yours in creative Photography, Bob

by successfulbob | landscape photography, Lumix GX85, photography, star photography
Photographing the Night Sky – Capture Techniques
Night sky photography has its own little set of things to think about and prepare. I’ll try to share a few sources I came across in my research in trying to get night sky photos. (some issues covered here)
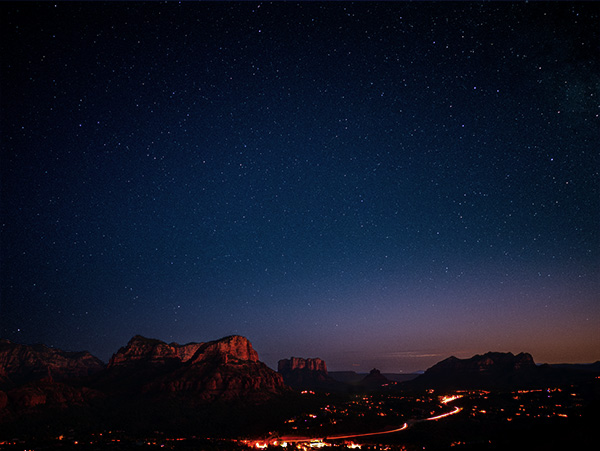
 Landscape with stars over the Village of Oak Creek, Sedona Lumix GX85 with Leica DG Summilux15mm f1.7 lens
Lens choice is crucial. Faster glass means better images as they will allow more light to reach the sensor. Wider angle lenses can give you more time to let some of that light through. Look into the rule of 500. It will help you keep your stars as pinpoints as opposed to starting to streak.
According to the rule, the longest shutter speed you can use before your photo gets blurry is equal to 500 divided by your lens’ focal length. This formula has variables, but it is a good starting point. In my searches, I found this calculator on the Lonely Spec web site. There’s excellent info contained in the calendar that has been a great help to me! The calculator takes all variables into account. Sensor size, focal length, ISO, and aperture. If you are looking for more in-depth info, Ian Norman is rocking it over on his site.
 Great resource for night sky photography
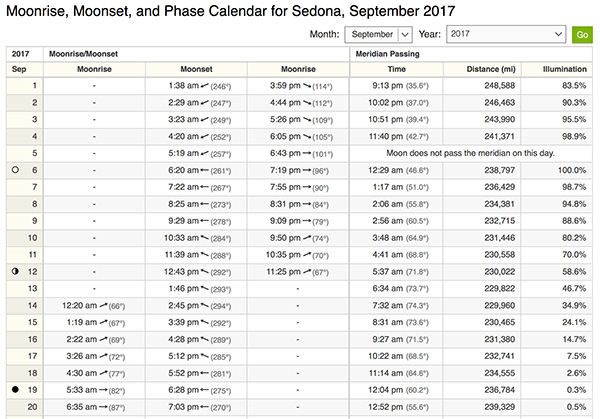
Another important site is timeanddate.com. You can look up the sun or moon cycles, rise and set times along with the direction of appearance on the horizon on the charts. This is handy if you want to find out where the moon will be rising if you are trying to catch rock formations or building with the full moon. (next full moon should be a good one in October AKA Harvest moon)
 Above is a moon chart for Sedona, AZ. Go to the site and plug in your town/city name. Use the compass in your phone to see where the moon will come up. Note that if there are mountains and hills between you and the horizon the moon will be moving across the sky a bit and you’ll need to make adjustments.
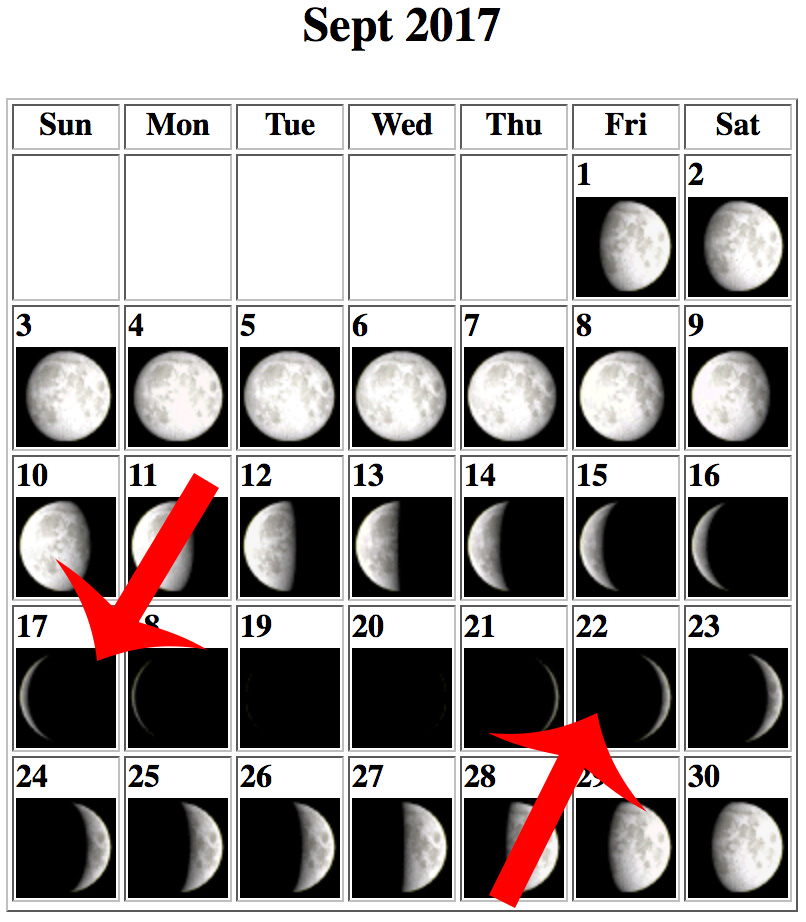
Stardate is a great site. The more you know about your subject, the better your results will be. For example, if you are trying to photograph stars the darkest skies will be of help and know where, and when, the moon will be in the sky is important. Stardate can also keep you up-to-date with happenings in the heavens.
 Moon chart with dates. Days around the New Moon are the best for dark skies and better rendition of your stars
The new moon is not the only time for photographing the night skies. A little bit of moon can help render the landscape visible for a different night photography look. Full moon and waxing and waning gibbous moons I tend to shoot for the landscape itself as the extra light tends to make the stars less visible.
Next post, I’ll look at processing the files once you are back at the computer.
Yours in Creative Photography, Bob

 LUMINAR 2018
 Luminar 2018 FEBRUARY OFFER through the 26th

