by successfulbob | landscape photography, Lumix GX8, panorama, photography education, photography gear
I really enjoy the field of view you can achieve with a panoramic photo. The Lumix GX8 is pretty solid with the in-camera stitching when you need a quick capture of the scene for sharing… And with this version going to print. There are still some occasional stitching errors in areas with lots of confusing crossing details or areas with hardly any detail but I had to look really, really hard to find a small error in one of the tree clumps… Sweet!
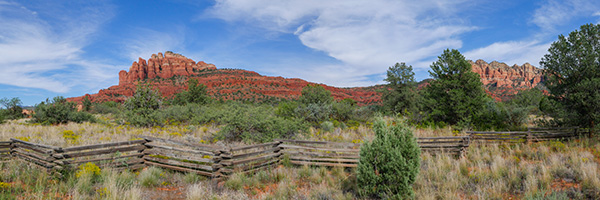
This is the view on the way to Cathedral Rock in Sedona, Arizona. Heading down Verde Valley School Road in the Village of Oak Creek (view of the right side of Cathedral Rock)
Here’s a tip that some people don’t think of when creating Panos. Turn the camera to the vertical position as you make your capture. This will give you some more vertical room. You can also capture a next ‘row’ of image and stitch them together in Photoshop or your favorite Pano program.
One more thought to help get smoother stitching… Point your feet toward or slightly past where you would like the pano to end. Then pivot your stomach muscles to the beginning of the captures and use your stomach muscles to move the camera with your elbows tucked in and the camera touching your forehead.
Yours in Creative Photography, Bob
by successfulbob | black & white, infrared photography, landscape photography, Lumix G6, Lumix Lounge, photography education, photoshop tutorial
OK. I went back to the same file I worked on yesterday and reprocessed using a couple different techniques. Here is the new version captured with the Lumix G6 and the 7-14mm f4 lens.
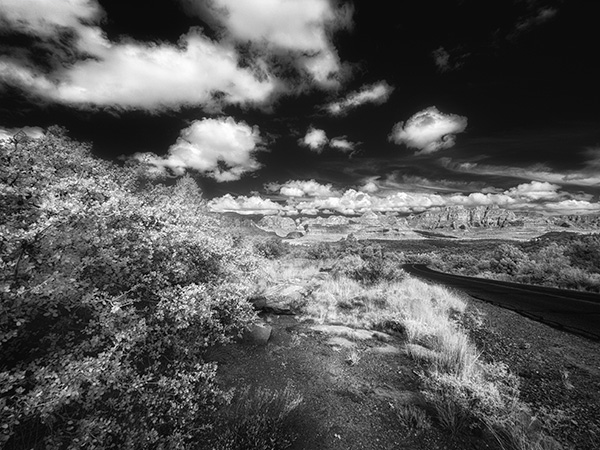
Different processing led to a cleaner more detailed IR image.
First I used Adobe Camera RAW to process the file twice. Once for the foreground which was in shadow and again for the background which was in full sun. Using a Layer Mask I blended the two files together. Then using the Channel Mixer I swapped the Red and Blue Channel information as this file is still comprised of RGB information. When you first open the Channel Mixer adjustment Layer you’ll see the Output Channel set to Red at 100%. Change this to 0%. Go to the Blue color and change it to 100%. Then change the Output Channel to Blue and make the Red color 100% and the Blue color 0%. This is to give a ‘blue sky effect’. I didn’t like that effect so I kept going.
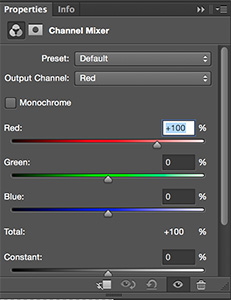

Swapping the Channels gave me a better image ultimately so I will keep this as part of my IR processing in the future.
Next using NIK Silver FX Pro 2 I converted to Black and White adding some mid-tone structure and fine structure. in NIK Color FX Pro 4 I added a bit of Glamour Glow with neutral color. This helped increase the IR look. A little goes a long way before you blow out some highlights so be careful here. Final bit of tweaking is a blank Layer set to Soft Light Mode using the Brush Tool with Black or White color to dodge and burn the image just a bit to control where the eye travels throughout the photograph.
Looking forward to working in IR more often. Gives a great look to noon-day sun images when you would normally refrain from making image captures.
Yours in Creative Photography, Bob
by successfulbob | black & white, infrared photography, landscape photography, Lumix G6, Lumix Lounge, photography, photography creativity, photography education
It’s a bit of a different world when you move into infrared imaging.
This is photography with a totally different look.
It used to be very difficult to capture infrared as the filters used to allow the non-visible light spectrum through were extremely dark making it difficult to see and frame your subject. The film was extremely sensitive and was quite susceptible to fogging ruining exposures before you even got them into the developer. In addition there was the need for focus adjustment as visible light focused on a different plane than the invisible spectrum which would often lead to out of focus images. And finally there was lots of grain in many of the captures.
Fast forward to today… I just received my Lumix G6 back from LifePixel after a conversion to allow the camera to capture infrared. It’s still not quite a piece of cake to create an infrared image but the capture sure got easy!
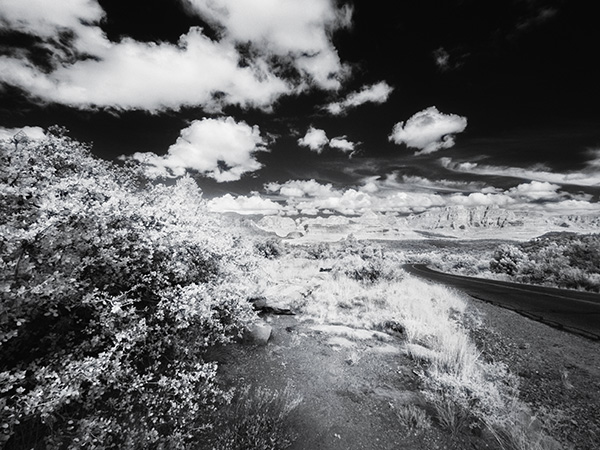
First infrared image from newly converted Lumix G6.
In this image the foreground area was in shadow so it wasn’t receiving the full infrared effect but the clouds, sky and rocks in the distance showed well. To combat this the image was triple processed. Once for the top half, and twice for the bottom to carry the infrared look through the image. Black and White conversion was made with NIK Silver FX Pro 2. Masks were applied to make the changes

With the filter switched to a straight infrared filter you end up with a reddish sepia-tone image straight out of camera.
In order to have a better idea of what I was capturing as far as a final image of Black & White infrared I shot with a camera setting for Black & White. I then set the camera to capture RAW + Jpeg so I would have all the information presented to the camera but also have a quick BW in the jpeg.
There is another way to process the images (well probably as many ways as there are photographers) which I’ll share in another post using Photoshop Channels.
Yours in Creative Photography, Bob
Here are some links to my follow-up IR posts
https://chd.lzi.mybluehost.me/infrared-imaging-part-2/
https://chd.lzi.mybluehost.me/infrared-photography-part-three/
https://chd.lzi.mybluehost.me/gila-wilderness-infrared-photos/
by successfulbob | black & white, Lumix GX8, Lumix Lounge, people photography, photography
It is a lesson in asking.
When we are out and about we run across people who have character. People who have lived long and are happy to share about their lives if you only open the dialog. Over the years I have met or seen many people that I would have liked to have photographically captured an image of but was too nervous to ask.
I’m finding that I get more interesting conversations and life stories when I ask and share my wish to capture an image. People who know me might say, “Bob, SHY??! You’ve got to be kidding me?” But I have let situations go by where I just didn’t feel comfortable asking to create an image. usually it was all in my own head and I’m getting better thanks to spending time with Levi Sim. Levi is a wonderful person who connects with people in a great way. I enjoy his techniques for getting to know people and making them comfortable in front of the camera in a nano-second. When I was with Levi in Chicago I watched as he approached a guy on a motorcycle, in traffic, and had him maneuvering his bike in order to get a better background. The guy was happy to do it… Remember this is in traffic, in Chicago.
Here’s Gary…
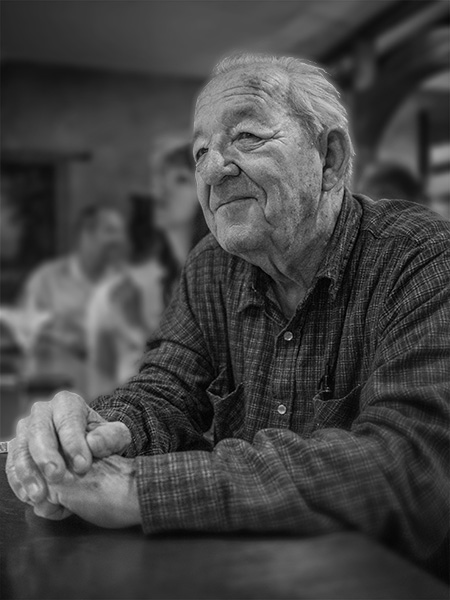
Met Gary at Bella Vita Ristorante in Sedona.
It was a wonderful conversation my wife and I had with Gary. He shared that he was born and raised in the desert. He loved tramping through the high Sierra Mountains where Ansel Adams created many of his iconic images. This came about because I had my camera (Lumix GX8) and after chatting with him asked if I might make a few exposures. He was flattered and we had a very pleasant time.
I had the 20mm 1.7 lens on and shot wide open. ISO 3200 This is a sweet piece of glass. I added just a bit of blur in the background to render the other people unrecognizable.
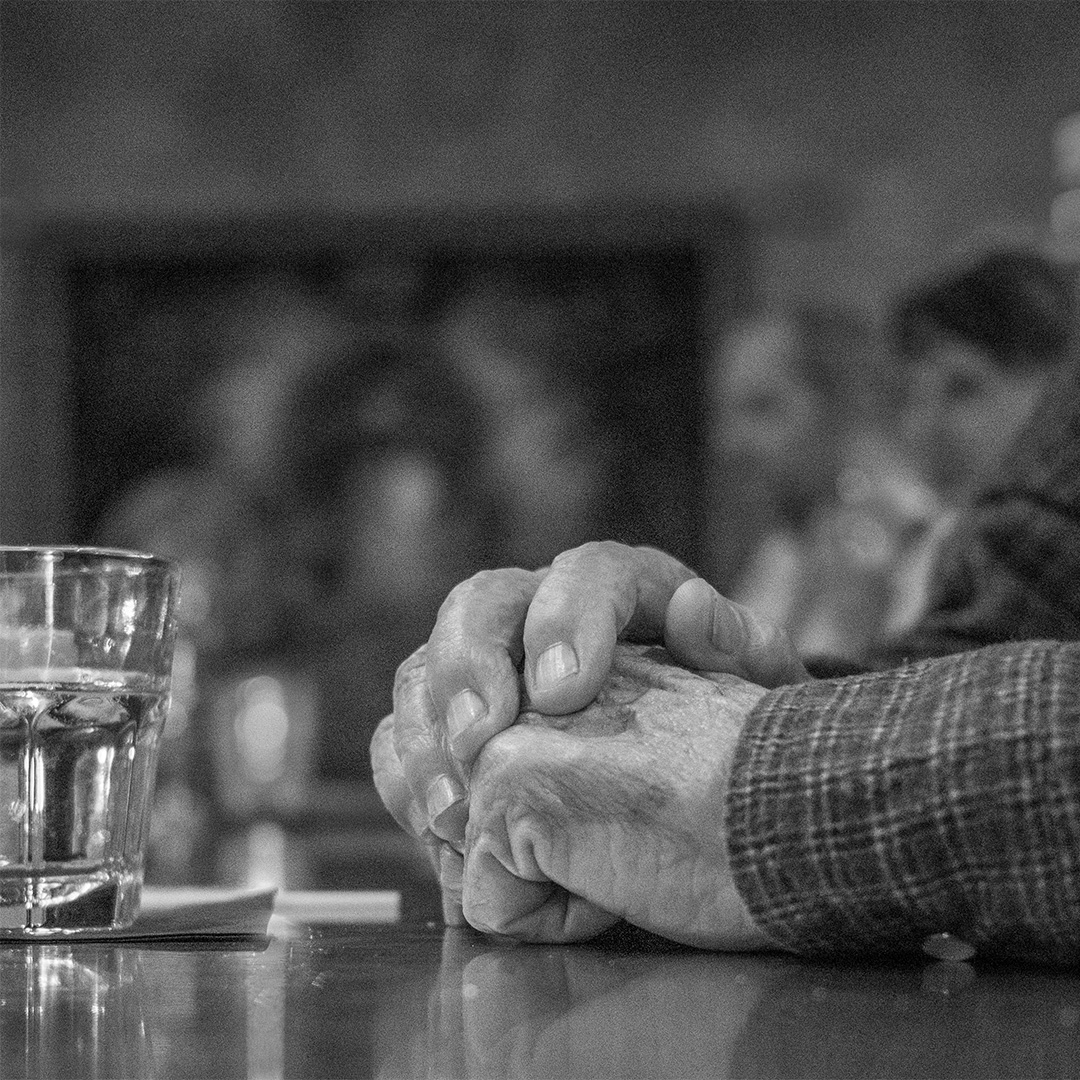
Word is eyes are the window to the soul. I find I enjoy seeing the results of the aging process on hands. Love the story I see here in Gary’s hands.
Yours in Creative Photography, Bob
by successfulbob | cloud photography, Lumix Lounge, Lumix LX100, photography, photography education, photography gear
Yesterday I shared a few images from the window seat and today here are a few more. As a Panasonic Lumix Luminary (check out the Lumix Lounge) I get to work with a lot of different pro and advanced amateur camera gear. On this trip it was going to be very quick run to Atlanta, and back to Sedona, through Phoenix within 72 hours so I wanted to travel light. Camera-wise I couldn’t get much more compact than the camera I’ve dubbed the ‘Pro’s Point & Shoot’ the Lumix LX100. Lot’s of powerful features in a solid, easy to use piece of machinery. All images were captured with the LX100.
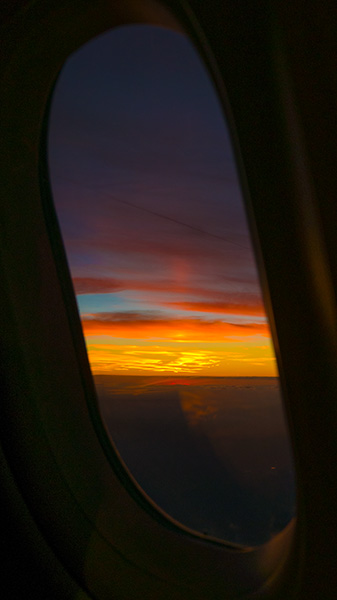
You need to change the exposure compensation quite a bit to make this sunset image work. Easy to do as the Exposure compensation is on a metal knurled dial right by your thumb. Up to three stops under or over.

I like this view of clouds from above. The layers feel like it might be some kind of lunar landscape. And who knows? It just might turn into one in an art piece…

Working the wing to silhouette over a cloud back with flare from the sun.
Sometimes you just need to push yourself by limiting yourself to find the capabilities of a camera. I hadn’t spent any quality time with this camera before this trip cause I had some other favorites always at hand. Because of this if you have any questions about which Lumix camera might be the best for your needs get in touch and I can share some ideas. bob@bcphotography.com
Yours in Creative Photography, Bob
