
by successfulbob | 6K photo mode, flower photography, LumixGH5, photography
Lumix GH5 Post Focus Mode
This winter and spring have been wonderfully wet in the southwest leading to one of the most wonderful flower bloom seasons in many years. With that said I have been chasing some of those blooms, especially the cactus as they are absolutely beautiful.
I’ve been testing the Lumix GH5 and the Post Focus Mode in which the camera leverages a 6K Photo Mode wherein the camera creates a short video clip using all two-hundred and twenty-five focus points. Any one of these points can be pulled as an eighteen MegaPixel file. Or a range of images choosing a set of focus points. Or even better, it will combine all of the focus points into a fully focus stacked final image. This is an amazing technology to secure a look that is not possible in a regular capture with a camera. I love leveraging this tech to create artistic images.
Let’s take a look at some of the possibilities using my cactus flower friends.
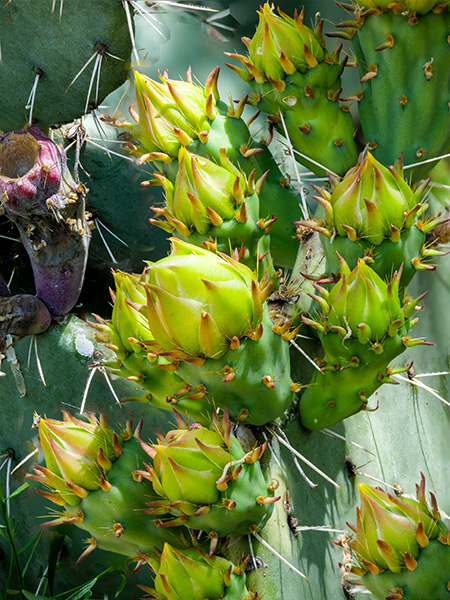 This image has been processed using all the focus points processed in-camera from front to back. This is not necessarily a good look for this particular image as to the field of focus makes too much of the image in focus.
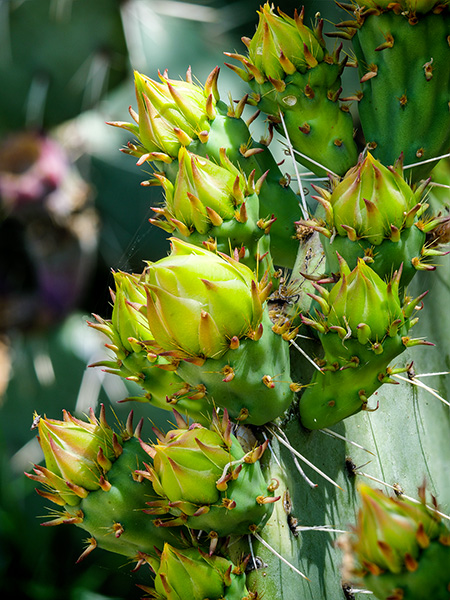 Another image using the same Post Focus capture but processed with a range of focus points which helped to isolate the subject of the flower buds from the background. The beauty is that this can be processed as many times using different sets of focus points for very different looks. All in the camera!
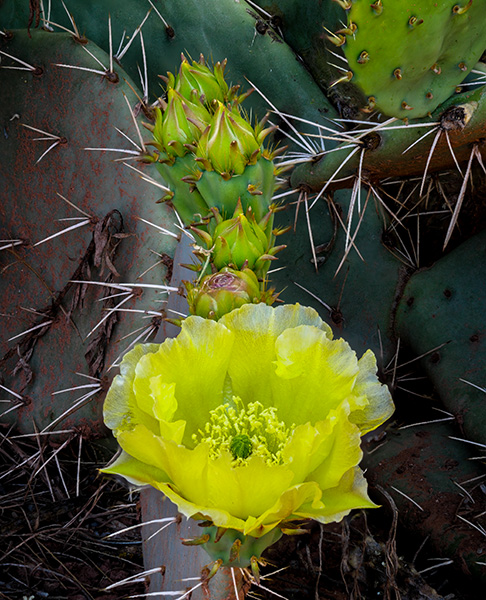 Here is another image with everything in sharp focus. Depending on the story you want to tell this can be a perfect rendition of the scene with all of the thorns in sharp focus. Very prickly.
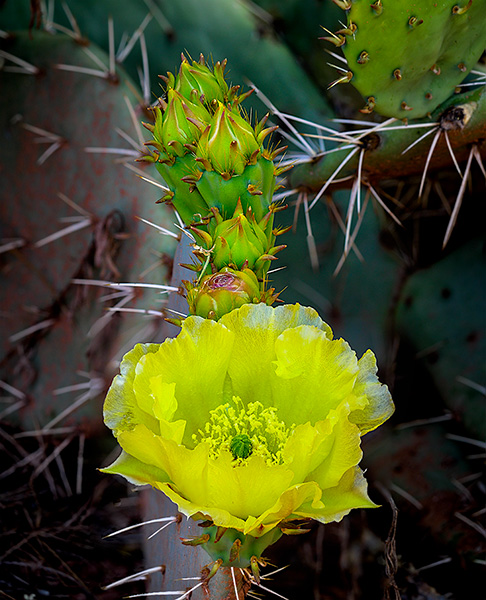 This image has all the important information in focus with the background allowed to be more soft which has a different feel even though it was from the same video capture.
More on this in a few days.
Yours in creative Photography, Bob
Save

by successfulbob | black & white, fine art portrait, Lumix Lounge, LumixGH5, people photography, photography, photography gear
Post Processing on the Portrait of Ernst
One of the great pleasures of traveling to speak to photography groups is the fellowship with photographers. I met Ernst Ulrich Schafer while at the PPW Conference in Yakima, Washington. Ernst and I went out on an adventure and had a blast getting to know each other.
I asked Ernst to take a moment to pose for me to make a portrait. Found a decent spot for a nice lighting pattern on his face but the final portrait was completed in post-production. Here is the story of ‘The Making of Ernst”.
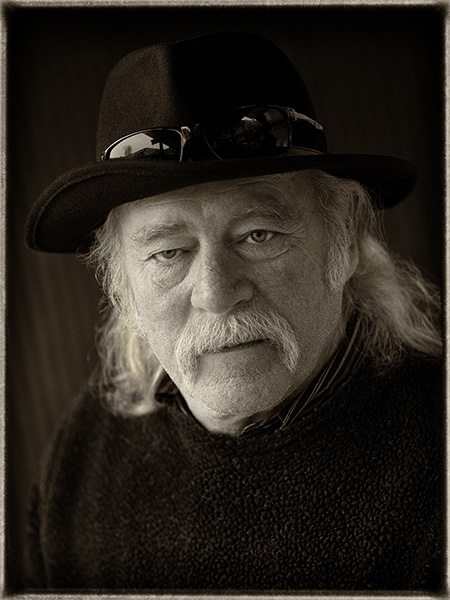 Final image of Ernst
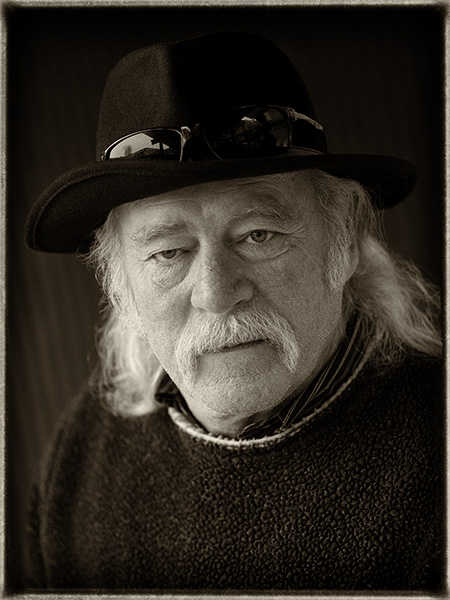
 Original capture. Looking for a soft split light pattern.
I looked for a background that had a little bit of a gradient and a soft shadow transition from light to dark. Accomplished but finding an overhead light block with two open sides. I placed Ernst closer to the left-hand side to make the short side of his face the lighted portion. The light coming from the other side worked as fill. If aI wanted a sharper contrast I would have moved him further left. Less contrast further right. Since we can’t move the lights in a situation like this moving the subject is the only way to go.
 Process in NIK Silver FX Pro 2 with Sepia Tone. Note the difference between this image and the final at the top of the page. The white rim on the collar was removed as it was a distraction. Additional dodging and burning was done to lightly increase contrast and control some of the highlights. Check out the Layers Palette Screen Capture for more details.
If you don’t already have NIK filters be aware that they are a free download from Google. There is a great variety of filter effects available in the Suite. I often use Silver FX Pro 2 for my black and white and sepia tone conversions.
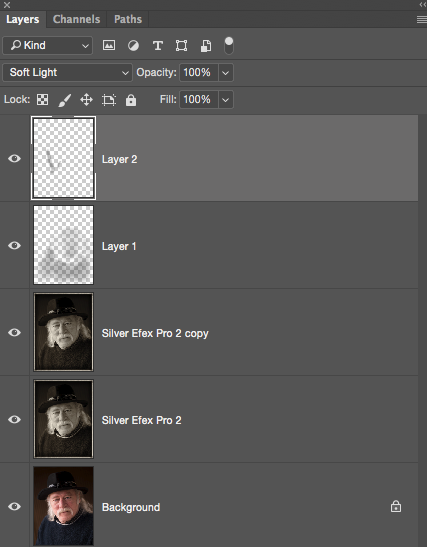 Layers Palette
Background is the original capture. Silver Efex Pro 2 is the Sepia Tone conversion. The copy Layer shows some retouching with the removal of the white collar. Layer 1 is a Soft Light Layer to burn in the sweater and add contrast to the shadow side of the face. Layer 2 is another Soft Light Layer to control some highlights and add a little sparkle to the eyes. I use the Soft Light Layer Mode to dodge and burn my images.
As you can see Adobe Photoshop with a pit stop in Adobe Camera Raw is a large part of my workflow.
Image made with the new Lumix GH5 and the 42.5mm f1.2 Nocticron lens @f1.2 1/320th sec ISO 200
Yours In Creative Photography, Bob
Save
Save
Save

by successfulbob | black & white, landscape photography, Lumix GX8, Lumix GX85, Lumix Lounge, photography, photography creativity, photography gear
Working with Tiffen ND Landscape Filters
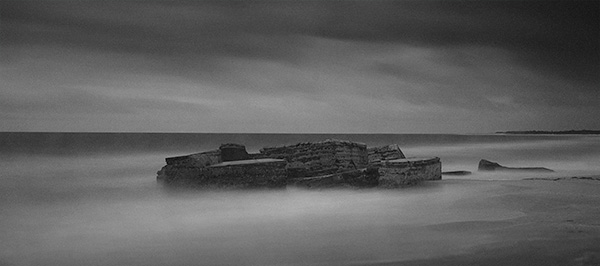
Had a good time making photographs in Tampa with Rob Bird a couple of weeks ago. We were on the beach at Fort Desoto Park, and I was working with my Tiffen ND Pro 100 Landscape filters. I used the 10 Stop plus the three Stop filters stacked together under overcast skies.
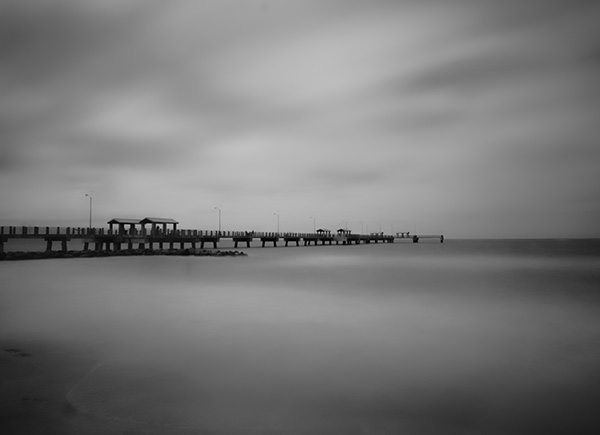 Made with Lumix GX8 camera and 12-35mm f2.8 G Vario Lens with a sixty-second exposure. Added a bit more blur to enhance the scene in post processing in Adobe Photoshop
I like the ability to add a sense of time to my images by using the deep ND filters. Clouds and water merge into an otherworldly look. I’ve only just begun to experiment with this type of photography and look forward to getting better.
When working with the Tiffen Filters, I feel confident that the glass will protect the actual filter material. In the past, I had been using plastic filters and often ended up with scratches making replacement frequently a necessity.
 This image had the same settings and gear as above. Added just a bit of grain in post-production. Also removed a tower that was in the background that was a distraction.
Please note that this is not documentary photography. I am working toward giving you the vision I have for the final art piece. I am always adjusting my artwork to suit my vision. With that said, I am onboard with Julianne Kost in using the term ‘Lens Based Artist’ or ‘Lens Based Art’ to differentiate this work from my more realistic work.
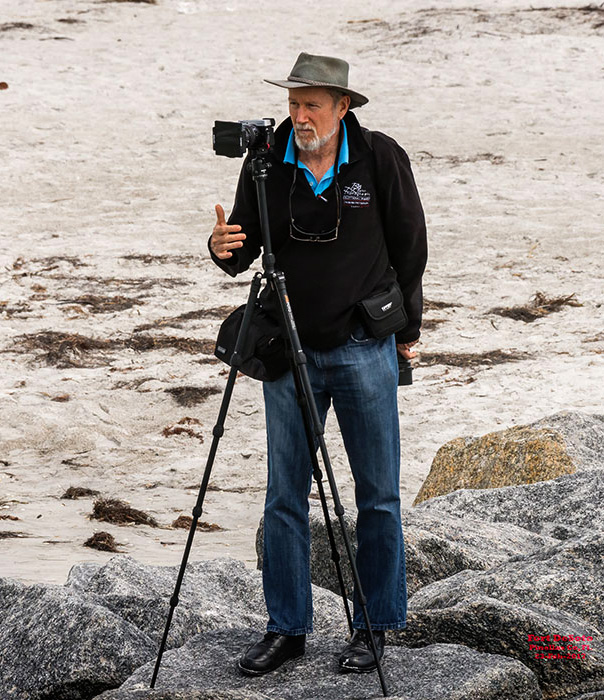 My working set-up for Landscape and Nature photography.
Image © Rob Bird http://www.pockethamsters.com
I work light when on location. Here’s my gear list that is pictured above. MeFoto Road Trip Tripod. Lightweight yet solid. Packs up small for travel. Think Tank Mirrorless Mover belt bag. Hold three lenses, spare batteries, lens cloth, mini-tripod and extra SD Cards. Lumix GX8. 12-35mm f2.8 Lumix Vario Lens, 7-14mm f4 lens, 35-100mm f2.8 Lumix Vario Lens, 20mm f1.7 Lens. Also on my belt the Tiffen Filter kit mentioned above. On my shoulder is a Lumix GX85 and the 100-400mm Lens.
Yours in Creative Photography, Bob
Save
Save

by successfulbob | fine art musician portrait, graphic design, Lumix GX85, Lumix Lounge, musician photography, people photography, photographer of musicians
Walt Richardson & Friends at Sound Bites Grill Sedona
What a great show! Walt is known for his reggae music, but he is so much more. He’s a legendary songwriter with a big heart, and it shows during his performance. His friends are entertaining and talented musicians. There’s a reason Walt is in the Arizona Music & Entertainment Hall of Fame.
Walt’s own words say it best, “I am a Soul, Living out my life as a Songwriting, Storytelling, and performing Musician.”
Learn more about Walter Richardson & Friends.
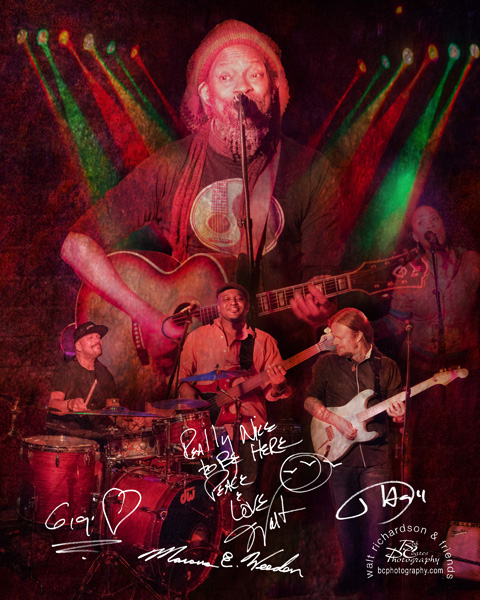 Art with signatures for the Wall of Fame
If you have followed my work you know I photograph the musicians live while they are performing for marketing of future performances. In addition, I create an image for the ‘ Sound Bites Grill ‘Wall of fame’. These art pieces are created with each individual member of the band recorded and then extracted from the image and rebuilt. It’s a great challenge to render each performer and band in a slightly different style. Here in a nod to the reggae, the red and green lighting pattern was utilized in the spot lights. The singer-songwriter and personality of Walt was highlighted by picking an expression with that little smile and wide open eyes.
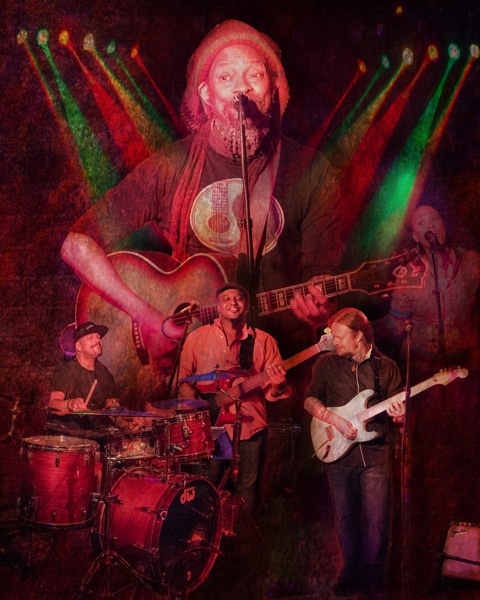 Non-logoed version of the art.
Most of the images were captured with the Lumic GX85 and a 35-100mm G Vario lens.
 Image of the full band for future marketing and appearances at Sound Bites
 Back-stage view at SBG.

Walter Richardson black and white photo.
When I am creating the marketing photos I always make the conversion to black and white as well as a color version. There is more to creating a dynamic black and white image for printing than just desaturating the image to monotone. You need to control the contrast and the highlight and shadows properly to make a solid photo.
Yours in Creative Photography, Bob

by successfulbob | landscape photography, Lumix GX85, Lumix Lounge, panorama, photography, photography creativity, photography gear, photoshop tutorial
Working a Scenic Landscape
The light was fantastic. Scenery amazing. Time? Very short!
I was on my way to a photo shoot in the evening and saw the moon just starting to peek above the horizon as the light from the fading sun had already dropped below in the west. I grabbed the Lumix GX85 and the 7-14mm f4 lens to see what I might capture in the few minutes I had available. I don’t usually like to rush when a situation like this appears, but duty and a deadline called.
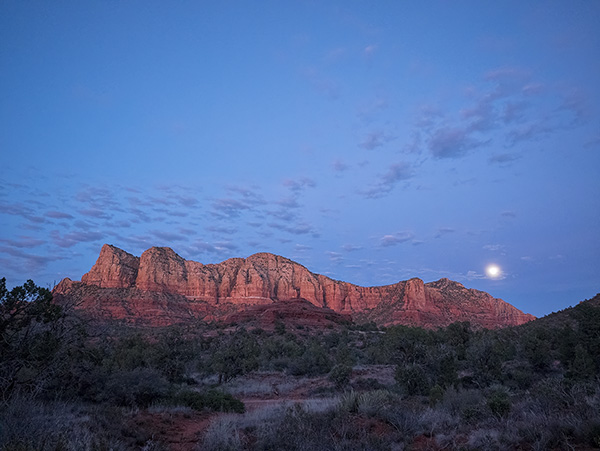 This was the first quick image to make sure I had something in the can.
I first quickly grabbed an overall scene-setting image. Then I tried a couple quick grab shots. I ran down the parking lot to get a better overall view. Having the wide angle lens gave me a lot of the scene but I knew I would need more to be happy.
 Nine image panorama capture for further work in post. Note the images have already been adjusted a bit in Adobe Camera RAW
I set up and shot a nine image panorama with the camera in the vertical orientation to gather as much info as possible. Already the light was starting to fade and my job was calling.
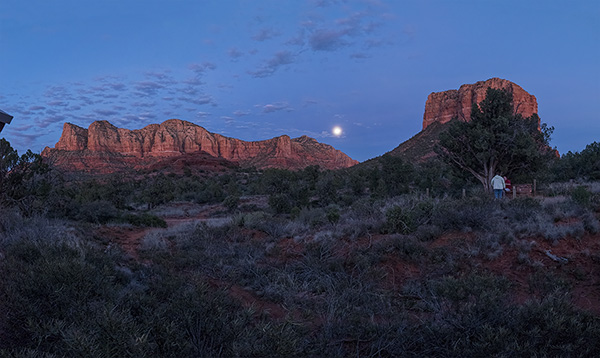 Image output after using Photomerge in Photoshop.
I allowed the Adobe Photomerge tool to do a lot of the heavy lifting for me. I highlighted the images in Adobe Bridge selected Photomerge from the Tools drop-down menu Tools>Photoshop>Photomerge… Layout was set to Auto. The following text boxes were checked. Blend Images Together for obvious reasons. Vignette removal. This was checked because the lens had a bit of vignette and would have made for messy skies. A reason for not checking the vignette box would be if you had files that had no vignette because the files could process faster. Geometric Distortion Correction. You can try working without this but I have found in a scene like this the red rocks would have curved. Content Aware Fill Transparent Areas. When a handheld pano is made like this there is often areas that don’t completely fill the rectangle of the final image. Photoshop will look around and use it’s best guess to fill the areas. You can check on them quickly as it will also leave a selection around the areas it filled in case you need to make some adjustments. In this particular case, it did a great job. All setings are available for you to play with if you don’t get the exact results for which you are looking.
Post-production is a huge help in these instances to obtain quality images.
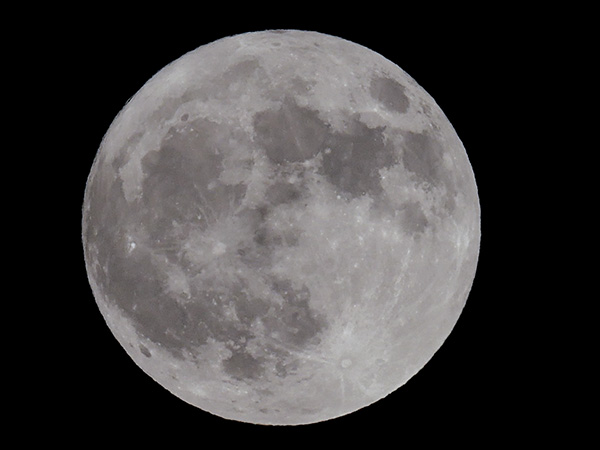 I pulled a full moon from my files as the moon area was blown out. Another case of the eye being better than the camera. If I had more time I would have bracketed exposures to get the detail I needed.
 Here’s the final. The moon has detail. The image was cropped to bring attention where I wanted it and
a little judicious Cloning was used to remove the couple under the tree.
If you have any questions or comments give me a shout!
Yours in Creative Photography, Bob
Save
Save