by successfulbob | bird photography, black & white, imaging competition, inspiration, Lumix GX8, Lumix Lounge, photography competition, photography creativity, photography gear, wildlife photography
Sunday Photo Art Quote – Thomas Jefferson
I’ve seen this quote attributed to Tom although I’m certain it belongs to him as there are variations in place attributed to others. I try to research my quotes for accuracy. With that in mind if you know who the originator of this quote was, please let me know.
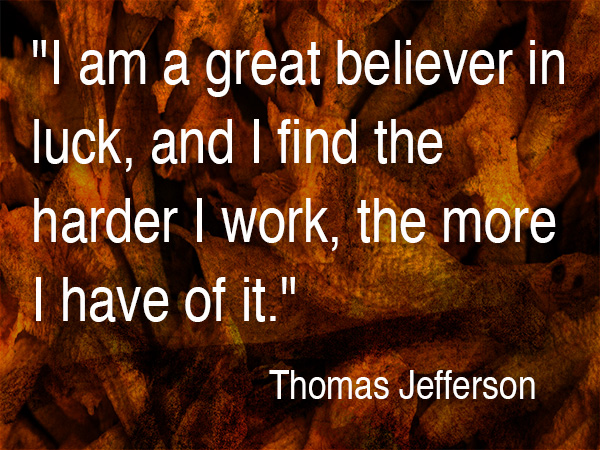 “I am a great believer in luck, and I find the harder I work, the more I have of it.” – Thomas Jefferson
You might ask, “What in the heck does this have to do with art, Bob?”
It all has to do with getting in there and doing the work. Whether you feel like doing it or not. Many times I will happen into a fortunate art situation just because I keep on trying even though things have not worked out crazy good in the past. If you see a concept, you need to keep acting on it until it comes to fruition.
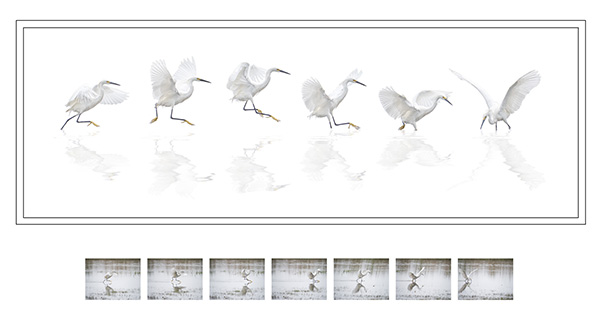
Here’s an example. I love photographing wildlife, especially birds. I enjoy the texture of their wings. Studying and anticipating their movements to capture more compelling images. The time alone searching out new behaviors. It can be very frustrating to try to come up with something original. That doesn’t stop me from going out and trying. Over and over. And over. Until that magic moment when the luck part comes into play. Because I was still there trying I was treated to this perfect moment of a Snowy Egret chasing fish.
I captured approximately 200 images of the bird working the shallows in front of me. And this is the composite I thought I wanted to accomplish.
 Working composite of Dance of the Snowy Egret
I had sifted through and extracted many images of the snowy egret to get this far but wasn’t happy with what was happening. It was the vision I originally had in my head while I was photographing the bird, but it just wasn’t working form, although my wife loved it. So I kept working.
So I kept working. And working.
And because I kept working on it even though I wasn’t happy I had another stroke of luck. In turning off the background to clean up my extractions of the birds, I saw the image in it’s simplest form. All attention became focused on the positions of the birds with absolutely no distractions.
 PPA Loan Collection Image – Dance of the Snowy Egret by yours truly
I entered the image in the International Photographic Competition from Professional Photographers of America, and it was judged into the Loan Collection in the Master Artist category. That judging is based on twelve elements (click here for more on the twelve) including composition, technical excellence, and storytelling. Also, how the artwork was accomplished is a significant part of the criteria which is why the reference images are shown.
I feel I was lucky on two fronts in the creation of this photo. But I did work hard to get ultimately get there
But I did work hard to get ultimately get there.
Yours in Creative Photography, Bob
PS – I think one additional piece of luck was the equipment I’ve been using. Because the micro 4/3rds format is so small and light I was able to handhold a 600mm equivalent lens and track the egret comfortably for a long period of time. Heavier gear would have required a tripod and been much less mobile. Lumix GX8 with the 100-300mm f4.0-5.6 lens
by successfulbob | landscape photography, Lumix GX7, Lumix Lounge, panorama, photography, photography creativity
Let’s Talk Panoramic Photography – Part 2
In looking through my files for some examples of in-camera panoramic photos I came across some more examples I wanted to share. I feel the format adds another arrow to the creativity quiver. Here’s a few made with the Lumix GX7.
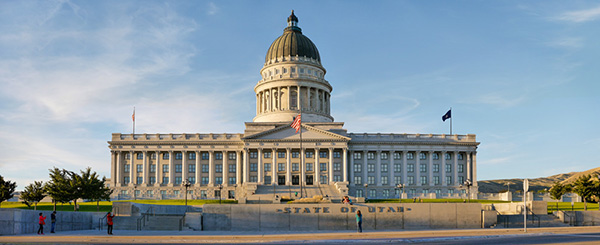
 Outside Salt Lake City – Panorama format is perfect for telling the dramatic landscape story.
 Another from the Salt Lake City Trip.
 A different way to share a scene.
As I was going through my photos, I realized I didn’t share a slightly different idea to leverage the in-camera panorama feature. Sometimes the resulting photo just doesn’t quite cut it as far as capturing the scene. Or you want a file that will have a different aspect ratio but is still a panoramic image. Or, you need more pixels but don’t have time to create a full set of images for future stitching. So here’s two rows followed by the final.
 Showing the dome.
 Showing the base.
 Here’s the final with the two stitched in-camera panorama images using Adobe Photoshop.
 From the Red Butte Arboretum in Salt Lake City.
 One more.
Think about the ways you can use the panorama feature. I don’t have one at my fingertips, but you can also make the panorama vertical.
Yours in creative Photography, Bob
by successfulbob | Lumix G7, Lumix GX7, Lumix Lounge, panorama, photography
Possibilities of Panoramic Photography
Let me put this out there if you don’t already know. I love the panoramic format!
 Red Butte Arboretum – Salt Lake City Utah. In-Camera Panorama Lumix GX7 Shot a few years ago.
Panorama images are not the be all and end all they are there to tell a story that can’t be told in the two by three or three by four ratio. Sixteen by nine is becoming a more ‘standard’ image size to our eyes because we see it more often in movies, television, and our phones.
This post was triggered by a question about the in-camera panoramic photos vs. shooting individual images and stitching photos in post production. Here was the question, “When I use the Lumix G7 it does a Gatling gun shoot as I shift the camera left to right and we all know you shouldn’t be moving a camera when shooting a landscape. I’m curious the quality difference between one shot at a time and stitched in an editor vs. the G7 spray technique.”
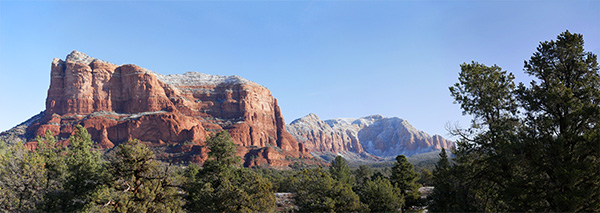
 Courthouse Butte in Sedona – In-Camera Panorama. Print to about 27 inches.
Great question. We have different tools for different jobs. The in-camera panorama feature is a tool for the convenience of capturing a scene quickly and being processed for output immediately. For example, you want to share a scene on social media that is panoramic in nature. The camera will produce a completed image that can instantly be uploaded via the camera’s built-in Wifi. It is also a fine way to capture a scene as a memory that will only live in the digital world where higher resolution is not a necessity. That’s not to say you can’t make a beautiful print from the in-camera pano, I’ve made some beauties.
Advantages of in-camera panoramic photos. Immediate gratification. Ideal for web presentation and medium sized prints.
Now to the advantages and drawbacks of a stitched image.
In the capture of individual images to create a panoramic in post-production, you can shoot in the RAW format which will give you a larger file and the ability to finesse the most quality from the file. The larger size files when combined allow for printing very large size images. The only down-side is that post-processing is necessary before you can share the picture as a panoramic.
 Same scene as above. Ten frames stitched in Adobe Photoshop. Easily print to about Seventy-eight inches. Note the details and color were more available from the RAW file information.
Final thoughts. Use the best of both worlds. Make an in-camera pano to make a quick record of your scene. It can be utilized as a reference for the future building of your panorama or quick sharing of your view in social media. Make your individual images for large format printing.
Yours in creative Photography, Bob
by successfulbob | fine art photography, fine art portrait, photography, photography creativity, photography education, tuesday painterly photo art
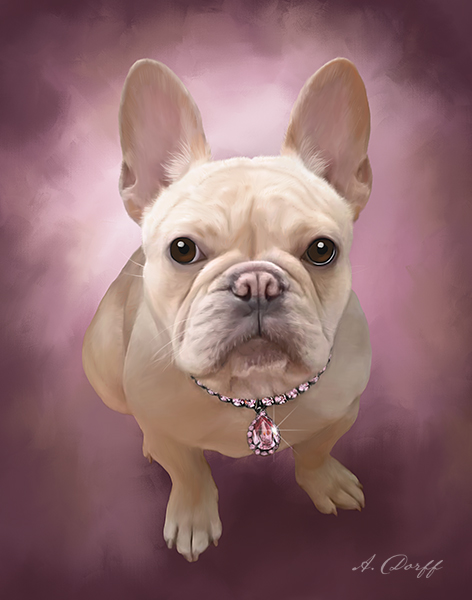
Tuesday Painterly Photo Art – Arica Dorff
I met Arika when she was on a road trip creating images for her pet photography business. She was passing through Sedona, and I had the pleasure to make her acquaintance and discovered her pet art painting. I love the expression of her pet portraits and the feel of her art. I think you will too!
Here’s Arika.
“I got into digital pet paintings using Corel Painter after I sold my pet photography studio in Las Vegas, Nevada. I had my studio for nine years and always wanted to offer my clients the option to have their portraits enhanced to a painting, but I never had the time to devote to learning the art. Specializing in painting pets was a natural decision for me since working with domestic animals, and their awesome owners had been my niche for my entire photography and teaching career.
 Had to put this photo of Lola right up front! Check out the bling! © Arica Dorff Photography
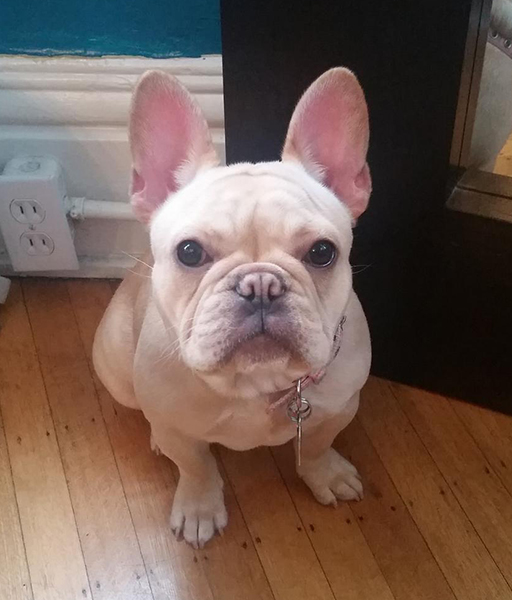 Lola before. Arica is often working from cell phone images supplied by her clients
Getting started I reached out to two well-known pet painters whose work I admired and I had the opportunity to train with them one-on-one. Their process of turning a photo into a painting is completely opposite of each other, and I quickly realized that, like any other art form, there is no right or wrong way to do things. Working one-on-one with artists you admire, along with online tutorials, is what I recommend to anyone wanting to learn Corel Painter. Painter is much like Photoshop in the sense that they are both incredibly powerful programs but not something the average person could sit down and use with ease without some training and understanding of how the software functions. If you are a Photoshop user, I’m sure you can recall your beginning stages of learning and how you wanted to throw your computer out the window because you couldn’t accomplish what should have been a very simple task. Or maybe you accidentally hit something on your keyboard, and now nothing is working properly. I’ve been there too. So save yourself a headache and invest in training and tutorials when learning Corel Painter and getting started will be fun!
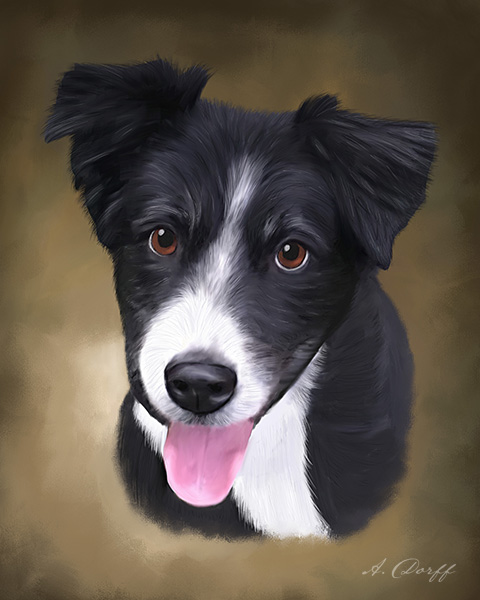 Tasha – Makes you want to say AWWWW. © Arica Dorff Photography
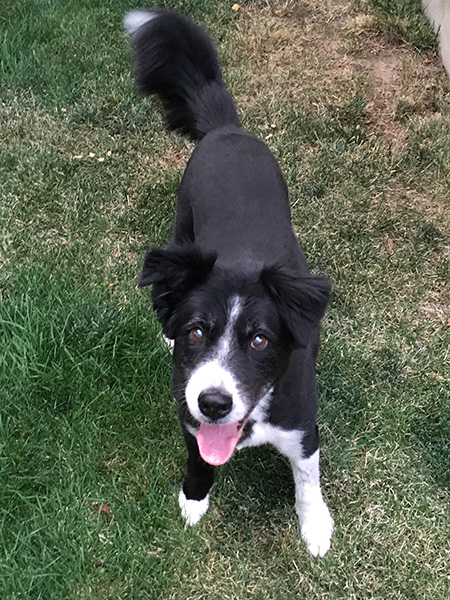 Tasha original capture.
As portrait photographers, we make decisions every day regarding lighting and how we want the light to fall on our subjects. But when I started painting I realized that shadows were something to which I never gave much thought. I would just light my subjects the way I wanted, and the shadows were naturally just wherever they were. Well, when you hand paint a background in like I do for most of my paintings (as opposed to enhancing the current background in the portrait) your full-length subjects would be floating on the background if you didn’t anchor them with a shadow. Such a simple concept, but not something I ever gave much thought to until I had to create my shadows.
Painting also forced me to pay more attention to the direction of where light was coming from, which is useful when creating dimension and depth in your backgrounds. Notice how most of my backgrounds have a lighter area near the animals face, this lighter area always coincides from which the direction the light is coming. The opposite side of the painting is always a darker shade which represents the natural fall off of light.
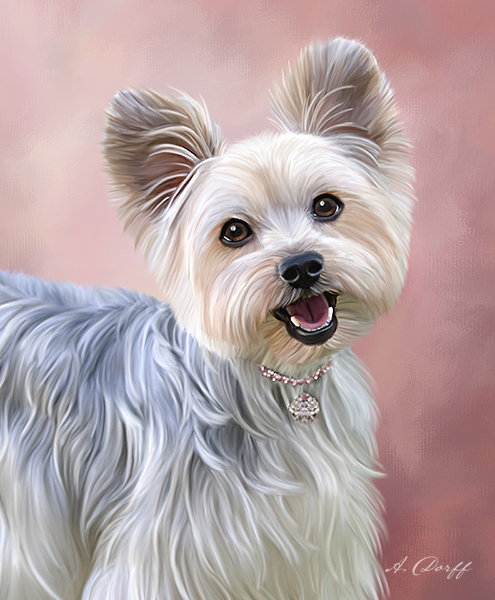 Emma – Great expression © Arica Dorff Photography
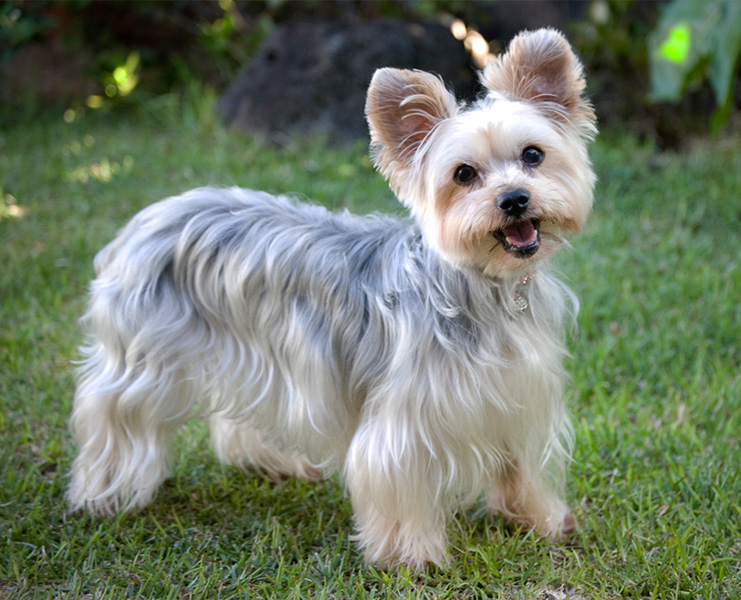 Emma Before.
Pets eyes are my favorite part of every painting (okay wispy stray hairs might be an equal favorite), but the eyes are what makes the paintings come to life. When doing digital paintings, I often use the existing photo and just enhance it with detailed brush strokes. But not with eyes, I always paint in the eyes freehand. Step 1: Paint in the eye color. Step 2: Paint in the black pupil. Step 3: Paint in the white catchlight – make sure it’s on the same side of the eye where the light is coming from! Step 4: Paint in the counter catch light area with lighter highlights to bring the eyes to life.
Since I’ve done some teaching in the pet photography world, I’ve had a lot of people asking me to train them on digital pet paintings. I currently offer one-on-one screen sharing training sessions, and I’m working on putting together a downloadable video tutorial. For the photographers who don’t have the time or desire to learn to paint, I offer a wholesale option where I send them the digital artwork for them to brand and print for their clients (as opposed to my retail customers who I present with canvas gallery wraps).
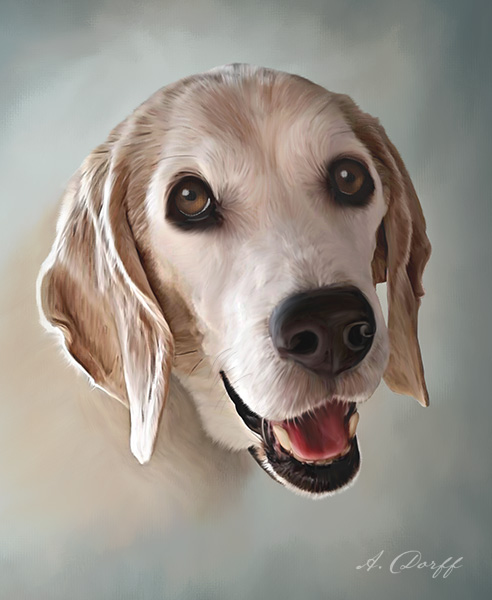 Cooper – © Arica Dorff Photography
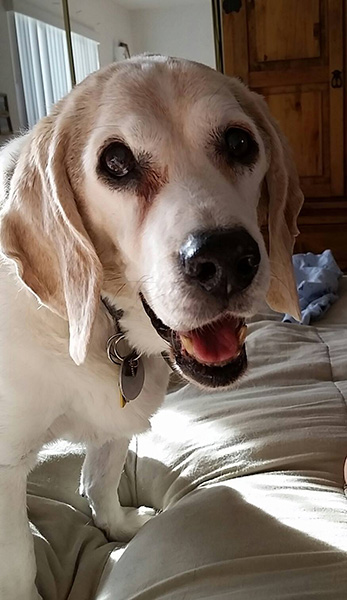 Cooper – Before.
Digital Pet Paintings have been an awesome way for me to stay connected with the pet photography community, pet owners who I love to create cherished art for, and I get to do it all while hanging out with my pup and working from home!”
Check out more of Arica’s work. aricadorff.com
Yours in Creative Photography, Bob
PS – If you are someone who is creating Painterly Art with photography as a base, or know someone who is, and would like to be featured here on Successful-Photographer get in touch.
Save
Save

by successfulbob | photography
Tip – Target Mode Macintosh Computer
Today’s post is brought to you by the letter “T.” The first three people who get in touch with me with the number of “T’s” that appear in this post get a 1/2 hour coaching session on the subject of your choosing.
When on the road I download images to my laptop computer to check on photos especially when experimentation with new techniques is involved. Such was the case this past week when I photographed sandhill cranes at Bosque Del Apache Wildlife Preserve in New Mexico.
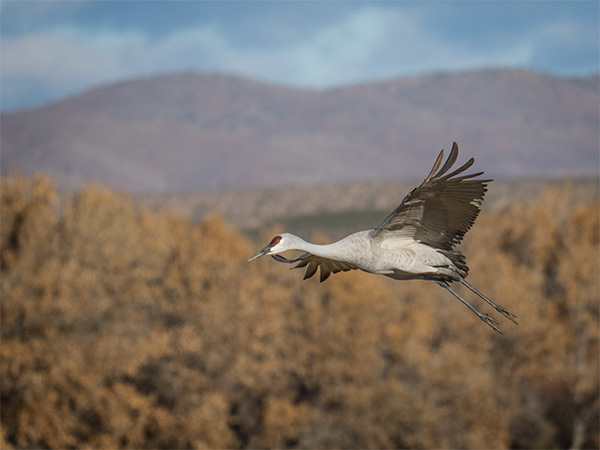 When photographing wildlife, especially when tracking birds in flight, you can be capturing lots of frames from testing shutter speeds, focus, and experimentation for special effects.
Upon return from a shoot like this, rather than download all the images from the camera cards all over again I start the computer up in Target Disk Mode. When in this mode the laptop is recognized as a hard drive when connected via a Firewire, USB, Thunderbolt, and transferring the files can be done pretty quickly. Saves extra time too as I’ve already been culling the duds and misfires and lightly processing some of the images.
 Here’s what your screen looks like when it is Target Mode. That little icon rides around on your screen.
Target Disk Mode is easy to do. Click the “Startup Disk” icon and click the Target Disk Mode button to restart your Mac in Target Disk Mode. You can also enter Target Disk Mode by rebooting your Mac and holding down the T key as it boots. Connect your Mac via a Firewire or Thunderbolt cable.
Yours in Creative Photography, Bob
Save

 “I am a great believer in luck, and I find the harder I work, the more I have of it.” – Thomas Jefferson
 Working composite of Dance of the Snowy Egret
 PPA Loan Collection Image – Dance of the Snowy Egret by yours truly


