by successfulbob | landscape photography, Lumix GH4, Lumix Lounge, panorama, photography, photography education, photography gear
Sometimes you just want more pixels in an image.
Do you have to buy a new more expensive camera? Nope. You just have to learn how to sew… I mean stitch.
Basically even with the 16MP micro 4/3rds chip we are working with in the Lumix line of cameras we have multi-megapixel (like 100MP plus) cameras in our hands if we take multiple images and overlap them. Here is an example.

This is 13 images overlapped with the camera held in the vertical orientation. This file comes in at 385MB after processing in Photoshop.
I could easily print this image 26 inches by 158 inches. That’s about 2 feet by 13 feet!

Here’s another version with 2 rows of 10 images overlapped with camera held in vertical orientation. This file is almost 400MB after processing. Could easily be printed to 3 feet by 10 feet…
This technique can be used with large group portraits, architecture and any stationary subjects.
Images were captured with the Lumix GH4 and the Lumix Vario 35-100mm f2.8 lens at ISO 200 f10 1/320th sec. The built in level on the GH4 helps to keep the horizon straight during this hand held capture to make the panorama stitching easier in the software. My overlap of individual images is about 30%. Any less than that and you’ll tend to find stitching errors in the final image.
So you’ve heard the expression “Go big or go home!” Now you can with whatever gear you are working with….
Yours in Creative Photography, Bob
PS – using links on this site to make your gear purchases help to support this web site and the education being shared. Thanks in advance!
by successfulbob | landscape photography, lighting, Lumix FZ 1000, Lumix Lounge, photography education, photography gear
They say the camera you have with you is the best camera. I’m a big believer!
How many times have you been out and about and left your gear at home because it would be too bulky or a PIA to have with you? Since joining with Panasonic as a Lumix Luminary I have had access to a number of cameras, all of them smaller and lighter than my former DSLR kit. As a result I almost always have a camera on hand and less of those found moments are getting away from me.
I was giving a workshop and stepped out to go to the rest room and saw this scene unfolding in front of me. I dashed back and grabbed the Lumix FZ – 1000 because of it’s 400mm reach and was able to grab these two images of the red rocks of Sedona being lit in front of some storm clouds.
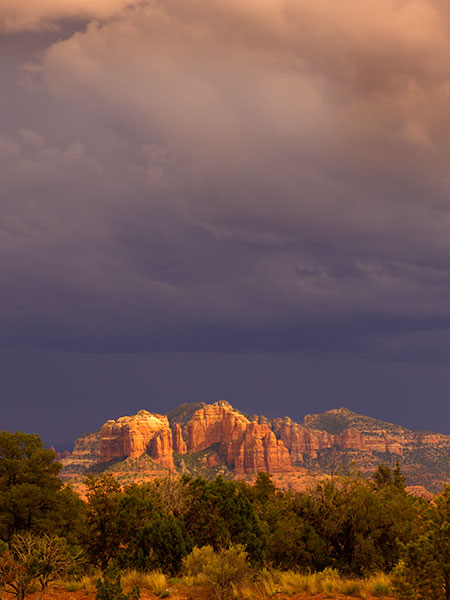
The camera allows for up to a 7 stop bracket. In this case I bracketed 5 stops at one stop intervals and processed in PhotoMatix Pro 5. This kept the rocks being lit by the sun from being blown out against the dark background of the sky.
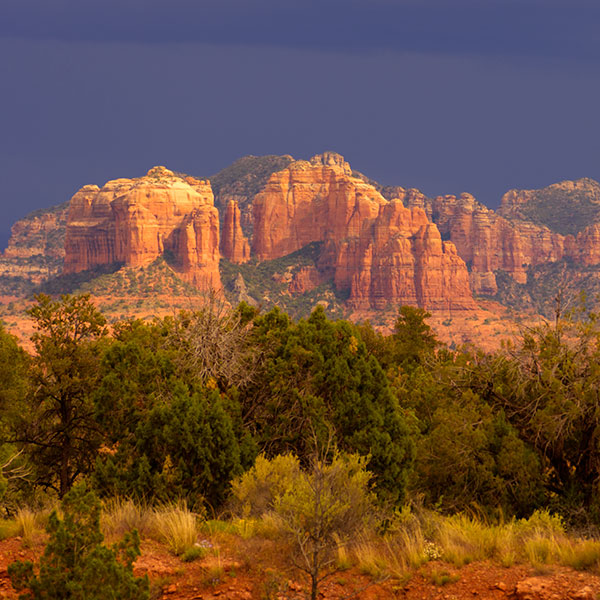
Don’t forget to ‘Work the Scene’ when you come across different photo ops. Shoot as a horizontal, vertical, zoom in, try different crops. I didn’t have much time to do this but at least I captured 3 different renditions of the scene.
The Lumix FZ 1000 is often the camera I am grabbing to have with me all the time. 25-400mm f2.8-4 all in a body unit that weighs about 2 and a half pounds. Sweet!
Yours in Creative Photography, Bob
PS – Please remember that if you use the links from this web site to make your purchases it helps support the education provided on Successful-Photographer.
by successfulbob | photography education, photography gear
Since I am traveling so much and I got tired of switching out my Wacom tablet between my desktop and my laptop I needed to get a second tablet. So I ordered one from Amazon and it arrived today.
One word.
SWEET!
This tablet is small and portable for travel and staying hooked up to my laptop. But here’s a bonus. The model I bought is like having a giant touch pad to boot. It has the gestures available for scrolling, resizing, zoom ,swipe images and such. It’s the Intuos Pen and Touch Small Tablet and only having it hooked up only for a few minutes and I love it! It has the 1024 pressure sensitivity.
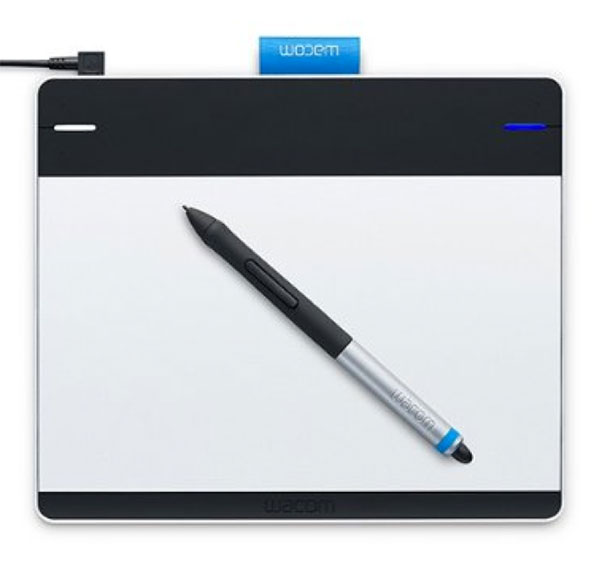
Wacom Intuos Touch Tablet
If you use Photoshop a tablet is very important. Making selections with a track pad or a mouse can take you a lot more time and is not near as accurate as using a pen tool. The difference is akin to drawing with a rock or a pen and makes a huge difference. For under a hundred bucks I think this one is a great value. You can spend a bit less or a bunch more with the Bamboo or any of the other Wacom Products. I would only recommend spending more money if you would like a larger size or you are a graphic artist that needs the higher pressure sensitivity because you actually draw or use the airbrush…
Yours in Creative Photography, Bob
by successfulbob | fine art photography, Lumix GH4, Lumix Lounge, macro, photography, photography education, photography gear
I took my Lumix GH4 out for a hike yesterday. I was accompanied by it’s friends the 7-14mm f4, it’s cousin 12-35 f2.8 and it’s big brother the 35-100mm f2.8. This combination of camera and lenses gives me the 35mm equivalent focal range of 14-to 200mm with fast glass. Add a spare battery, a five in one 20 inch Westcott reflector, some extension tubes and put it all in a small Tenba ‘Switch 10’ bag and I’m ready for almost anything I might come across photographically.
Oh, did I mention all of that gear weighs just a bit over six pounds? Throw in a MeFoto backpacker tripod and water for the hike and it’s still under ten pounds. TOTAL.
The Lumix Micro 4/3rds Mirrorless system rocks!
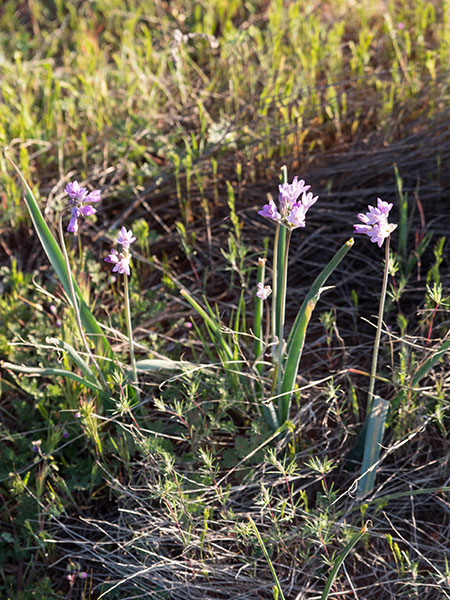
Happened upon this stand of delicate little lavender flowers.
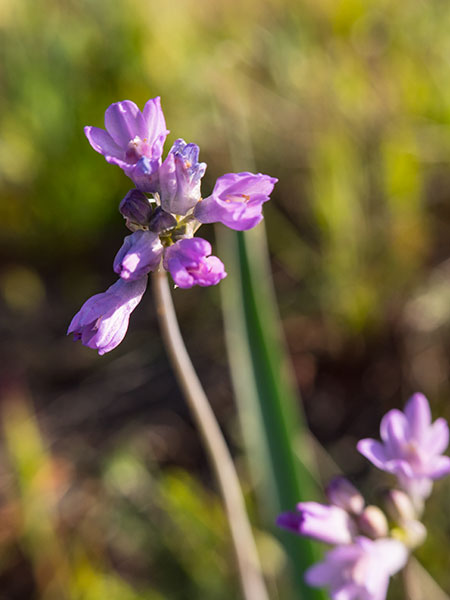
Mounted the GH4 with 35-100mm on the tripod. Added a 10mm Vello extension tube and it looks like this in full sun.
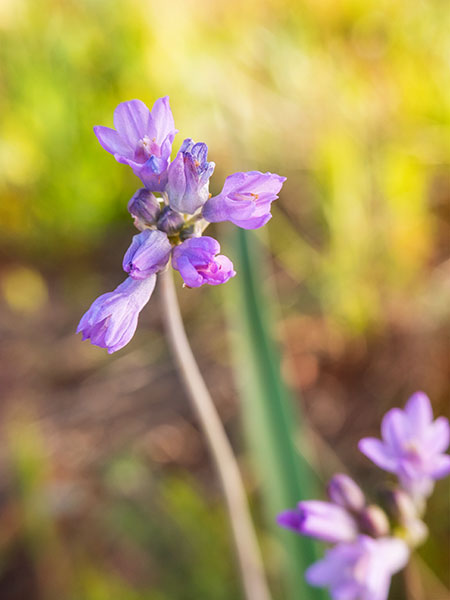
Open the 5 in 1 Westcott reflector, take off the cover and use the scrim between the sun and the flower and look at the change.
I think I’ll take the kit out for a hike again tomorrow.
Yours in Creative Photography, Bob
PS – If you use the links to Amazon.com as an affiliate I will receive a small percentage form the sale. It helps support photographer education and the Successful-Photographer web site. TIA.
by successfulbob | commercial photography, fine art musician portrait, graphic design, Lumix GH4, Lumix Lounge, musician photography, people photography, photography, photography lighting resources
Honored…
That’s what I am when I am asked to help fellow artists, in this case musicians, to photograph and create images and packaging to help them sell their CD.
Eric Miller and Ralf Illenberger are releasing a new music project on March 22nd at Relics Restaurant in Sedona and asked me to come by and make a photo showing them in their creation space. Of course, I asked what vision was in their mind and I headed for the shoot with all sorts of ideas on how I was going to light the scene. And then found them in this ‘closet-like’ space and had to start from scratch on what I was going to do. First we had to revisit the vision. Recreate working the feeling of working late into the night… Possible moods to depict? Serious, fun, thoughtful, etc…
Small room. Large window. First task – make the sun go away by blocking the light from the window. 2nd task – find a way to light the scene. Used the wall to bounce a large strobe because there was no room for light modifiers. Note that the walls are painted reflective gold and deal with the color change that would occur. Add a small LED light from camera left to fill shadows and add detail. Find point of view. Choose a viewpoint outside the door looking in to give the viewer a sense of peeking in at these guys at work. Almost voyeuristic.
Process image for the mood I was looking. Change mind as experimentation led to processing a warmer gold tone image taking advantage of the golden walls. Sharp. But layers of soft at the same time. A little painterly kind of fantasy look.
To the design. Choose one working photo for the cover and add several additional photos to help tell the different moods of the story. Choose fonts. Design.
Show initial layout. Get feedback and more information. Refine layout. Retouch.
Repeat.
Move graphics and refine to create CD information. Send for final review of layout, spelling clearance and last minute tweaks.
Convert files for the printer. (repeat a couple times as we found a couple small errors and additions)
And here it is.
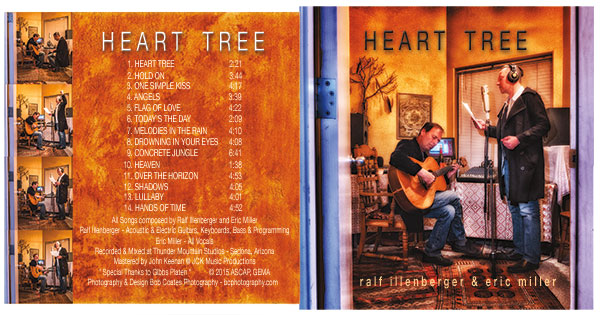
Heart Tree CD Jacket for Ralf and Eric
The capture was with the Lumix GH4 and the 12-35mm f2.8 Vario Lens. I ended up using just the 250 watt modeling light on the Paul C Buff White Lightning X-3200 light plus a little kicker fill from the Fiilex Brick LED light This is a pretty handy light to have in your quiver. Color balance and brightness is adjustable and the light is quite soft. Give you a nice WYSIWYG and doubles as a video light.
Yours in Creative Photography, Bob
