The video below is a time-lapse of Beaver Creek near Sedona, Arizona. Time lapse of water gives a slightly jerky feel at least the way this was captured and processed. These were captured a frame every 2 seconds and processed out to time lapse at 24 FPS 4K video then slowed 50% in post-production in Adobe Premiere Pro. The sound was added from another clip of video captured at the same place.
Watch for ‘The Dance of the spiders’ in the right-hand bottom corner.
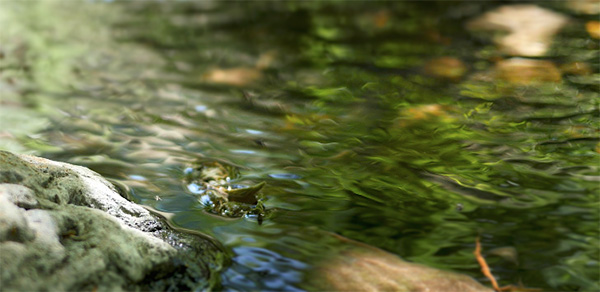
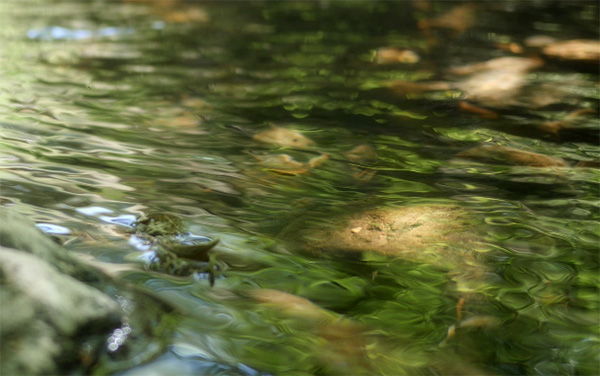
Watch the space pictured above when you look at the video and you’ll find my ‘spidey’ friends.
Images captured with the Lumix GX8 and the Lumix G 20mm f1.7 lens. In a couple of days, I’ll share some video from a different day on the creek shot with the same gear and an entirely different feel.
I’m always testing and trying to find out more about the tools that I use in photography and image making. This example is taking a bunch of still images and combining them into a video known as time-lapse.
Time-lapse of water flowing on Beaver Creek in Sedona, Arizona
I used to avoid creating time lapse videos because of all the steps that were involved. Making the images, which involved using an intervalometer and hard to follow calculations to gather the photos. Downloading the pictures. Processing the images. And, finally, combining the images through software into the final video.
A crop from one of the stills from the spider play video below
There are two things that have gotten me more interested in time-lapse videos, and both have to do with the ease of getting to the final product.
One is the settings built into the Lumix line of cameras which makes it simple to calculate the frame rate and capture of images without additional gear. AND (this is the BIG on) the capability to process finished time-lapse videos in-camera with a variety of settings including speed of playback and quality. This is huge!
The other is a simple processing program called Time-Lapse Assembler. A very easy to use bit of software. Select your images. Set the playback frame rate. Set the quality. And Viola! Time-lapse video complete.
From the same location I set in a new place and in playing back the time-lapse I found the spiders dancing around the scene. You need to watch carefully as they are small critters. I enjoy the shapes and forms of the ripples as they combine and reshpe due to the combining of still frames verses straight video capture.
I got a bit more creative in putting these videos together using Adobe Premeire Pro. Because I was able to process the time-lapse into 4K video size that allowed me to move within the scene zooming in on the spider action. This also allowed for the sound of water to be added. You won’t get sound when making time-lapse video because you are combining still photos. I recorded some other video to get the water sound track.
Images were made with the Lumix GX8 with a LUMIX G II LENS, 20MM, F1.7 ASPH
I enjoy the ability to create time-lapse video in the Lumix line of cameras. Built into the cameras are settings that many cameras need an add-on to complete the captures. One of these is an intervalometer which makes it possible to set the number of images to record and the timing in between each capture that is made. Even better is the in-camera processing to see your videos almost immediately without having to download images to a computer for processing.
In today’s post, I’m going to look at three versions of in-camera processing and then another version where the jpeg files were downloaded, processed through Adobe Camera RAW and then run through Time-Lapse Assembler for a different look. Time-Lapse Assembler is a free download.
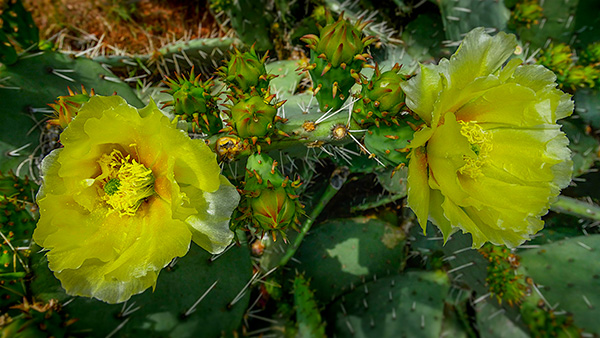
First, let’s take one of the original jpegs that I processed through Adobe Camera RAW and added a little zip and pizazz with the MacPhun Plugin from their Creative Suite called Focus CK.
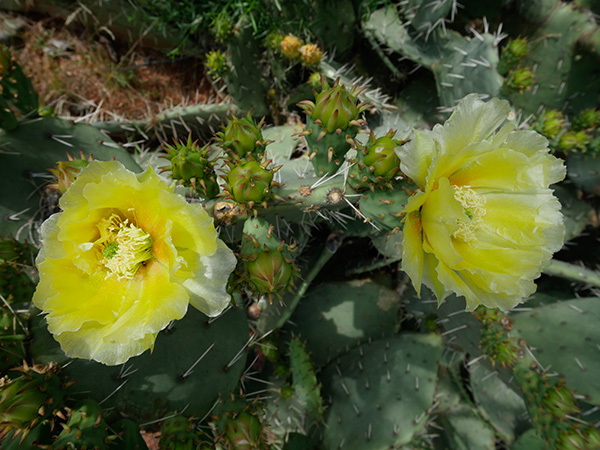
Original SOOC (straight out of camera) capture
Cropped to 16×9 aspect ratio and added some clarity and saturation in Adobe Camera RAW. Then finished off with MacPhun’s Focus CK plugin to add a bit more snap and intensity.
Here are the three versions processed straight out of the Lumix GX8 camera sized to 4K. You can choose any number of settings for size along with the number of frames per second. I used 6 fps, 12 fps, and 24 fps. Because I made these in 4K I am able to add additional movement to the videos without loosing quality.
Images were resized to 16×9 aspect ratio and saturation along with clarity was added. They were then saved out to jpegs. The files were processed into a six-image fps and twenty-four image fps videos. These were not able to have panning and additional movement as they were processed to HD size.
While I was in Florida for the Lumix Luminary summit on the GH5 I had scheduled a couple of extra days in Florida to photograph wildlife and nature scenes.
Thanks to fellow PPA member Rob Bird I was able to get to some cool areas with great subject matter. One of the benefits of being a PPA member is that you have photographer contacts who know the lay of the land all around the country. We got up and going for what I call dawn patrol to capture the city of Tampa at sunrise. I decided I’d work a couple of cameras with my Lumix GX8 capturing a time lapse of the whole sunrise while I used the Lumix GX85 for stills.
Tampa sunrise set to the music of Eric Miller – ericmiller-worldmusic.com The video was put together using ScreenFlow a screen capture program that has some pretty powerful video processing features.
The time lapse features of the Lumix cameras are pretty amazing. You don’t have to add an intervalometer because it is built-in. You can select your timing between image capture, the number of frames, start and stop times in an easy to use interface. But, here’s the incredible part. You can process the finished time lapse in the camera. Choices for how many frames per second and quality level is chosen. In this case, I prepared the files to a 4K .mov video. 4K allows me to move around within the image in post-production when using a smaller timeline.
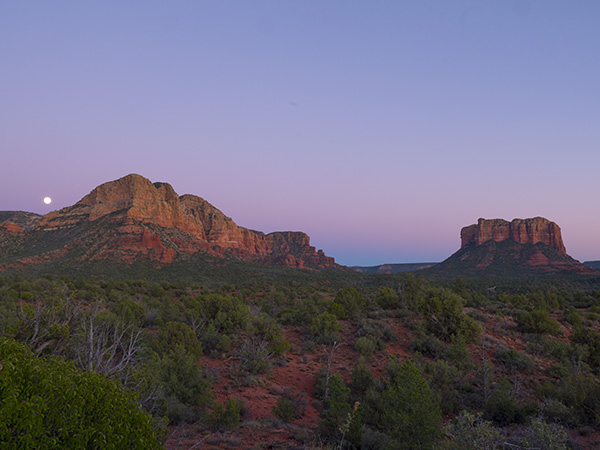
While out waiting for the moon to make its appearance the night before the Supermoon I worked a couple of cameras. I set up the Lumix GX8 to do a time-lapse of the sunset/moonrise. Glad that I also had the Lumix GX85 as a second camera to mess about with while the time-lapse was being recorded.
Here’s a still I pulled for the time lapse sequence.
The time-lapse was pretty simple. The settings are available in the camera. No need for an intervalometer. Under the Time Lapse Shot menu, you have the choice of Start time which can be immediately (now) or a time set in the future. Shooting Interval which is the amount of time between frame captures. Image Count which is the number of frames to be captured. In this case, I fired one frame every four seconds.
I thought I had a better position for the moonrise which was quite a bit to the right of where it actually showed up. I stopped the captures pretty early after the moon made its appearance. Looks like I need to calibrate my compass.
I was able to add some interest because I choose to have the camera process the still images to a 4K video. 4K video enables you to move around in the image without losing quality which I did in Adobe Premiere. Did you catch that part about the camera processing the time-lapse? A very cool feature. I choose the output settings including quality and frames per second. In this case, I used twenty-four.
For the video below I changed the output settings to 12 frames per second. I did a little color correction and added movement in Adobe Premiere.
Tomorrow I’ll show you what I was photographing with the Lumix GX85.
For infrared conversion of my cameras I use LifePixel. Infrared allows you to put an older camera to use and opens up a new time time of day for productive image creation.
Learn Photoshop in a fun environment. Aaron Nace applies the right amount of fun with easy to understand and follow tutorials. Actions and brushes are included with lessons!
Best embroidery ever. Give Queensboro a try, get a $20 instant credit to get started by clicking on the logo! They specialize in great quality custom logo apparel and promotional products with the best customer service.
Platypod has become a great resource for being creative in getting your camera gear easily into unusual places. As an Platypod Pro I get to work/play with the gear even before it comes out. Head over to Platypod, subscribe to the newsletter and you will get special discounts reserved only for subscribers.

 Watch the space pictured above when you look at the video and you’ll find my ‘spidey’ friends.