by successfulbob | bird photography, Lumix GX85, photography, photography gear, wildlife photography
Bosque del Apache Wildlife Refuge – Part One
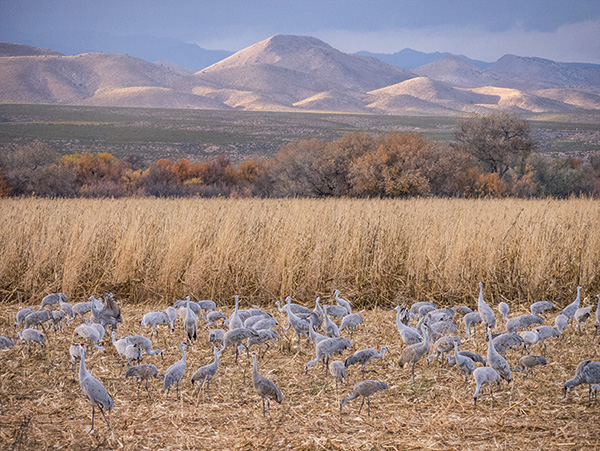
Talk about a target rich environment! Possibilities for incredible wildlife photography abound. The scenery, a variety of birds, and combinations of the two make for a great time photographing in this wildlife preserve about one and a half hours south of Albuquerque, New Mexico near Socorro. Learn more about the Bosque here.
This was my first visit, and I already look forward to returning in the future. Sandhill Cranes are a favorite bird for me to photograph. I have worked with them on the Gulf Coast of Florida. I’ve never seen groups this large. Since they are tanking up from traveling, they are pretty relaxed. They are chomping on rows of corn grown for them. The ponds are just the right depth for them to overnight and makes for interesting photographs as they fly in and out at dawn and sunset.
Let’s take a look at the photos.
This was one of the very first pictures I made when we got to the refuge. I am always trying to show the behavior of the animals when making images to add interest. Because I had previous experience wit the Sandhills, I recognized that this bird was about to leap. The fact that the other two birds are at the end of its wings was serendipity. Not the best time of day for photographing but we were checking out the area.
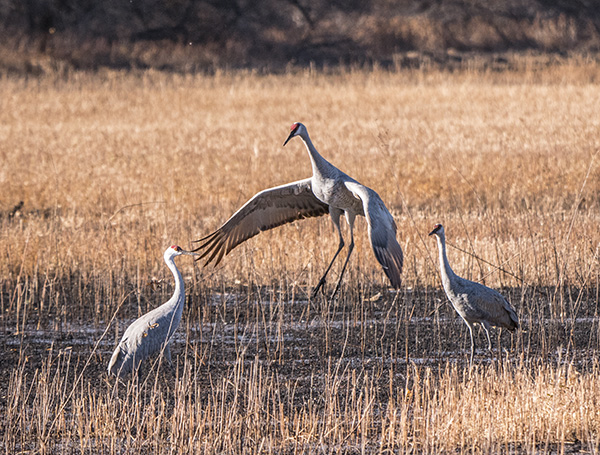 Jumping Sandhill Crane
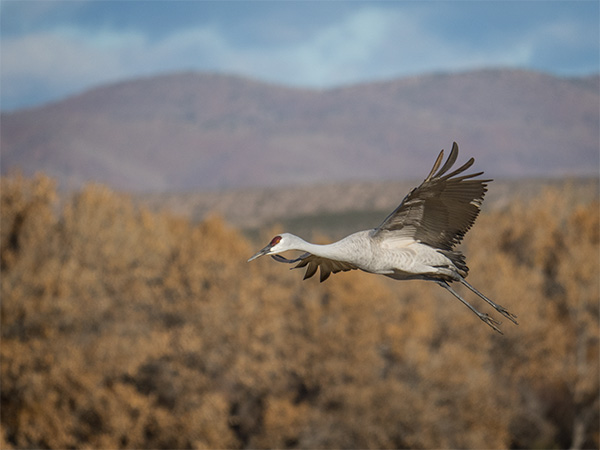 Sandhill Crane on a flyby through the field.
 Sandhill Cranes in the corn field planted for the migration as a feed stop.
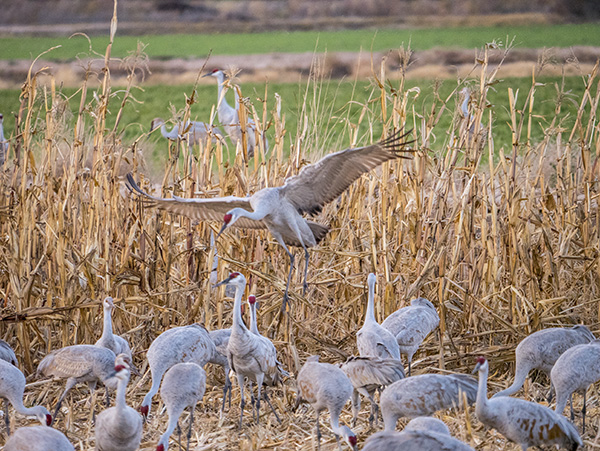 Getting ready for landing in the corn field.
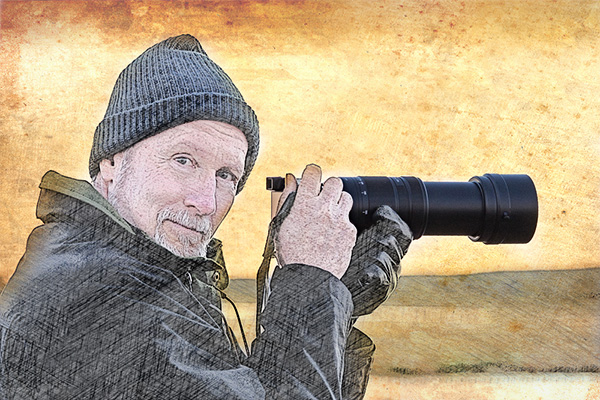 Bob Coates (hey that’s me) Original photo made by my shooting partner on this trip, Dennis Chamberlain. Dennis is an incredible photographic artist. You can see some of his work here. (PS – I arted-up Dennis’s photo so don’t blame him for how it looks!)
Here’s some feedback on the gear that I used. I was testing out the Lumix 100-400mm lens with the Lumix GX85 to see how it would hold up to not being on a tripod. I’ve always tended to photograph birds in flight handheld because I could track their movement better but would often end up with more tossers than keepers due to blur. The dual image stabilization rocks! Total change with this gear. I’m very excited about the number of images I got that were keepers with this rig. You’ll see more of those in the next couple days.
Yours in creative Photography, Bob
by successfulbob | Lumix GX85, Lumix Lounge, photography, photography gear, wildlife photography
Sedona Wetlands Photo Gear Testing
Well, I gotta tell ya it’s been very busy and I’ve been remiss in posting here for about a week. I photographed a four-day event coverage job with its attendant post-processing along with my regular work. There are only so many hours in a day so the blog had to wait.
I’m back!
And I got a lens I was lusting after to add to my quiver that I’ve started testing. The Lumix 100-400mm G Leica DG Vario-Elmar f 4.0-6.3 lens is as beautiful as I thought. I do not normally get too excited about glass for my cameras. I think of them as tools, and if they do their job as advertised, I’m cool with them. Occasionally, a lens tends to perform over-and-above That’s when I get excited. The 100-400mm is one of those lenses.
I went back out to the Sedona Wetlands for a quick test and here are some results.
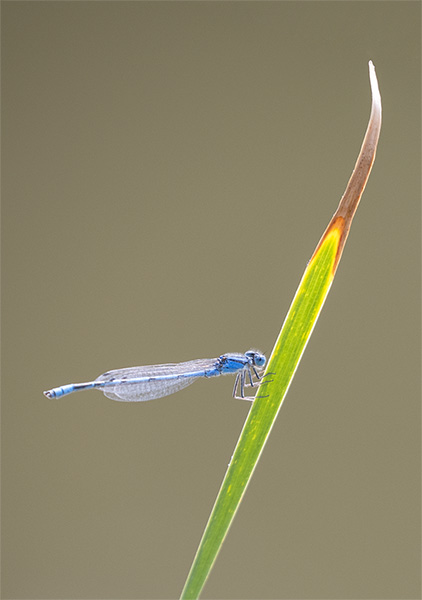 Blue Dragonfly – I was unable to identify this dragonfly. Wonder if it’s because it’s a juvenile and the wings haven’t changed yet. Any ideas??!!
Even though there were quite a few of these critters darting in and out of the stalks of green I could barely see them. They are tiny. Tiny and almost transparent. With some patience, I was able to finally track one of the dragonflies down that took a moment to rest. Excellent detail of something I almost couldn’t see. Oh by-the-way, I was hand-holding the shot with the lens racked all the way out to the 800mm equivalent. As a matter of fact I handheld all the images in this post at the 800mm equivalent. The GX85 was the camera and was a help in this regard as it is using five-axis image stabilization.
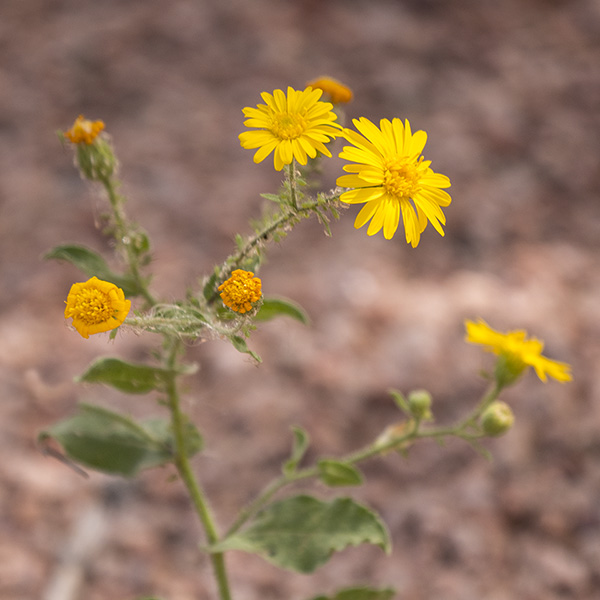 Even at f6.3, there’s some beautiful separation from the background with this lens.
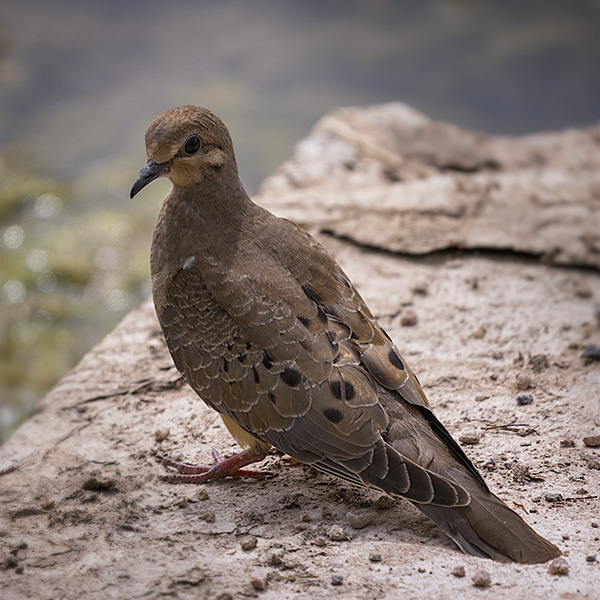
 Mourning Dove – A bird capable of attaining flight speeds of 55 MPH hung around for a portrait. Sweet.
Not so much a beautiful photo, but a test to see the amount of detail that can be represented in the feathers. Sharpness is enhanced in this camera by the removal of the anti-alias filter. I might look to extract the bird from the background and use the pattern of the feathers in an art piece. We’ll see.
Yours in Creative Photography, Bob
Save
Save
by successfulbob | black & white, cloud photography, infrared photography, landscape photography, Lumix G6, Lumix Lounge
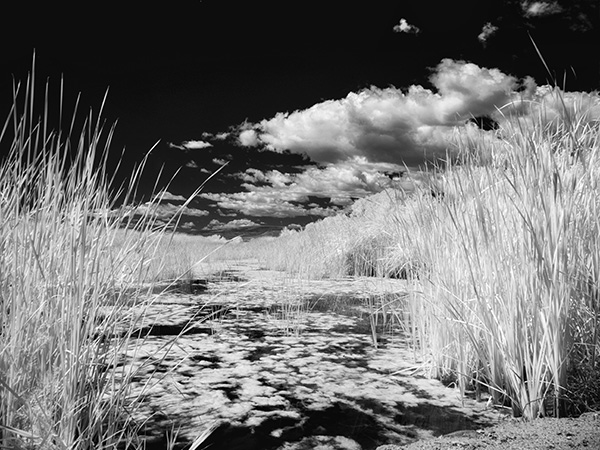
Infrared Image Wetlands Near Sedona, Arizona
The Lumix G6 is coming in very handy now that it is converted over to infrared capture by LifePixel. Midday is not the best time in the world for catching beautiful photos with standard color capture. But move to infrared and the middle of the day is a whole new world.
I was out scouting some new areas to photograph with wildlife and really didn’t think I would be capturing any images but I had the new Lumix GX85 and the 100-300mm lens and had some fun there in spite of the time of day. (check the post here) And I also had the G6 in IR. This is one of the advantages to shooting with micro 4/3rds gear. I was able to have all these options with me with no strain when hiking around and scouting. Used to be I would leave gear behind until I was absolutely certain I wanted to make images. Now opportunity abounds and I’m having more fun and getting more images.
 Sedona Wetlands (learn more about them here). Designed land to help with the processing of wastewater while creating habitat for wildlife. There are quite a number of species taking advantage of the new ‘watering holes’!
I’ve started to narrow down my processing of infrared images. I have bee taking the RAW file and lowering the color and tint sliders to 0. Dialing in highlight and shadow to taste. A pinch of Clarity. Add some black. Add some white. Then tweak the contrast. Open the image and take it to NIK Color FX Pro 4 for a little Glamour Glow and we are looking pretty good. Once I am pretty certain this is the processing path I want to take I’ll set up a preset in ACR which will dial in all the goodies to get me close then tweak. When I set that up I’ll share it here on the Successful-Photographer blog. You can see a bit more in-depth info on this IR conversion in this post on LifePixel.
Yours in Creative Photography, Bob
by successfulbob | bird photography, Lumix GX85, Lumix Lounge, photography, photography gear, wildlife photography
Lumix GX85 Camera
I have only had this camera in my hands for a couple of days, and I’m liking it! The Lumix GX85 was built on the same chassis as the GX7. It’s a body that is small but very comfortable, in my opinion, to handhold. I remember when I took the GX7 out for a test spin about three years ago and didn’t like the feel of the grip when first using it. But as part of the Luminary Team, I was given the assignment to take the camera cross country and make images and send them out for two days. First half day I was uncomfortable with the camera’s feel. By the end of the first day, it was, “I kinda like this camera.” By the end of the second day, I was pleased and comfortable with the feel of the camera.
The other bonus was/is that this camera is very low profile. Combined with the smaller lenses of the micro 4/3rds system I found almost no one who said no to the request of making their picture. A decided difference from the equivalent full frame DSLR gear.
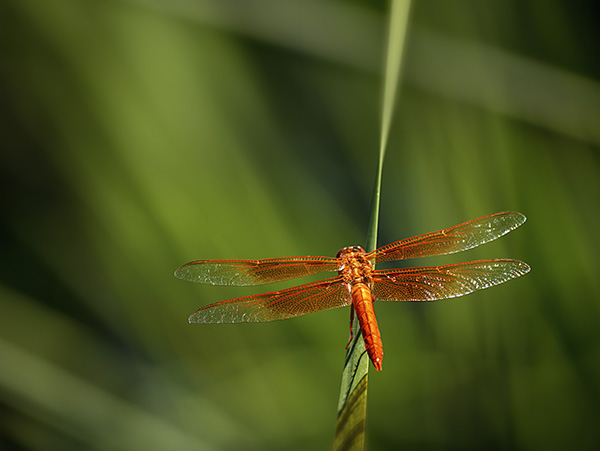
Fast forward to yesterday and photographing some wildlife. I was out scouting a wetlands area just south of Sedona. (who knew, right?) It was the middle of the day, and I wasn’t planning on making any images but just in case I set up the GX85 with the 100-300mm. The camera stabilization is fabulous, and the pictures I took are tack sharp. When photographing wildlife, I like precise detail and was excited by the results from handheld photos. It can be tough using a tripod when chasing flying critters around the marshes. This little guy is called the Flame Skimmer or Firecracker Skimmer for obvious reasons. I found chasing dragonflies is a lot like photographing birds in that you need to study behavior patterns to obtain well composed interesting images.
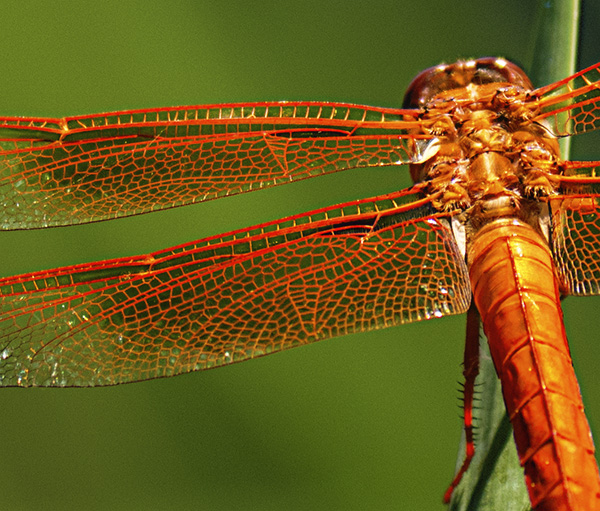 Here’s a detail of the dragonfly. A little bit of sharpening was added in post using MacPhun’s Creative Kit Focus
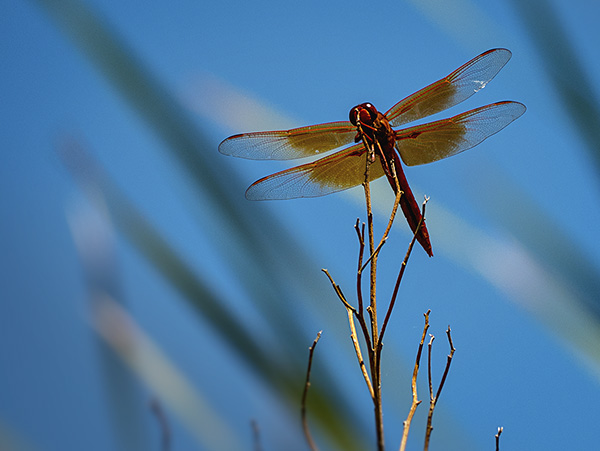 Here’s the under-carriage of another dragonfly. Amazing little critters!
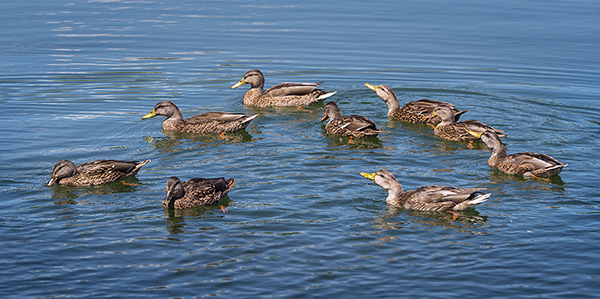 I moved to a different area with more water at a place called Bubbling Springs over in Page Springs and found this huge family of Mallards out for an afternoon swim.
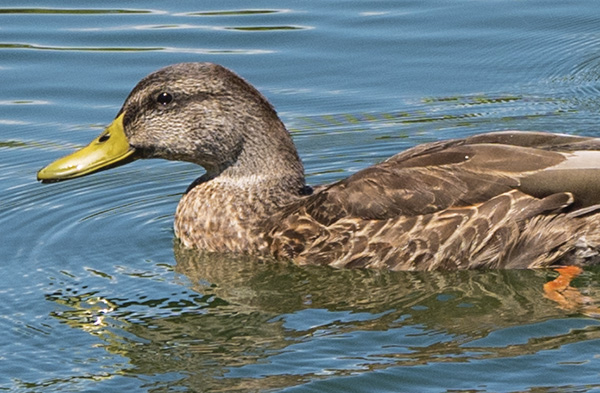 Mallard duck detail.
Images were captured with the Lumix 100-300mm Vario f 4.0-6.3 lens. That’s a whole lotta reach for about $550 – Especially when you consider it’s the full frame equivalent of 200-600mm.
Yours in Creative Photography, Bob
PS – Can’t wait to try out the new Lumix G Leica DG Vario-Elmar 100-400mm Lens with this camera.
PPS – Please remember that using links to make your Amazon purchases helps to support this website. Cheers!
Save
by successfulbob | bird photography, Lumix GX8, Lumix Lounge, photography, photography education, wildlife photography
Hummingbird Photo – Lumix GX8
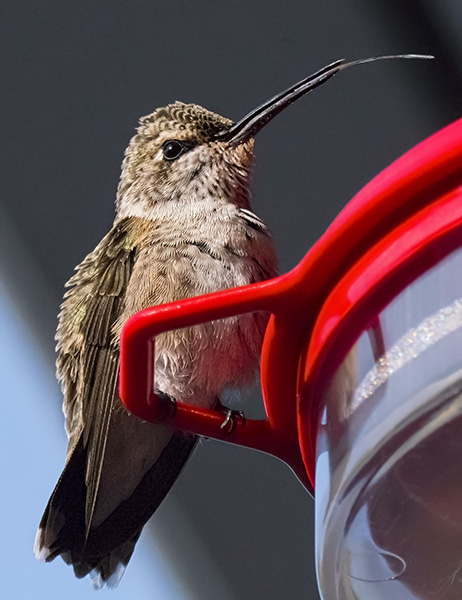
Hanging out this morning and thought I’d do some camera testing with my Lumix GX8 and the 100-300mm G Vario f4-5.6 (200-600mm equivalent) lens. I made these images handheld with stabilization turned on. Settings for these were f14 1/2000th sec at ISO 6400. I’ll share some hummingbirds in motion images at different settings a little later. I became enamored of this little critter because he had so much peppy personality. Looks like he just arrived from a long migration. He’s not one of our local birds and seems a little worse for wear.
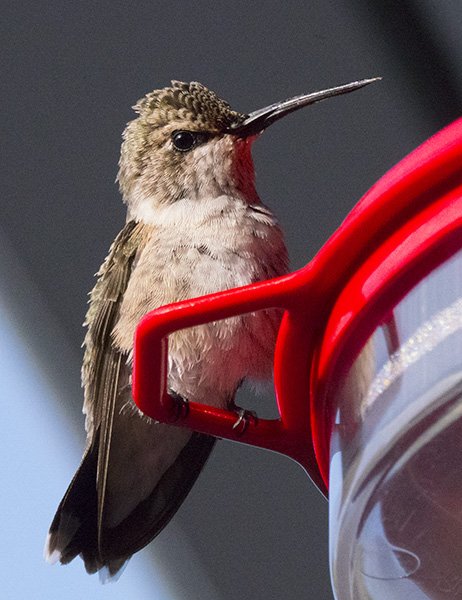 Hummingbird Straight out of the camera. He’s checking me out.
 After seeing me, he stuck out his tongue! Not sure if that was social commentary or not. Here’s the little guy after processing with MacPhun Noiseless and MacPhun Tonality (for sharpening the feathers just a bit more. Explanation below)
So these images turned into a processing exercise. Some photographers mention that they are concerned with noise in images from smaller chip cameras like the micro 4/3rds. Personally, I feel that we get a little too hung up on that as the newer algorithms that are used in processing give a very natural feel to the noise that replicates the grain structure we had back in film days. (can you hear my creaky bones as I talk???)
To see if there was an elegant solution for those who have a concern when you push the camera to higher ISO’s thought I’d see how software might be of help. Oh man, it does if you are on a MAC. I’m using MacPhun Noiseless, and it worked a charm. MacPhun is only for MAC OS systems. I’m sure there are similar products for those on PCs. One of the problems I had in the past with noise reduction programs is the removal of detail that I wanted/needed in some parts of the image. I’ll let you decide, but I don’t think that’s a problem anymore!
On to the processing!
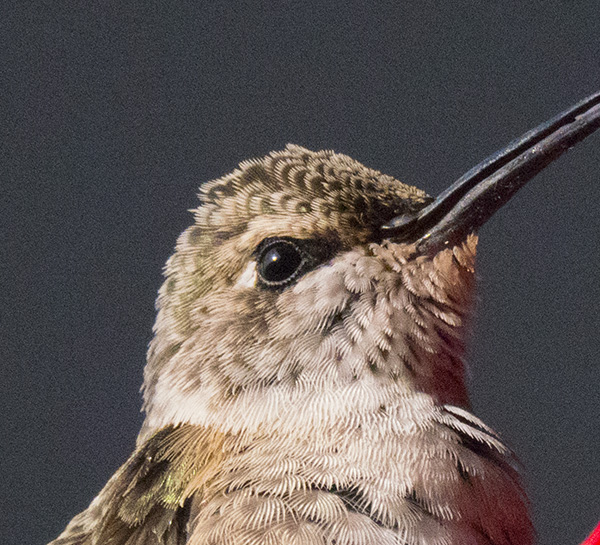 Original detail capture SOOC.
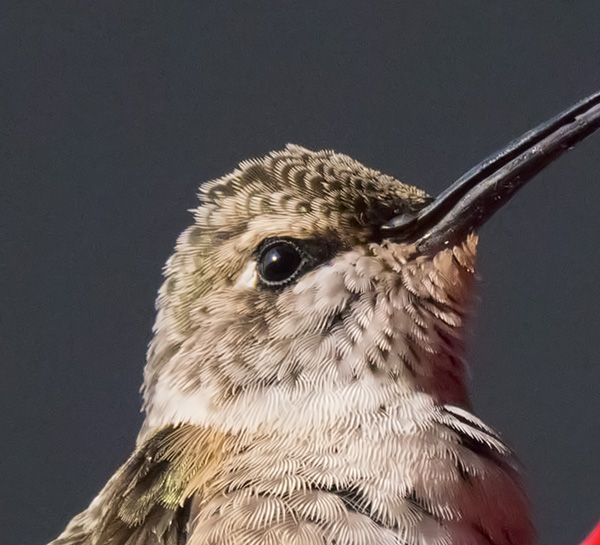 Here’s the image after running MacPhun’s Noiseless software. There are lots of settings and possibilities. This was a fairly aggressive treatment. It smoothed out the noise in the background nicely without losing detail in the feathers.
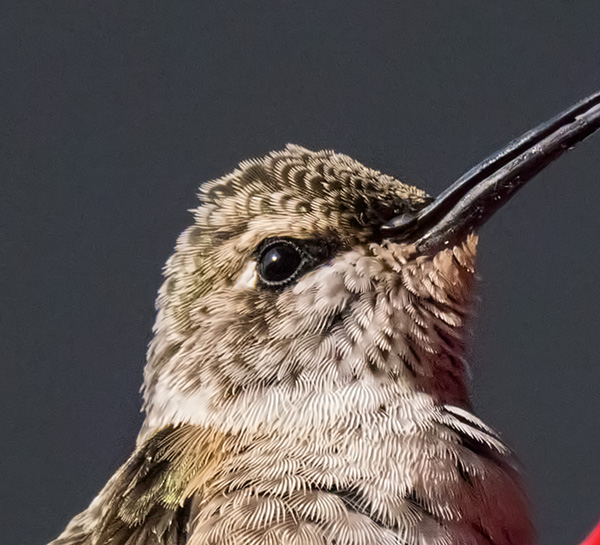 This is the final. I used the Tonality software from MacPhun to sharpen the feathers a bit more. “Wait a minute Bob! isn’t tonality made for making an image black and white?” You bet. But, I liked the controls that allowed me to sharpen small details and micro control the contrast in different areas of the image. The secret is to do this on a separate layer and change the Layer Mode to Luminosity in Photoshop. Then only the information that is Luminous is applied to the image. Using a Layer Mask, I applied the sharpening to only the feathers.
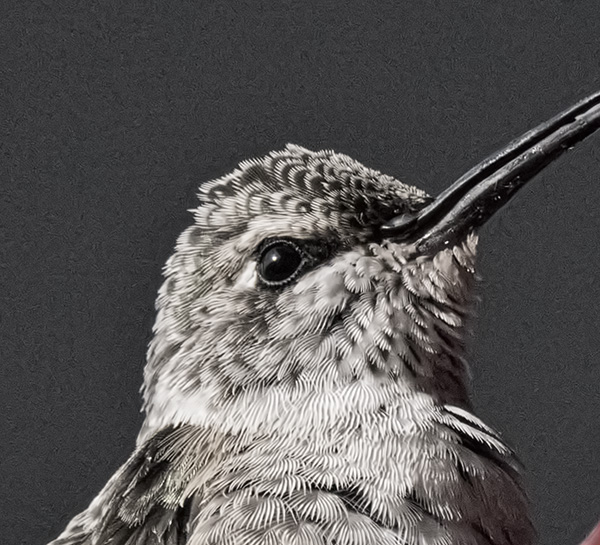 Here is the Tonality layer without a mask. You can see where it sharpened the background as well hence the use of the Mask in Photoshop in addition to changing to the Luminosity Mode.
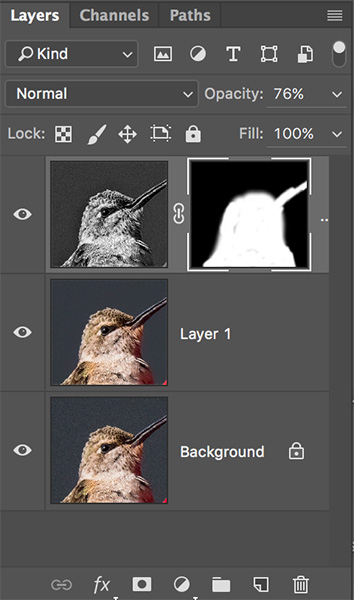 Here’s the Layers Palette. Background Layer is original capture. Layer 1 is with noise removal. Top Layer is Tonality with a mask.
Yours in Creative Photography, Bob
Save
Save
Save

 Sandhill Crane on a flyby through the field.
 Sandhill Cranes in the corn field planted for the migration as a feed stop.
 Getting ready for landing in the corn field.
 Bob Coates (hey that’s me) Original photo made by my shooting partner on this trip, Dennis Chamberlain. Dennis is an incredible photographic artist. You can see some of his work here. (PS – I arted-up Dennis’s photo so don’t blame him for how it looks!)


