These were taken Sunday night July 3rd with a LumixGX8 and 7-14mm f4.0 Vario lens. Settings f8 ISO 200 for five seconds.
Single five-second exposure
This burst was one of my favorite captures for the evening
Composite image with the Casino, which was behind me and the fireworks in front of me.
Fireworks composite image.
There’s a secret o create composite fireworks images. Develop each image to be it’s best. Drag and drop the images one above another as Layers. The secret is to change the Blend Mode of the Layer to Screen. The mathematics behind Screen mode makes all the dark area of the sky to disappear only allowing the light from the image to register. (Bonus tip: if the fireworks burst is not as bright was you wish to make a copy of the layer and the lighted areas will become brighter. Too bright? Lower the opacity to taste) The next move is to place the bursts where you would like them using the Transform tool. Once the photos have been rearranged, there will be areas that need to be masked out. Adding a Layer mask and painting with black will conceal the unwanted information on the Layer.
File this post away for the next time you get ready to photograph fireworks.
Earth Day Photography – Landscape Photography Magazine
Landscape Photography Magazine put out a call to photography artists to create an image of sunrise on Earth Day of this year. The image I created was accepted into the curated collection gathered from that day. Here is my entry as it appears in the Landscape Photography Magazine Earth day PDF. Download your copy for free & get a 60% off deal on a new subscription. If you are a landscape photographer I know you’ll love this. (disclosure: I am not an affiliate of LPM magazine. Just think they do a great job!)
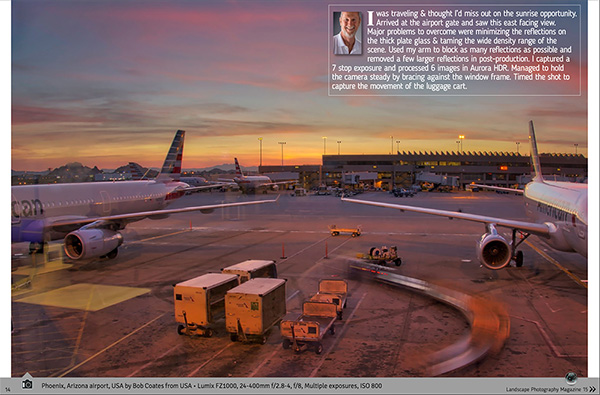
Earth Day Photo – Capture Lumix FZ1000 25-400mm f2.8-4.0 @f8 Multiple Exposures ISO 800
Text from image follows below
“I was traveling and thought I’d miss out on the sunrise opportunity. Arrived at the airport gate and saw this east facing view. Major problems to overcome were minimizing the reflections on the thick plate glass & taming the wide density range of the scene. Used my arm to block as many of the reflections as possible and removed a few of the larger reflections in post-production. I captured a 7 stop exposure and processed 6 images in Aurora HDR *. Managed to hold the camera steady by bracing against the window frame. Timed the shot to capture the movement of the luggage cart.”
Yours in Creative Photography, Bob
*Until July 5th there is a Fireworks Bundle available from MacPhun
Special Bundle price: $99 – Over $300 in Savings
Creative Kit 2016 – 6 Powerful photography apps
Creating Powerful Photos of Fireworks – Video Training from PhotoFocus
8 Intensify presets and 3 Noiseless Presets created especially for fireworks images
PhotoBulk app by Eltima Software – Resize photos and add watermarks
Uplet app by Eltima Software – Upload photos from your Mac to Instagram
Lumix LX100. Built on a solid magnesium body with all necessary controls on the exterior of the body with machined knurled knobs or solid switches. Fast f1.7-2.8, 24-75mm, Leica DC zoom lens. While this camera is only 12.8 MP, it has 4K video and Photo Mode which enables printing of images pulled from still frames. Features are coming out the wazoo of this camera including several ways to capture HDR images, bracket your aspect ratio, bracket white balance, 11 frames per second burst rate, and more.
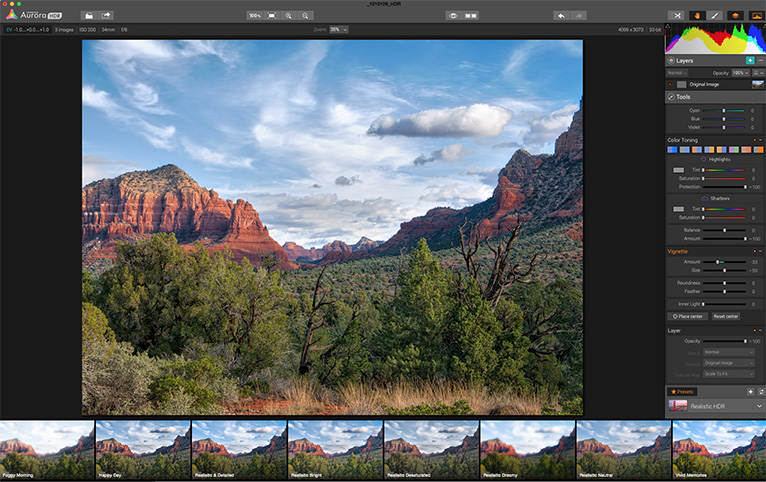
Here’s an image I created from a three-stop bracket of the red rocks. The frames were processed in Aurora HDR software from MacPhun.
Red Rocks of Sedona, Arizona – High Dynamic Range (HDR) Photo
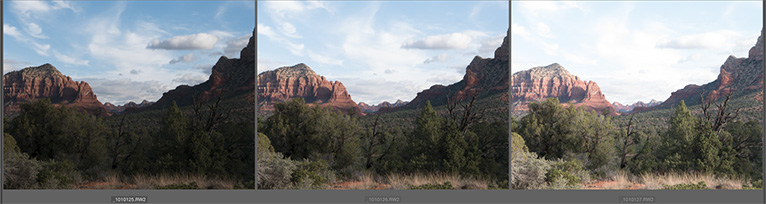
Here’s the three stop bracket. Images Straight Out of Camera (SOOC) Middle exposure was 1/160th sec f8 ISO 200 34mm (FF equivalent 75mm)
I’m liking the Aurora HDR software as it has LOTS of controls for processing the image without having the ‘HDR halos’ and other problems I always associated with using software to process multiple exposures. There are many presets for getting into the ballpark of the image you would like to create. You can still go HDR crazy if you want to push it that way. It’s up to you.
Aurora HDR software window. There are many more controls available by scrolling the right-hand panel. There are also a plethora of presets with the ability to create and save more of your own.
I feel we are living in a time of unlimited creativity. Between the new camera capabilities and software options imaging is moving into a whole new world. Yes, it’s easier for the average person to obtain a correctly exposed image. But, for those of us who have been working photographers for a long time, we can leverage that knowledge and push the tools to give us more possibilities for creating images with solid depth and dimension.
For photographers that are looking for a new and improved HDR photo editing experience, MacPhun is offering a very special competitive upgrade price, and some very special bonuses when they switch to Aurora HDR Pro from their current software.
Key Features:
*Special Competitive upgrade price: $79.99 $20 Savings
Exclusive live webinar with Trey Ratcliff
20 Minute Deep Dive Aurora HDR tutorial with Trey
Jeff Carlson HDR ebook
A collection of full resolution textures from Flypaper textures
How to HDR video training with Matt Suess
*competitive upgrade pricing requires screenshot of their existing HDR app to qualify, qualifying competitive upgrade apps include but are not limited to: Photomatix, Adobe Photoshop, Lightroom, HDR Efex Pro, and many more
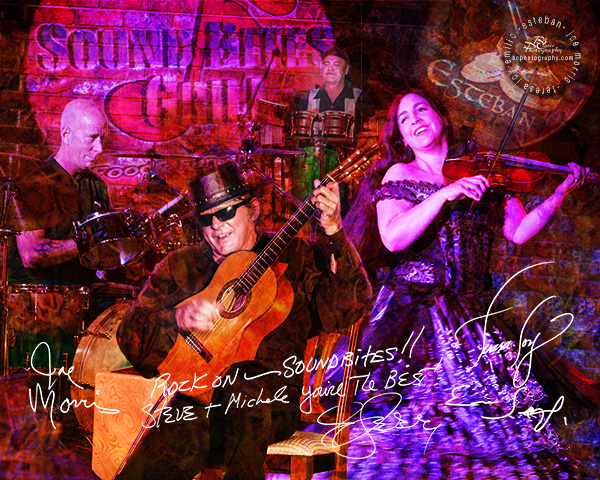
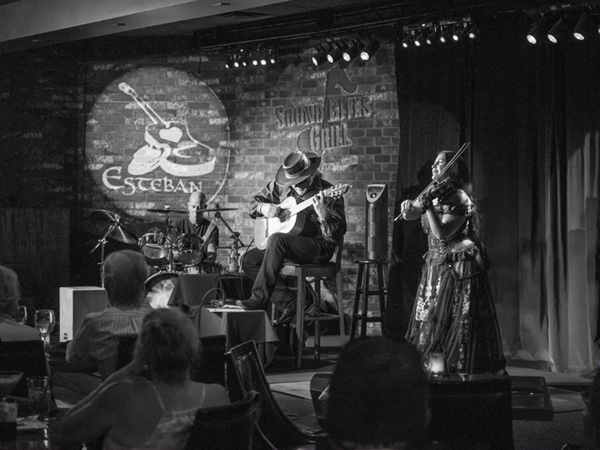
There’s a new rendition of Esteban and company on the Wall of Fame at Sound Bites Grill in Sedona. It was time to get drummer Joe Morris in place as he’s been playing for the last two years. Some great music at the bottom of this post. You might want to click play on that as you read the rest of the info.
Esteban – Teresa Joy and drummer Joe Morris
Here’s the rundown on the creation of art for the SBG Wall of Fame. I start with images of the musicians captured during live performances. They are individually extracted from the scene and then reassembled into the final composition.
In Adobe Photoshop the pieces are composited while adding layers of texture in various Blend Modes. Drop Shadows add depth. The Inner Glow Mode is used to create lighting effects. Artists are asked to add messages and autographs in black Sharpie Marker. These are inverted and added to the image as it would be almost impossible to track down people after they have completed their gig.
My cameras of choice are either the Lumix GH4 or the GX8. Both cameras have the density range and frame rate to handle the LED stage lighting which can be tough as there is only pure color in the lights. My primary lens choice for getting the individual photos is the 35-100mm f2.8 Vario. The lens is equivalent to a 70-200mm full frame.
Full stage at Sound Bites
For the entire group and stage publicity photos, I use the 12-35mm f2.8 Lumix Vario lens. It’s a solid wide angle zoom that teams up well with the 35-100mm.
Esteban – La Paloma Classical Guitar with Teresa Joy on violin
I have been fortunate to live in places with some spectacular scenery and would probably have a hard time living in an urban environment or someplace dull and flat. Sedona, Arizona is the gorgeous place I now get to call home. Red rock vistas and a dry climate that showers us with sunshine two hundred seventy-eight to three hundred days per year.
And, after residing here seventeen years, I still find different ways to view the majestic red rocks thanks to visitors spurring me on. Some visiting friends asked if a helicopter tour would be worth a go and would I be interested in joining them? I said, “Yes indeed!” I was surprised I hadn’t thought to fly the skies with my camera in all that time.
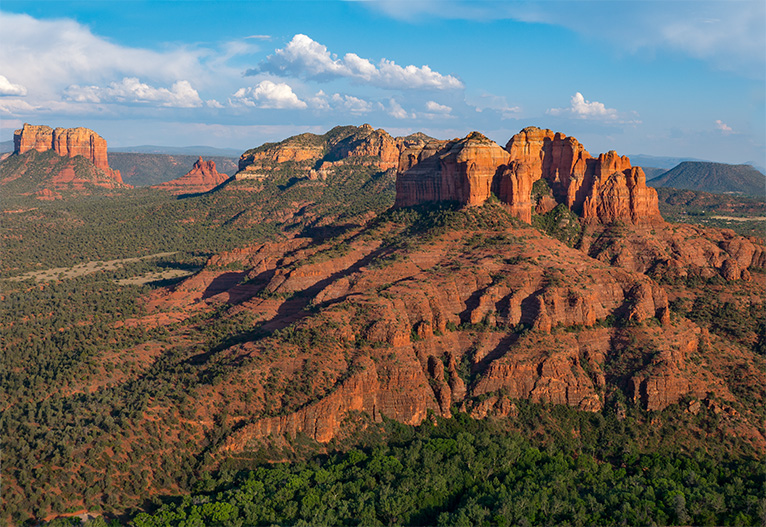
Sedona’s famous Cathedral Rock from the air. Lumix G7 with 12-35 f2.8 Vario G lens @f5.6 1/400 sec. 12mm (24mm FF equivalent) ISO 200
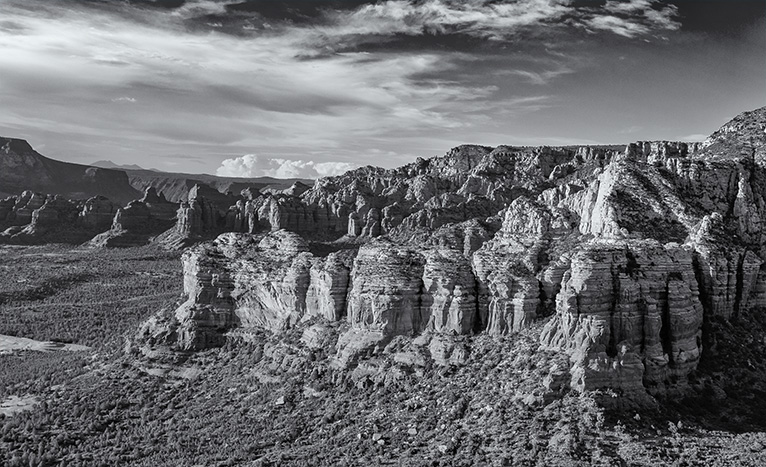
More Red Rock formations. Same gear as above. @5.0 1/400th sec, 19mm (38mm FF equivalent)
Processed in NIK Silver FX Pro2 (available free from Google)
Cathedral Rock is one of the state’s most photographed destinations. I know that I have photographed it on numerous occasions, but never from the air. An artistic rendition of Cathedral Rock was one of my first Merit images in Professional Photographers of America image competition.
Let’s talk about photographing from the air.
I have done photography in the past from the air, but it was always a charter flight where I was calling the shots for the position of the helicopter or plane and the possibility of staying on station or revisiting until I had the shot. With that kind of luxury, there was time to check settings of the camera ensuring they were correct. This flight was going to be a horse of a different color. A sightseeing tour lasting 17 minutes and no do-overs.
I thought about the new technology I have access to in the Lumix cameras and decided to place my trust in it. I’ve talked about this setting once or twice before. It’s called Intelligent Auto. I jokingly refer to it as the ‘Honey, stop the car!’ setting. It calculates the f-stop, shutter speed, and ISO. I have always used it sparingly as I want to make the decisions that control the final look of the image. In this case with no time to devote to changing settings I decided I would concentrate on framing and composition and see how well the camera would do. Shot in RAW to have more latitude to cover exposure but the SOOC files were pretty darn good.
After looking at the metadata for exposure settings (see above) I was surprised to note that the camera had automatically recognized the scene as a landscape and set the camera for ‘Landscape Mode’ – “For landscape photos with background in focus.”
Once again I was pleasantly surprised. Shutter speed was high enough to freeze the scene in spite of the helicopter’s vibration and motion. Exposure was solid for the scene. All-in-all it’s a winner. If this were a commercial shoot for a paying client, I would be working this entirely different but this is a great help in quickly changing situations.
Thinking about visiting Sedona? Check out http://www.sedonaairtours.com for your aerial view of the red rocks. really enjoyed my experience with Sedona Air Tours. They work together as a great team!
Learn more about other attractions in Sedona at theVisit Sedona website.
(You might want to scroll down to play the 1967 hit from the Fifth Dimension called Up, Up and Away while you read the rest of this post.)
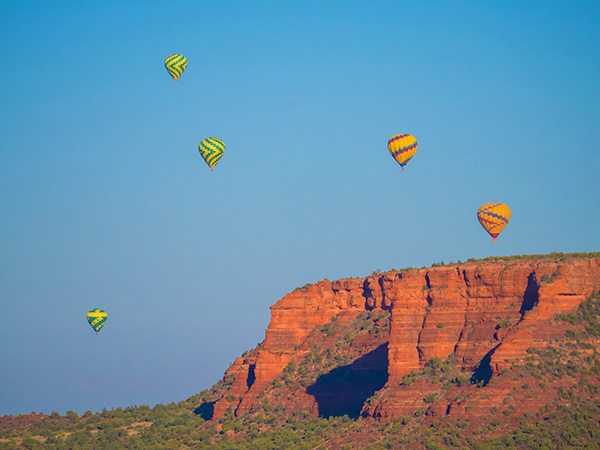
Imagine floating in Silence. Beautiful red rock vistas spread before you like towering sculptures.
That was the first thing that came to mind as a surprise when I took a balloon flight over the red rocks of Sedona. Silence only interrupted by the occasional roar of the propane burner to control our height above terra firma. Silence only changed by the occasional comment of a fellow passenger exclaiming about some new deer or rabbit that came into view unaware we were hovering overhead. Gliding over the landscape is an incredible way to experience Sedona.
You can’t beat it with a stick!
I was out on a photo ‘dawn patrol’ with my cameras and fellow Lumix Luminary photographers Suzette Allen & Jon Yoshinaga while they were in town for a visit. We set up for sunrise over the valley and were gifted with the lifting of the hot air balloons. It is always a fun addition to a shoot when the hot air monoliths pass through the scene as a colorful counterpoint to the scenery.
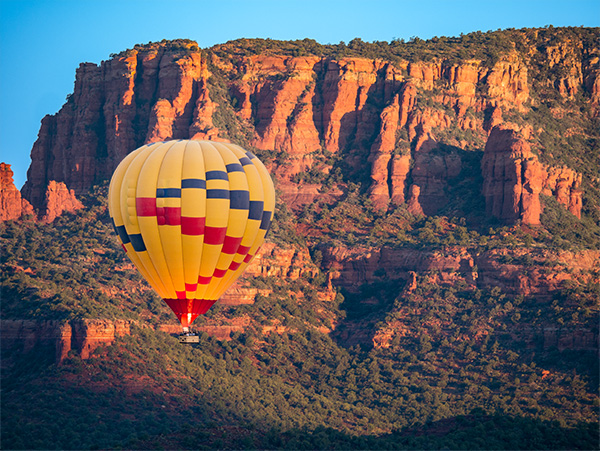
Here are a couple of the photos I captured of visitors heading off to a sky adventure.
Hot Air Balloon lifts off into the azure blue skies over the red rocks of Sedona. Captured with Lumix G7 with 100-300mm f4.0-5.6 Vario lens @f4.9 1/160th sec 193mm (386mm FF equivalent) ISO200
Balloons dot the skies above the Red Rocks. Lumix GX8 with 100-300mm f4.0-5.6 Vario lens @f4.5 1/10000th sec 150mm (300mm FF equivalent) ISO800
For infrared conversion of my cameras I use LifePixel. Infrared allows you to put an older camera to use and opens up a new time time of day for productive image creation.
Learn Photoshop in a fun environment. Aaron Nace applies the right amount of fun with easy to understand and follow tutorials. Actions and brushes are included with lessons!
Lightning, waterdroplets, sound, time-lapse, HDR sequences, smiles and much more control for your camera!
Cameras Get Smarter -
A High Speed Smart Camera Remote
Best embroidery ever. Give Queensboro a try, get a $20 instant credit to get started by clicking on the logo! They specialize in great quality custom logo apparel and promotional products with the best customer service.
Platypod has become a great resource for being creative in getting your camera gear easily into unusual places. As an Platypod Pro I get to work/play with the gear even before it comes out. Head over to Platypod, subscribe to the newsletter and you will get special discounts reserved only for subscribers.
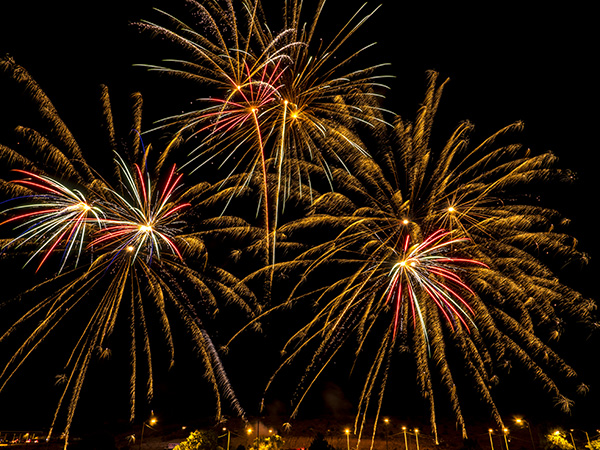
 Single five-second exposure
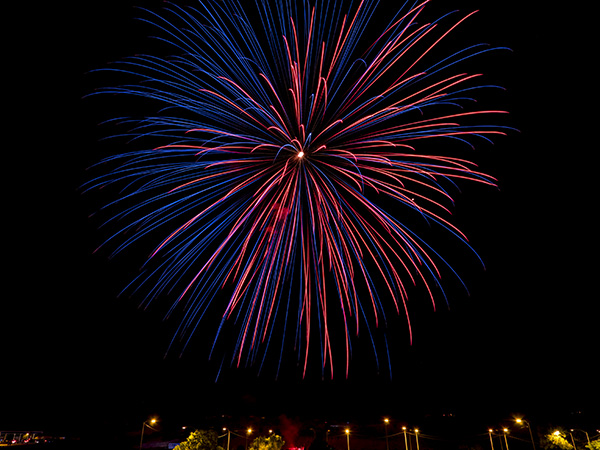 This burst was one of my favorite captures for the evening
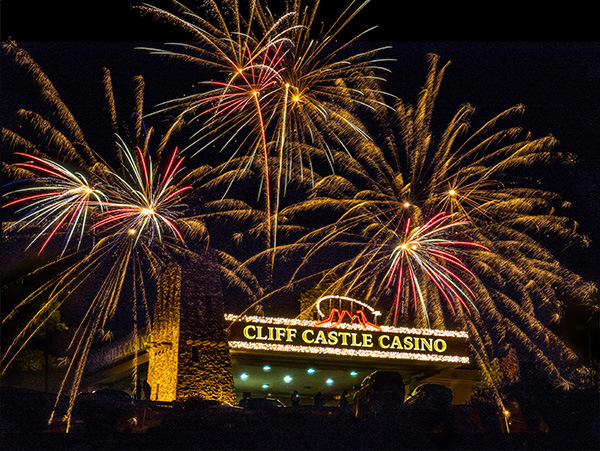 Composite image with the Casino, which was behind me and the fireworks in front of me.
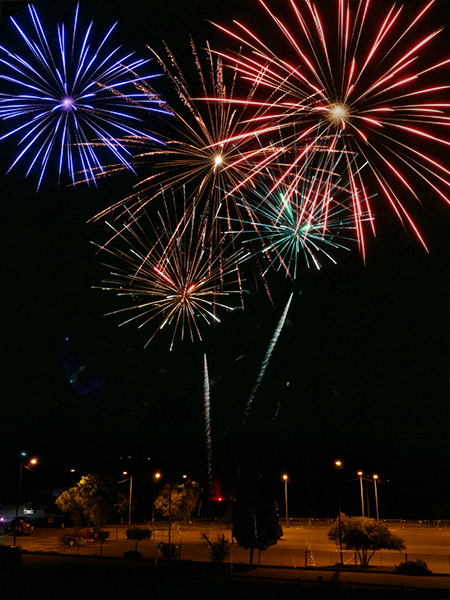 Fireworks composite image.