by successfulbob | architectural photography, black & white, Lumix GX7, Lumix Lounge, photography education
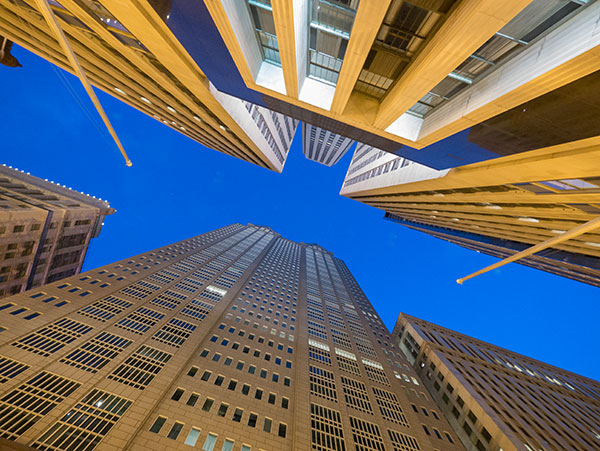
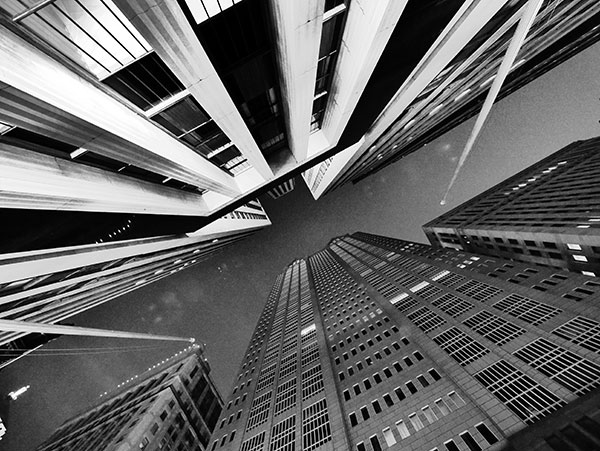
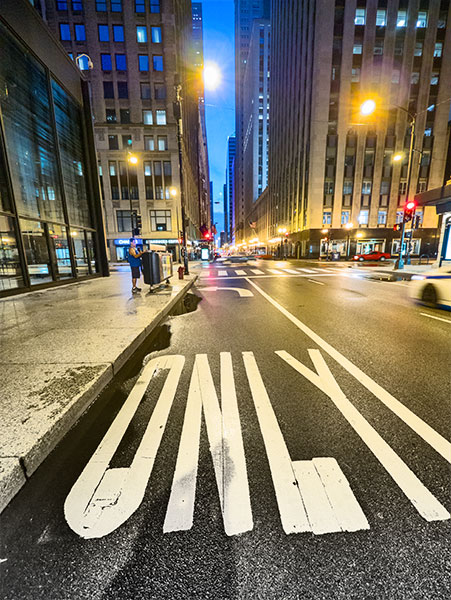
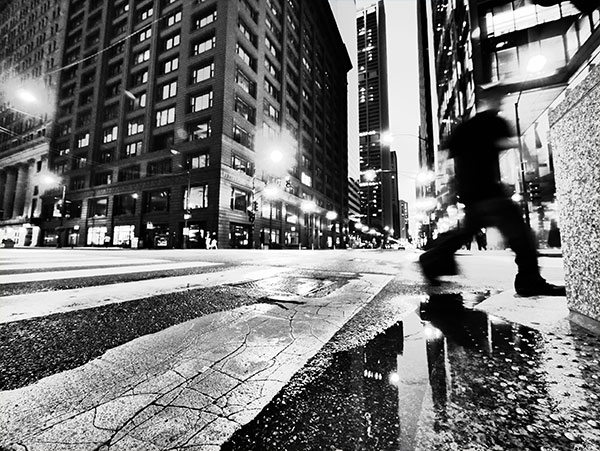
Sometimes it takes more than one image to tell a story… So here are three that speak of an unusual intersection in Chicago during a photo walk at the Out of Chicago Conference…
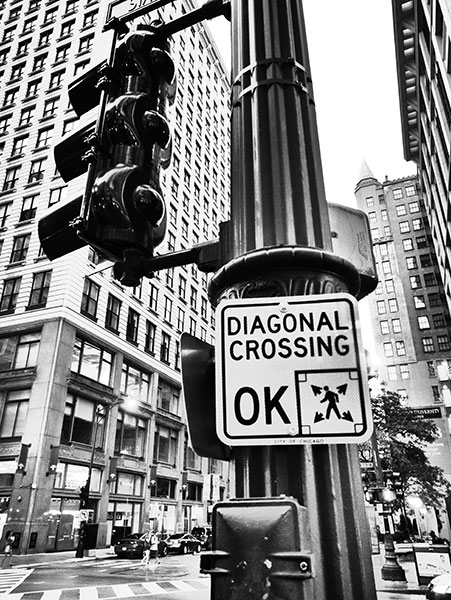 A strong dark slight diagonal of the signal pole with signage shouts the beginning the story.
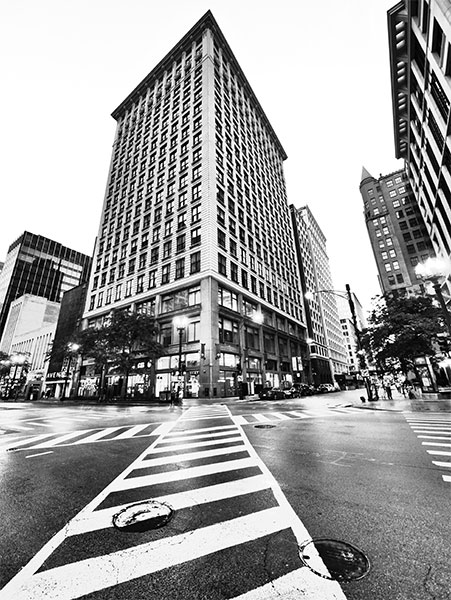 The crosswalk with with strong leading lines to a possible destination across the way… Lots of shapes and line to wander around in the image.
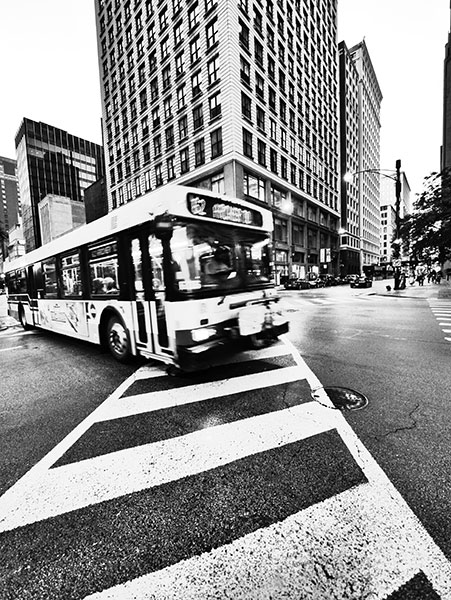 And the reason you might want to be sure to wait for the signal!
Images created with the Lumix GX7 and 12-35mm f2.8 Vario lens. Exposure 14mm f4 ISO 3200 1/50th sec. Camera set to Illustrative Art Mode pushed to black and white.
Think about creating stories in series with your image making… I could see these photos presented as a triptych.
Yours in Photography, Bob
by successfulbob | architectural photography, black & white, Lumix GX7, Lumix Lounge, photography education
Now this is Graffiti I can get into….
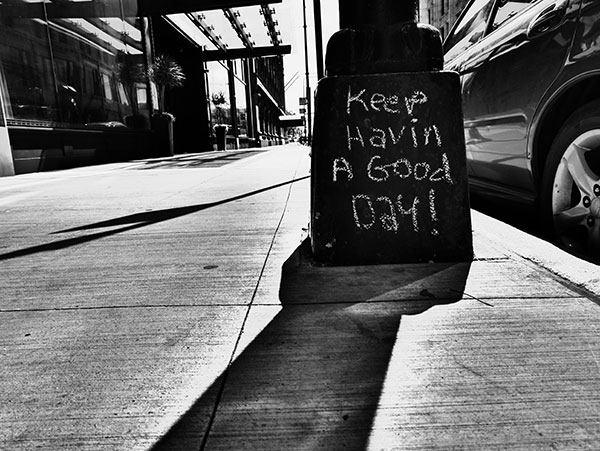 Keep havin a good day! Image made with Lumix GX7 and 12-35mm f2.8 Lumix Vario lens.
Impressive Art setting pushed to black and white to get the graphic feel.
Found this on my wanderings around Chicago after the Out of Chicago Conference this past week while working my way through the streets toward the Art Institute of Chicago.
I can only wish you the sentiment expressed on the streetlight. What could be better? “Happy 4th of July!!
Yours in Photography, Bob
by successfulbob | architectural photography, black & white, Lumix GX7, Lumix Lounge, photography education, photography seminar
While roaming the streets of Chicago during the Out of Chicago conference I was led to a place to capture a ‘Batman’ image. One of the organizers was on our photo walk and had found this great spot to play with the architecture and come up with this…
 Check out the blue sky for the batman logo formed by the buildings.
 Had to experiment for a different look.
Using the Lumix GX7 with the 7-14 f4 Aspherical Vario lens (a sweet and sharp lens with no distortion) in Illustrative Art mode set to Black & White and under-exposed by about a stop led to this more graphic rendition on the same scene. Totally different feel don’t you think? Don’t be afraid to get in there and play with the camera presets, especially since you can tweak them Remember to shoot in RAW plus jpeg so you get the arty image as a jpeg but also get all the information present at the time of capture so you can tweak away in post for a totally different look.
How do you find it? Just go down the streets looking up everywhere you go – you’ll eventually find it! Actually you can head out on a photo tour with Teresa Peek of Tour Through a Lens. She was the one who hooked us up with this spot giving very specific instructions on where to stand and what to look for. I promised I wouldn’t tell so you can wander around looking for it on your own or check out her photo tours.
Yours in Photography, Bob
by successfulbob | architectural photography, black & white, graphic design, Lumix GX7, Lumix Lounge, photography education
Had great time in Chicago at the Out of Chicago Conference put on by Chris Smith. What an incredibly successful event with over 160 people registered in it’s first year. You’ve missed it for this year but I suggest keeping an eye out for next year’s dates and get them on your calendar.
While out and about on one of the photo walks I moved to the Illustrative Art Mode on the Lumix GX7 and tweaked it to Black and White. This gives a very high contrast look with a bit of a glow. I enjoy this look for architecture with a graphic twist. But I had to try something just a bit different on top of that. Capturing images in RAW plus jpeg allows me to get to the full color information presented to the camera and I’m starting to play with mixing them and adding a gradient on a mask to blend them together.
 Splitting the photo into Black and White and color. Bottom to top.
 Reversed the gradient for this photo.
 Tried the split on this one and it lost it’s ‘Cartier Bresson Decisive Moment’ feel so I took away the color.
Experimentation is key to growing your photography. Does the split color work? For some images maybe but as I play with it some more I may find the perfect place to use this technique. Let me know what you think!
Yours in Photography, Bob
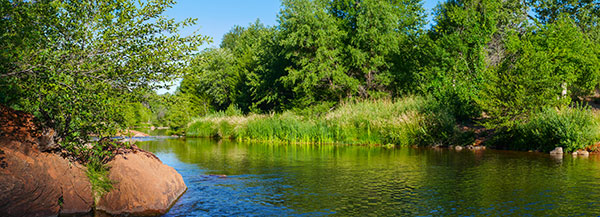
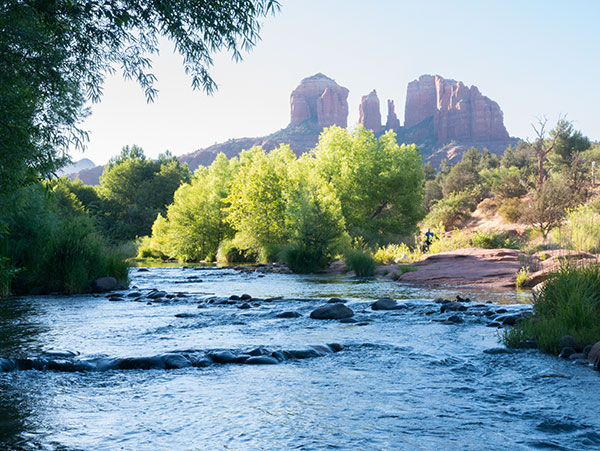
by successfulbob | landscape photography, Lumix GX7, Lumix Lounge, panorama, photography, photography education
Been enjoying the hikes more and more. This is on the Templeton Trail along Oak Creek in Sedona, Arizona. With the Lumix GX7 camera so light I’ve got it with me all the time… No excuse for seeing something I want to share and not having a camera at hand…
Used the Panorama setting to get in more of the creek view I was seeing.
 From the Templeton Trail Near Cathedral Rock.
Lens 35-100 f2.8 Vario at 35mm. Camera was held in the vertical position to get a taller file while still maintaining the panoramic photo dimensions. ISO 200 Exposure Settings – 1/640 sec. F 4.5 (pre-set by the camera) More panoramas and information on shooting panoramas here. https://chd.lzi.mybluehost.me/panoramic-photo-red-rocks
Hit the trails or hit the streets it’s a great time to be making images…
Yours in Photography, Bob
by successfulbob | landscape photography, Lumix GX7, Lumix Lounge, photography, photography education, video
The water dances, trickles and flows across the red rocks leaving music in it’s wake accompanied by the morning song of our avian friends…
Thought I’d share a video on beautiful Oak Creek at Red Rock Crossing in Sedona, Arizona. I am once again extremely fortunate to live in absolutely beautiful place. Here are a couple minutes of peace and tranquility. Turn up the volume sit back, relax and listen.
Two Minutes of Tranquility. Enjoy!
The Initial photo starting the video is an HDR rendition blended together from a five stop capture. Processed three of the images in Camera RAW and layered them together in ®Photoshop and used masks to blend them together. This allows me to process the image exactly the way I want without the strong ‘HDR’ look. The scene definitely called for some help in taming the dynamic range.
 Here’s the HDR version….
 Here is a single capture from the Cathedral Rock scene…
Images and video were captured with Lumix GX7 and the 12-35mm f2.8 Vario Lens. Just after sunrise for about an hour. I was not pushing things captured in Mpeg format cause I know I’m only going to make a YouTube Video. The files were processed in Adobe Premeire Pro. Been trying to learn the program but found it to be a bit deep (because it has so many possibilities) so I’ve been a bit slow to take it up. But I found on KelbyOne.com there are some great Premeire Pro intro videos from Brandon Ford that got me over the hump and this is my first official test.
By the way, if you are/were a NAPP member don’t let it lapse as you are now subscribed to KelbyOne training at the old NAPP rate of $99 per year. If you let it lapse you’ll only get back in at the higher rate. I’m finding the content there to be professionally produced and a great value. Tons of tutorials and tons of videos on all the Adobe products and they are producing more each week. Even at the higher rate it’s a great deal if you want to learn a lot from the best.
Yours in Photography, Bob
