by successfulbob | landscape photography, Lumix FZ 1000, Lumix Lounge, photography gear
Finally catching up with some of my posts after being on the road for an entire week working with the Lumix Luminary Team and helping to judge the PPA International Photographic Competition outside Atlanta.
Here’s an image from our first night in Sarasota. This was captured with the Lumix FZ1000, a camera I find in my hand on a regular basis because it is so versatile. As they say, the best camera to create an image is the one you have on you. With a built in 25-400mm f2.8-f4.0 lens that weighs under two and a half pounds it makes it pretty easy to have on hand.
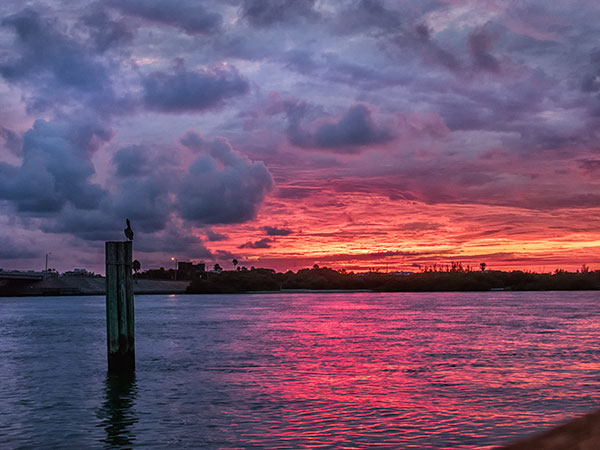
Sunset after processing with NIK Filters and Adobe Camera RAW Renders the scene closer to my memory of the scene. (OK maybe a little extra zing but not much)
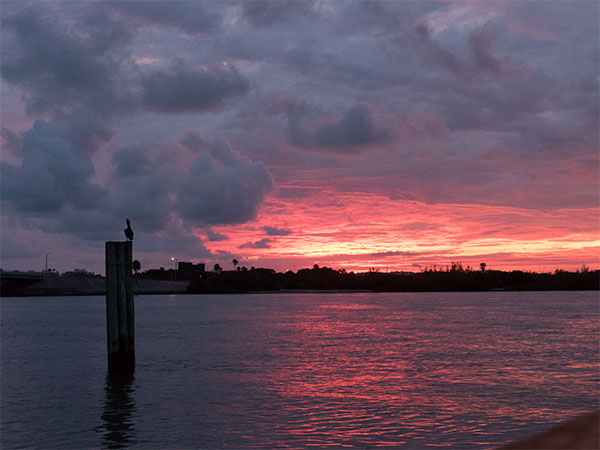
Capture straight from the camera. I could have preprocessed the image in camera but we were busy enjoying getting together with fellow Luminaries and even though we are all photographers we tend to ‘grab’ some images when we are not officially being paid for a specific job.
Yours in Creative Photography, Bob
by successfulbob | Lumix FZ 1000, Lumix G7, Lumix GH4, Lumix Lounge, photography, photography gear, video
Sarasota, Florida.
Two days.
Intense! But, fun!
We had the Lumix Luminary gathering over the last couple days where we get together and share ideas, techniques and new information about the Lumix cameras and their capabilities. They were long days but very productive. We broke into teams and created some videos together. Video not being my number one priority in my business I learned a lot. Saw quite a few ways to add some value for my stills clients through using video and some new ideas that were introduced.
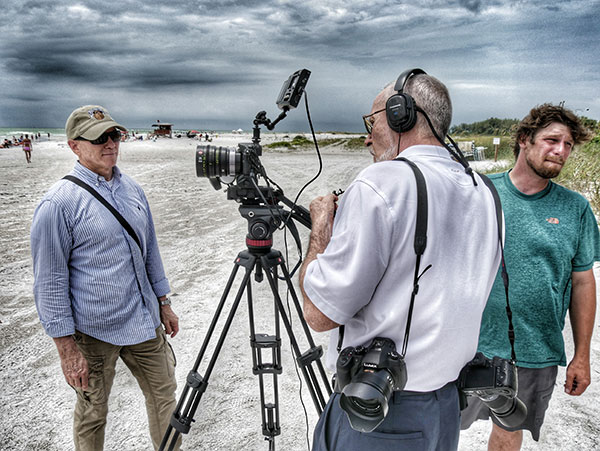
Here we are working on the beach. I’m getting the audio ready for the shoot and Armed with an FZ 1000 on one shoulder and a GH4 on the other. Image capture with the new Lumix G7 f8.0 200 ISO 1/640 sec It was shot by Dan using Tom’s G7 and 14-140 lens. He imported into his phone and messed with it using Snapseed. Added an HDR Scape layer and a Drama layer then used the Vertical Perspective under Transform and may have adjusted tone a bit..
(I’ll be sharing some work and features shortly from the G7. Pretty powerful camera!)
Sometimes as photographers running a one-man show our world can become a little insulated. Having an intense couple days with colleagues working and sharing ideas can be a great infusion of energy. Even if you can’t get together with a group like this I highly recommend at least getting together with a couple photographers and go out and shoot together for a couple hours. Then have a cup of coffee or an adult beverage or two. The relationships that you build doing things like this are wonderful!
Yours in Creative Photography, Bob
by successfulbob | architectural photography, commercial photography, Lumix GH4, photography, photography gear, photography lighting resources
Still working on photographing the Phoenix Airport Hilton after their eight million dollar refurbishing of the property.
It was great working with the staff while on the photo shoot. Everyone was as helpful as possible in getting the areas set for the photography. This makes the shooting day go better, smoother and leads to better photographs.
Sales manager Mike Manginelli was great in letting me know specifically what he was looking for. We were able to shoot to the IPad from the Lumix GH4 using the built in WIFI and Panasonic Image APP (free download) so he could see exactly what the camera saw as we worked out angles and ideas.
A bonus in operating and controlling the camera from the IPad (or IPhone or Android device) is when making multiple exposures to handle lighting situations with bracketing the camera is not touched. This allows for exact registration for blending various exposures using Adobe’s Photoshop Layers and Masks.
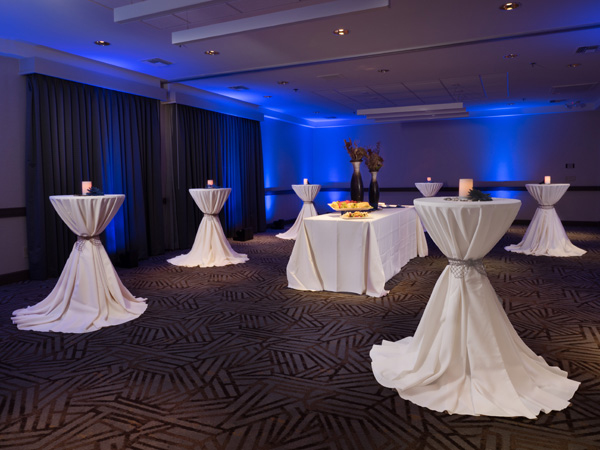
The Saguaro Room set for a reception.
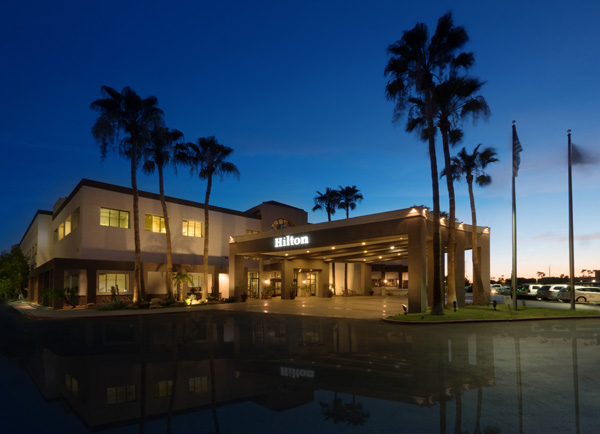
Exterior night image.
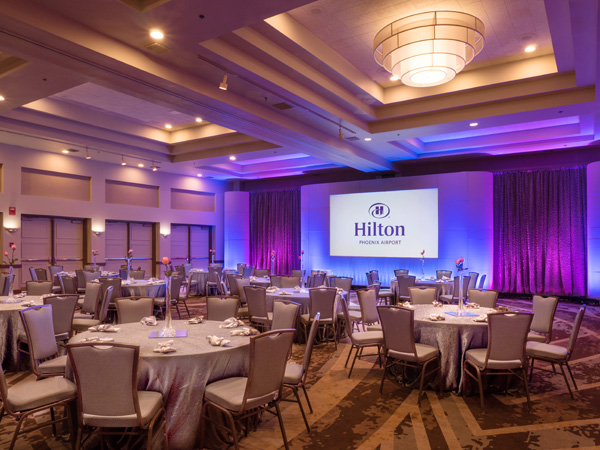
Ballroom set for meeting.
Another bonus to shooting from a remote system is being able to ‘paint the room’ with multiple pops of a flash and see the results as you go. These images are blended into the final scene adding light where necessary to fill shadows or creativity for esthetic reasons to add interest. I used a Paul C Buff light with a strip light box attached and a Vagabond battery pack to stay mobile. The Buff wireless triggers complete the remote set-up.
I’ve found the ability to ‘light my images’ with multiple exposures has made my shooting more efficient giving a better quality image to my clients. I spend more time in post production but my clients time is not wasted and I’m able to get the property rooms back online so there is little revenue loss when I photograph.
How do you work your interior and architectural shoots?
Yours in Creative Photography, Bob
by successfulbob | Lumix G7, Lumix GH4, Lumix Lounge, musician photography, photography, photography gear
Jazz singer Vivian Sessoms entertained at Sound Bites Grill the other night and here’s her image for the SBG ‘Wall of Fame’.
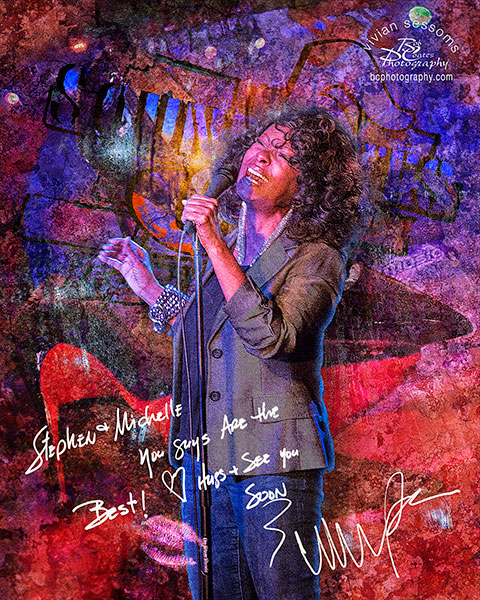
Vivian Sessoms in art treatment for the ‘Wall of Fame’
I was testing the new Lumix G7 side by side with the Lumix GH4. Both cameras used the same lens and same settings. ISO 3200 f2.8 1/60th sec. It shows me they are comparable and the G7 would make a great back up for the GH4. Price makes this a cool camera for those on a budget. The G7 does miss out on a few pro features on handling, like having to remove a tripod plate to get to the battery and SD card compartment. It also has smaller batteries and is built on a plastic body. But, image quality looks to be on a par. And, at half the price of the GH4 depending on your workload you might be willing to put up with a few non-pro features!
Here’s a sample of a couple stage captures from each camera with the same settings.
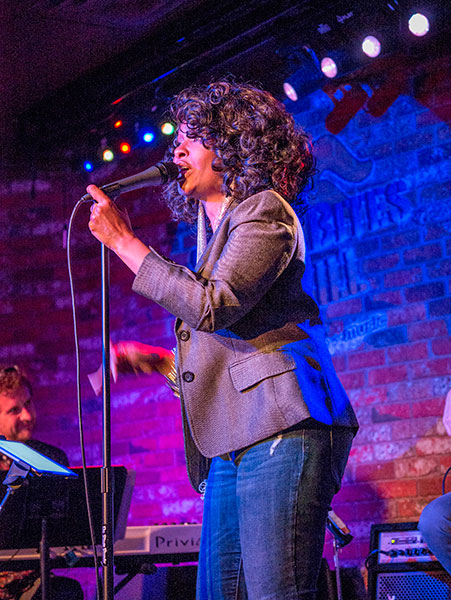
This image was captured with the Lumix G7.
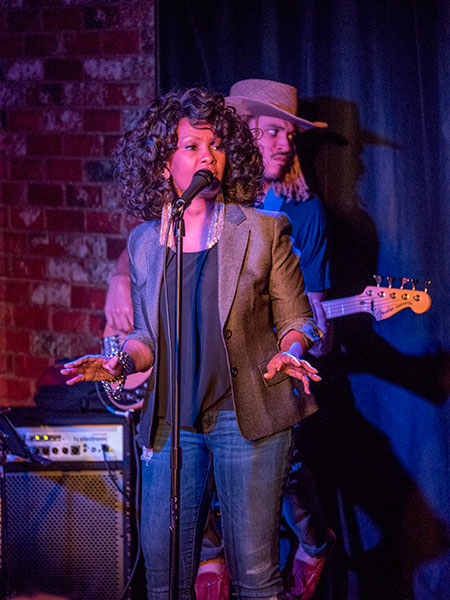
Captured with the GH4.
Yours in Creative Photography, Bob
PS – If you are ordering gear from Amazon it helps to support this web site and the info shared if you buy through any link on successful photographer. TIA!
by successfulbob | Lumix G7, photography, photography education, photography gear, photoshop tutorial
Just got my hands on the new Panasonic Lumix G7 – Lumix G7 w 14-140mm lens ($1098) or G7 w 14-42 ($798) – and have been putting it through some paces.
There are some beautiful desert plants that my wife has been landscaping the yard with vs having water-sucking plants since we live in the super dry climate of Sedona, Arizona. This is the bloom of the Apache Plume plant.

Apache Plume Bloom
Capture info
I used the 45mm f2.8 Macro to make the details of the ‘plume’ feathering jump. In order to get the most detail I set the aperture to f8 and used studio flash. Shoot through umbrella to the side and just behind the plant with soft reflector fill opposite. Black background paper lit with flash with snoot and 2 layers of blue gel. Used the Wifi from the camera to allow the Ipad to run the camera changing focus using the free Panasonic Image APP. Never having to touch the camera makes for better, easier blending because there’s no camera shake or movement.
Here’s How to Focus Stack
I captured fifteen exposures with focus through the image and used Photoshop to stack them together and achieve sharpness from front to back. Take the images into Adobe Camera RAW and tweak any color or shadow/highlight settings. From the Tools menu ask Bridge to Load Files into Photoshop Layers. Highlight all Layers in the Layers Palette. Under the Edit Menu > Auto-Align Layers. With all Layers still selected, Edit > Auto-Blend Layers with the Radio Button Stack Images Selected with Seamless Tones and Colors checked. Then go through your image and look for areas that might not have been blended perfectly by Shift clicking on the individual Layer Masks to see if there is a sharp image that might be blended better. **Note – Subjects that contain a lot of white will have more issues with Blending the Sharpness in this process than others with more color and contrast.
Initial Thoughts on the G7 (more to come in future posts)
This camera would make a great back-up to the GH4 if you are a pro on a budget. Controls are slightly different but not so much you would have a problem switching in the middle of a job or if you are doing a two camera shoot. Pros – VERY light weight, super-easy 4K Photo Mode, interchangeable lenses, image quality on par with GH4. Cons – Tripod plate needs to be undone to get to battery and SD card compartment, smaller battery, built on plastic body vs magnesium.
If you are really on a budget two or three of these cameras would make great kit to have pro backup capabilities.
Yours in Creative Photography, Bob
by successfulbob | Lumix GH4, Lumix Lounge, musician photography, people photography, photography, photography gear
There are two new inductees into the Sound Bites Grill ‘Wall of Fame’.
The RD Olson Blues Band played last week and rocked (blued??) the house. High energy blues from this five piece band had people squirming in their chairs and out on the dance floor. My wife Holly and I really enjoyed the music along with the rest of the patrons.

R.D. Olson Blues Band
Images of the band members were captured with the Lumix GH4 and the 35-100mm Lumix Vario f2.8 lens. This camera and lens combo gives me the density range to capture the highlights of the LED lighting and the deep shadows that come with stage spotlights. In addition, the 200mm lens (35mm equivalent) allows me to isolate the individual performers without disturbing Sound Bites guests as I photograph the live performance.
After downloading the images I select each performer and move them to a master file for compositing of the group for the art piece. Shadows and Inner Glows using Adobe Photoshop on layers help to give the individuals depth in the image. Multiple photographs of textures are added and Blend Modes altered to add the color and painterly effects.
RD was also selected by Sound Bites to also be featured as a single artist in addition to being on the ‘Wall of Fame’ as part of the band.
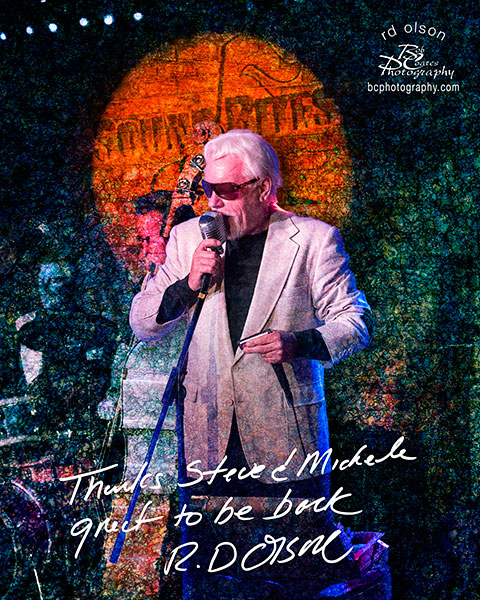
RD Olson
Blues On RD!
Yours in Creative Photography, Bob


