by successfulbob | black & white, infrared photography, landscape photography, Lumix G6, Lumix Lounge, photography, photography creativity
Infrared Photography on the Oak Creek
My job is tough!
Yesterday I took on the task of going hiking in Oak Creek Canyon in Sedona, Arizona to capture infrared photos. OK, maybe tough isn’t the correct word for this assignment. I love almost all aspects of working in photography. Getting out into nature and exploring is high on the list of the good parts.
I’m up in Oak Creek Canyon between Sedona & Flagstaff. The picnic area is called ‘Halfway.’ So named because it’s halfway between the hugely popular (& crowded) swimming hole known as Slide Rock and an excellent trail called West Fork. Halfway is a little less traveled spot as you have to scramble down a fairly steep embankment while climbing over rocks. Once down to the creek there’s a bit of rock hopping to navigate your way around.
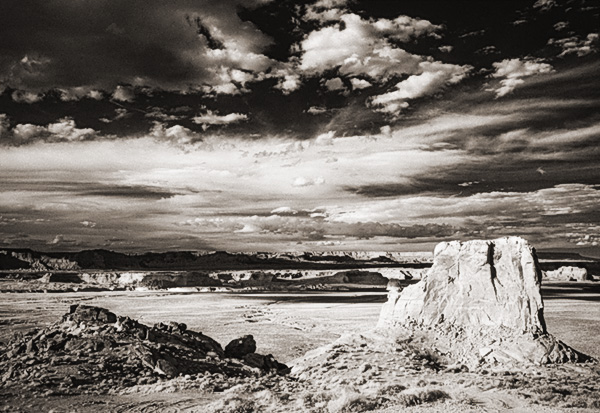
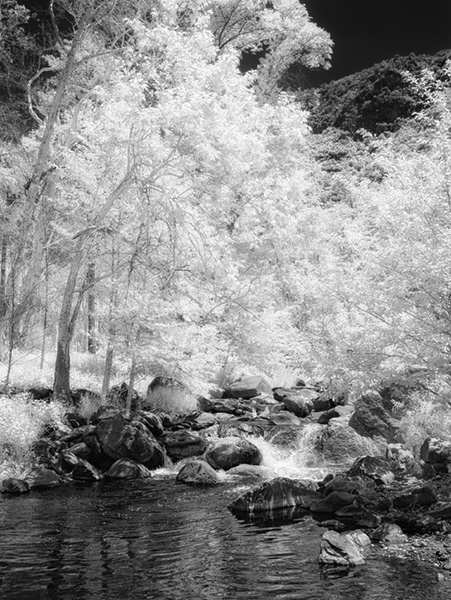
 LUMIX G6 20MM LENS F1.7 LENS @F9 ISO 160 1/200TH SEC
But I digress.
On to today’s thoughts on working the with a camera converted to infrared. I had my Lumix G6 converted by LifePixel with a standard IR filter ad it is working out pretty much as I had hoped it would. I find myself using the 20mm Lumix f1.7 lens quite often. It’s sharp, fast, light and has a very low profile. I guess at a 40mm full frame equivalent it pretty closely matches a standard field of view which I feel lends itself to most of my infrared captures.
As I make my IR captures I have been bracketing exposures. When I first started I was bracketing by five stops as I was learning how the camera ‘sees’ with the IR filter installed. I’ve now moved to a three-stop exposure bracket but I also set an exposure compensation adjustment depending on the dynamic range of the scene in front of me. I am capturing the images in RAW plus jpeg with the camera set to black and white. White balance is set to daylight.
The image above is two jpegs blended together to achieve the tonal contrast for which I was looking. After getting the tones blended in Photoshop using a mask, the Layers were merged and a trip to NIK Silver FX Pro 2 for some sharpening. I used the Structure and Fine Structure settings si tweak the sharpness and change the resulting layer blend mode to Luminosity. Only the luminous information is then transferred to the image. Then NIK Color FX Pro 4 was added utilizing the Glamour Glow to add some IR life to the highlights. The shadows were protected from the glow.
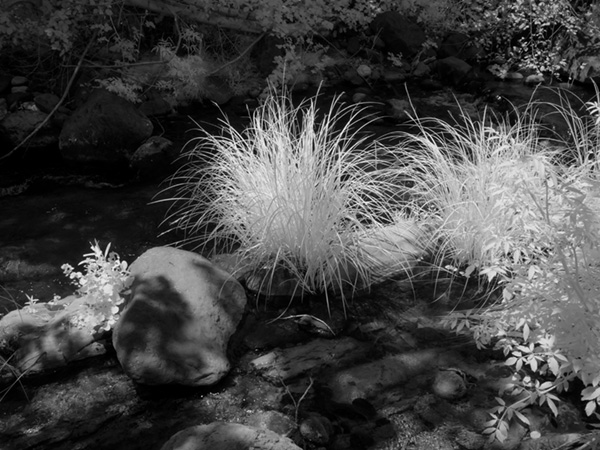 LUMIX G6 20MM LENS F1.7 LENS @F14 ISO 400 1/200TH SEC
This image was processed from a single jpeg which was opened in Adobe Camera RAW. Jpegs can be opened in the RAW editor to use the controls available but it does not have all the information of a RAW file. I was just trying to control contrast with this treatment so I didn’t feel the need to start with the RAW file. Exposure was adjusted as well as the highlight and shadow detail. A soft light layer was added for some dodging and burning. A vignette completes the treatment. I enjoy all the textures and tones of this scene.
Infrared photography can take midday, which is usually a tough time of day for making photographs and turn it into a blast.
That was my play yesterday. I created a few more scenes I’ll share with you tomorrow.
Yours in Creative Photography, Bob

by successfulbob | black & white, cloud photography, infrared photography, landscape photography, Lumix G6, Lumix Lounge
Stud Horse Point Infrared Photography – Page Arizona
Infrared imaging can add interest to a scene that otherwise would be OK but rather mundane. I have a Lumix G6 that I had converted to IR by LifePixel. It’s great to take an older camera that isn’t getting much use and have it converted to Infrared. Or if you don’t have an older candidate that will work you can but up a used camera and have it repurposed.
But why is it good Bob?
Some times of day are just not conducive to solid imagery. Usually, midday is less than ideal for making photos and that is when IR photography can shine especially when there are clouds and or trees in the scene. Here was an example where I wasn’t thrilled witht the lighting. We were hoping for great color in the sunset. You know how that goes. All looks good then falls flat. Rather than come home empty handed I kinda like the outcome of these.
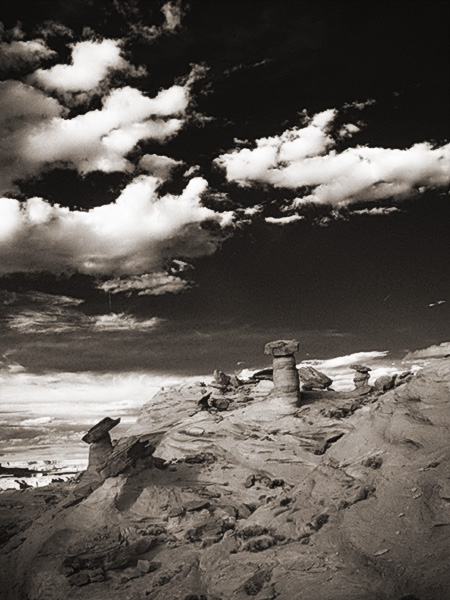
 Outside Page, Arizona – Stud Horse Point
 Hoodoos at Stud Horse Point
When capturing IR photos I tend to shoot in RAW + jpeg with the camera set to black and white. The black and white allows me to get a better sense of how the scene will render as the RAW image will come in with a magenta cast. I also bracket exposures as the camera’s meter and histogram are still ‘thinking’ in full spectrum color mode.
I picked the RAW images I wanted to process. Then output them to Photoshop and added some dodging and burning. Then took the image to NIK ColorFX Pro 4 to add some Glamour Glow and a little grain to emulate the look of film IR. As a final step, I evened out the overall color and added a light sepia tone over the image using a Hue/Saturation action.
Yours in Creative Photography, Bob
by successfulbob | black & white, cloud photography, infrared photography, landscape photography, Lumix G6, photography education
As you can probably tell by my lack of posting the last few days it has been extremely busy in bob’s world. Had a full two day shoot for the Sky Ranch Lodge after their remodel. I’ll share some photos with you as soon as the processing is done along with some of the techniques I used to get the images.
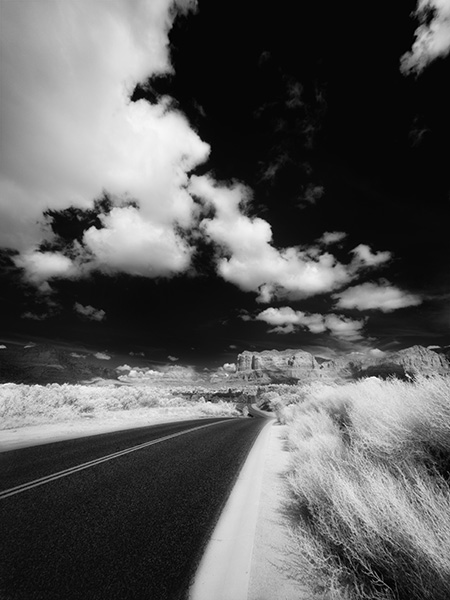
In the meantime, I did have a chance to process another image from my infrared photography. I really enjoy black and white images and the infrared adds another whole new dimension to it. I converted my Lumix G6 through LifePixel with a 750 NM (standard) IR filter. This gives you images that are on the pink side and of course need some processing to get them into final shape of Infrared BW images. As I practice and process more I am able to get a better range of tones throughout the photo.

Captured in the Village of Oak Creek, Sedona, AZ. Courthouse Butte is the main rock formation.

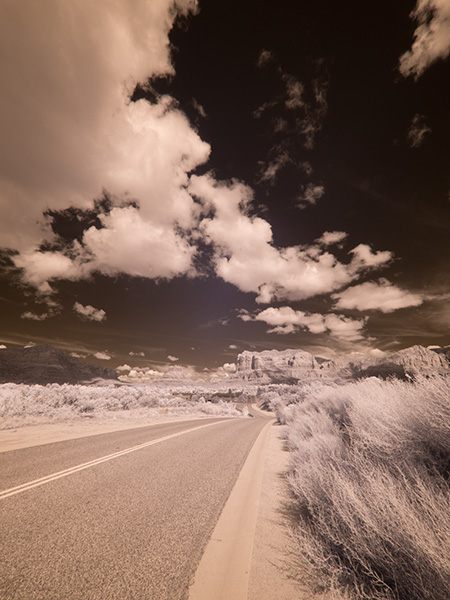
Here’s the IR image Straight out of Camera Note the pink cast. Finding I need to underexpose a bit in order to not loose highlights even though the histogram indicates it is with the scope. You have to remember that the histogram is letting you know about visible light not necessarily infrared exposure.
One of the really great things about having a dedicated IR camera is the ability to set recording for RAW + jpeg and have both images to work from in post production. If you shoot only in RAW you don’t get the processing from the camera. I set the camera to capture BW images so I can get a ballpark preview of the scene as I work.
You don’t need to convert a camera to IR you can always go ‘old school’ with a Wratten IR filter in front of your lens. The problem with doing that is your exposure time will be lengthy and focus can be a bit of a pain as IR light rays and visible light focus at a different depth on the sensor so additional calculations need to be made. (although the extended time might be cool for capturing cloud movement!) Might have to pick up an IR filter myself too…
Best part is infrared photography really opens up the mid-day time slot for creatively capturing images as it is usually too much contrast for regular photography.
Are you shooting IR yet?
Yours in Creative Photography, Bob
by successfulbob | infrared photography, Lumix G6, Lumix Lounge, people photography, photography creativity, photography education
The marriage theme continues from the Dia de Muertos (Day of the Dead) celebration at Tlaquepaque in Sedona. (see part uno)
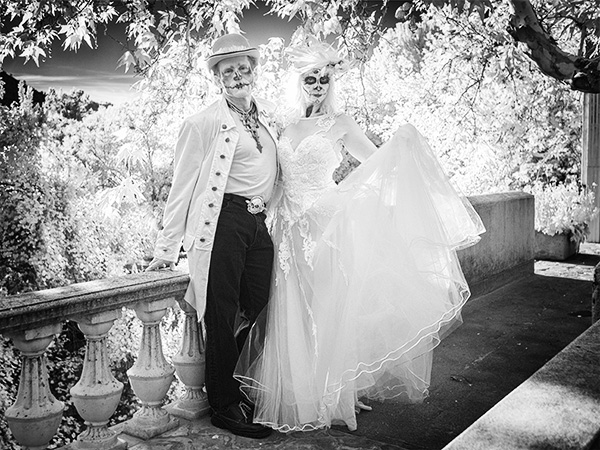
This couple was having a blast dancing with Mexican musicians providing music. They stopped and graciously posed for people as they wandered through the event. I asked if they wouldn’t mind posing for me where I could make the Infrared capture shine with deciduous trees as part of the background. Up the stairs we went…

Asking the couple to move to a different background made all the difference compared to just asking them to pose in among the crowd.
I’m still taking multiple exposures to make sure I still have detail in the highlights and the shadows, dark skies and bright leaves then process the files by blending them with Layers and Masks in Adobe Photoshop. This was a simple blend with the darker Layer on top I made a Feathered oval Selection using the Marquee Tool and Refine Edge. This allows you to see and tweak the results before applying the Mask. Even with the Bracketing I did end up loosing detail in the bride’s hair on the sunny side.

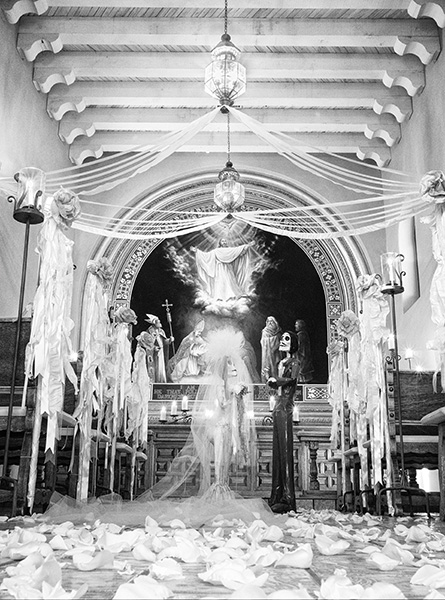
The wedding theme continued at the Chapel that was set for a Day of the Dead wedding.
As you might see I am really enjoying using the Lumix G6 that has been converted to Infrared by Life Pixel. I choose the standard (750nm) filter for my conversion because I wanted to get the traditional IR look exactly as I’d like it.
Yours in Creative Photography, Bob
by successfulbob | infrared photography, Lumix G6, Lumix Lounge, people photography, photography, photography creativity, photography gear
Obviously infrared imaging is not for people photography. Dead eyes. Super high contrast. Blown out highlights. Definitely not for people… Unless you are doing something artsy with the scene being most important and people are a relatively small element in the overall image OR you are at a Dia de Muertos (Day of the Dead) Celebration.
And, I just happened to attend one at Tlaquepaque in Sedona on Saturday and found a few people in costume and face paint to pose for me.

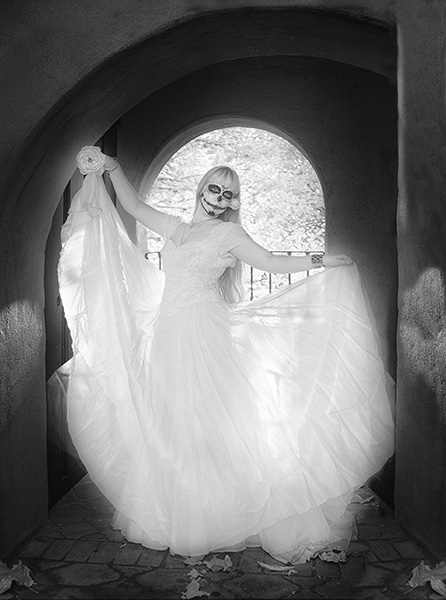
Had a lovely ‘Day of the Dead’ model join me for a quick photo session in a back lit alcove.

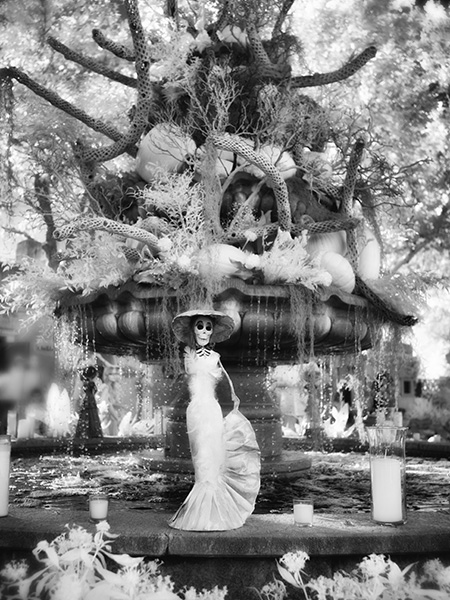
Paper mache Caterina on the fountain. Seems like it was a day for brides as I worked…
If you are unfamiliar with the Day of the Dead celebration it is a Mexican Holiday when families get together and morn and celebrate the passing of loved ones. The celebration is to help those who have passed to move on in their journey beyond.
Images captured with the Lumix G6 and 20mm f1.7 pancake lens. Converted to IR by Life Pixel. I had the
Proper tool for the job. I think infrared works for this situation. How about you??
Yours in Creative Photography, Bob
PS – More tomorrow…
by successfulbob | infrared photography, landscape photography, Lumix G6, Lumix Lounge, photography, photography creativity, photography education, photography gear
While on the mountain trip we rode off through the wilderness. Can you say “Curvy Roads!” boys and girls?
Lots of winding roads through the area but it led to some beautiful places. I had the Lumix G6 that has been converted to Infrared capture by LifePixel. It gives the image a pinkish cast straight out of the camera. I’m starting to find my groove in processing for the final Infrared photo look I am going for…

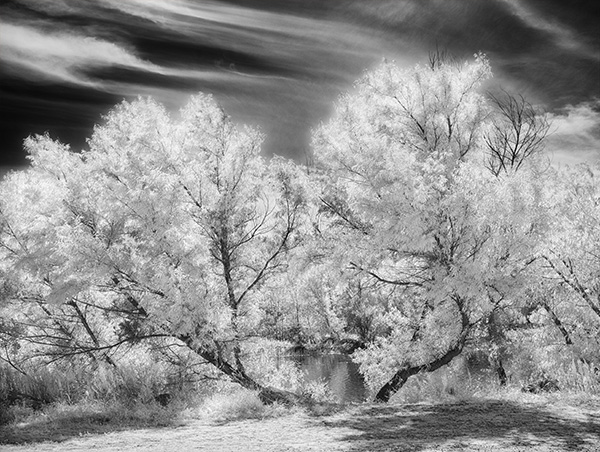
I enjoy how these trees framed a little window into the water beyond.

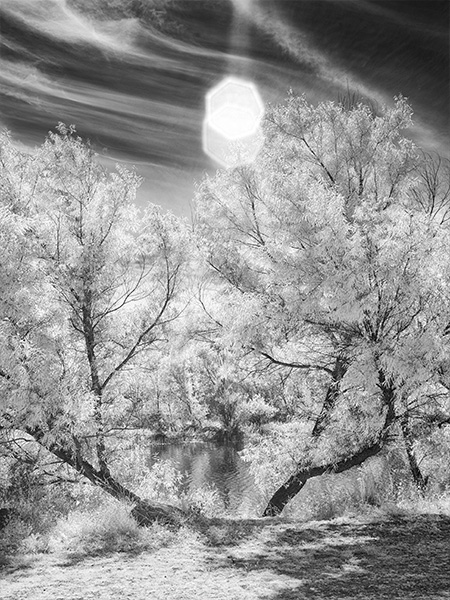
Same trees different composition with a witness to how careful you need to be in shielding your lens from a direct sun hit. Although in this case I think it’s a happy accident and enjoy the flare that found its way into the frame.
Here’s my workflow at the moment as I learn more how the camera ‘sees’ IR light. I capture the scene in RAW plus jpeg with the camera set to capture a black and white image. This give me a pretty good preview of what the IR image will look once it is processed. But since I am capturing the RAW images at the same time I also get all the information that was presented to and captured by the camera for tweaking in post processing. Having all the color information in different channels allows for some very specific processing that would not be available if only the Luminous information was saved.
In addition to the RAW plus jpeg I also bracket exposures. At the moment I am bracketing by seven stops to learn how far to over and/or under expose any particular scene.
Then I choose two of the separate RAW captures with one giving me the tones for the foliage and one for the sky. I process these in Adobe Camera RAW. Then using Masks I blend the two images together feathering the areas using the Brush Tool. I Save the file and merge all into a Layer on top preserving the Masked Layers just in case.
Then I take the file into NIK Silver FX Pro2 to process for Black and White because I still have the color information in the file I have more options for tweaking individual tones. Then I will process the color Layer one more time to vary specific areas even more. Then with the tow BW processed Layers I blend those together using Masks for the final tone blend. Then depending on the look I am going for I may process this Layer in NIK Color FX Pro4 using Glamour Glow and Mask those changes where necessary.
More IR images tomorrow.
Yours in Creative Photography, Bob

 LUMIX G6 20MM LENS F1.7 LENS @F9 ISO 160 1/200TH SEC
 LUMIX G6 20MM LENS F1.7 LENS @F14 ISO 400 1/200TH SEC

