by successfulbob | landscape photography, Lumix G9, photography creativity, photography gear
Interpreting the Red Rocks – Juuuust a Little Different
If you have followed this blog and my work for any length of time you know that I often like to take my images further than a ‘straight’ photograph. I have found a weird thing while working on this process. There are times to get a certain look you need to make what I would normally consider a ‘bad’ photograph. One that is either under or overexposed to create the vision in your using certain textures.
Here’s a case in point. The density range for this image was huge in that I was shooting the flower in the shade and the background was in full sun. I originally bracketed this scene to get a ‘correct’ exposure. I processed that, but when I went to work, I found that I had better results with the image that was a single exposure rather than having all the detail that Aurora HDR 2018 software would provide.
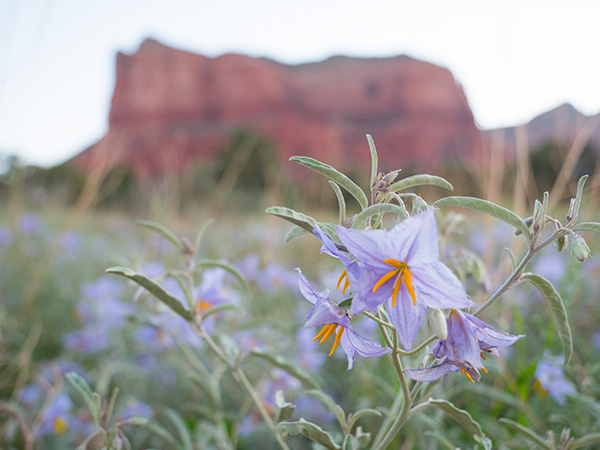 Here is one of the bracketed images slightly over-exposed. Little to no detail in the sky.
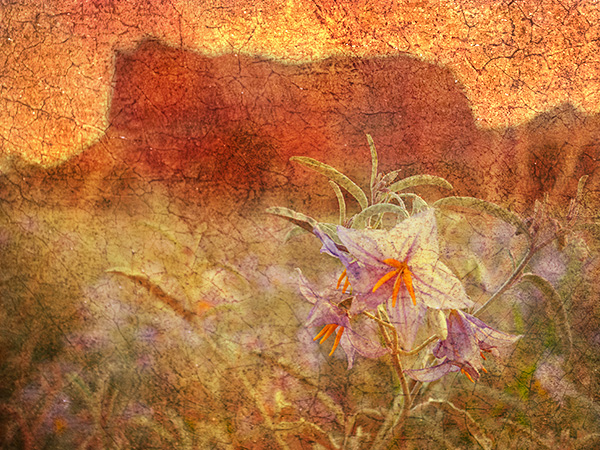
The little to no detail in the sky gives the texture a chance to shine. I used texture from a small section of an old painting in various blend modes to achieve the image below.
 Here is my artistic rendition of the image.
I think the plain image needed some help other than making a full range of tones visible. I work photos in many different ways before I find the vision for which I was looking.
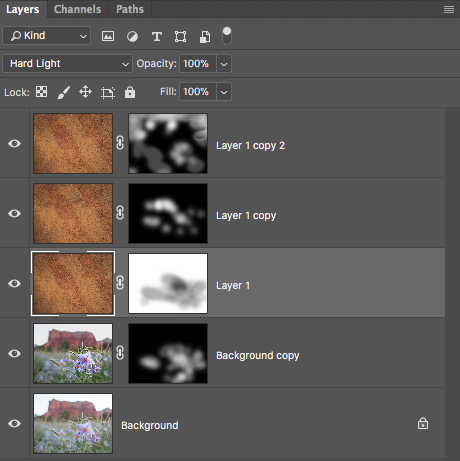 Here is the Photoshop Layers Palette from the image above. Note: all Layers had a different blend mode applied and Masks were used to extract or cover the information I did or didn’t want.
Lumix G9 with the Leica DG Vario-ELMARIT Professional Lens, 12-60MM, F2.8-4.0 was used for this capture. The fully articulating screen is helpful when framing an image where the camera is low to the ground. Saves getting down to try and look through the viewfinder and also save work in the laundry for clothes that have been doused in dirt!
Yours in Creative Photography, Bob
by successfulbob | fine art musician portrait, fine art portrait, lighting, Lumix G9, musician photography, people photography, photographer of musicians, photography, photography gear, photography lighting resources
Studio Photography of a Harp Musician
I enjoy working with creative people. It’s a blast. Creative folks tend to bring an extra little something to the photo session. I was working with Sedona musician Peter Sterling the other day. He had some specific thoughts on the session we were photographing for some headshots and CD cover art.
Once an idea is put forward, then it’s time to tweak the lighting to create the mood and feeling needed. We started with a high key background then went to a low key background with more dramatic lighting.
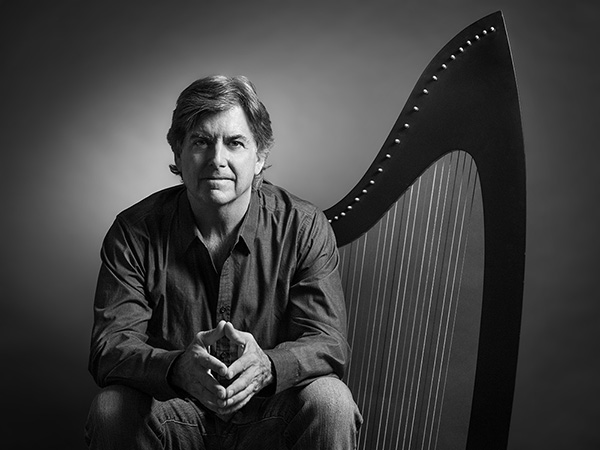
One of the first images from the session. * setup described below 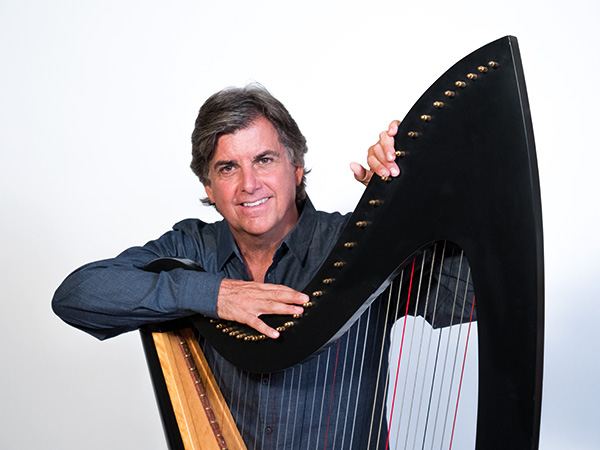 Harpist Peter Sterling
Above and below are unretouched photos on a high key background. Peter was an excellent subject as he made excellent eye contact with the camera and was easy to get relaxed. He made my job pretty easy!
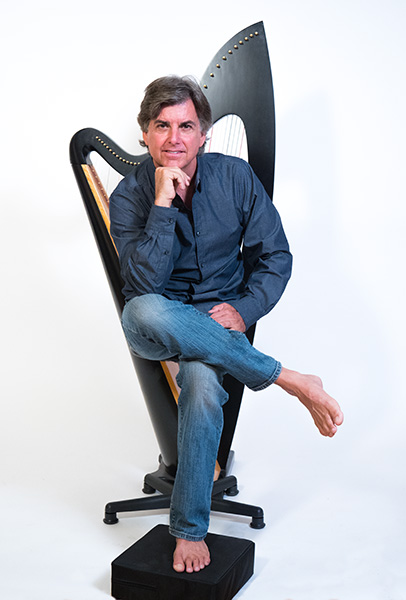 I liked this one as a different look but wasn’t thrilled with the foot pad and stool. I wanted to crop in but it has a very casual feel, and it keeps growing on me.
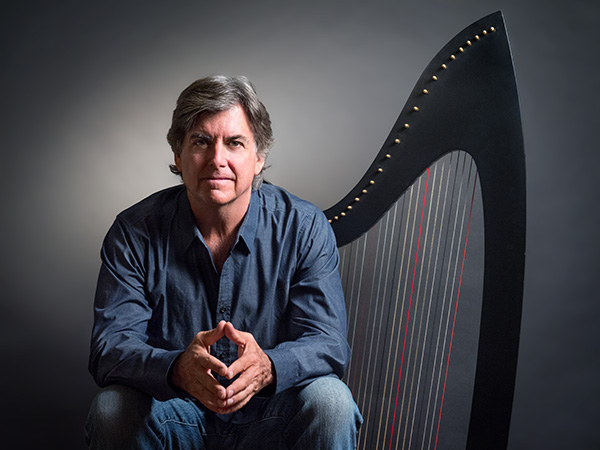 Moved to a black background and worked on a more moody look. Peter asked me to retouch this one, and I like it a lot! ** the setup described below
 When I do final retouching for artists, I always include a black and white version. This is often way better than sending off a color image and letting the newspaper or magazine do the conversion.
* White seamless backdrop with a Fiilex 360ex Variable LED light with 24×36 inch softbox as main light (camera right) Camera left another light with a smaller softbox used as fill.
** Black seamless backdrop and lights as above but adjusted for more drama. A 5-inch Fiilex Fresnel attachment was added to another light for the background
Images were captured with the Panasonic Lumix G9 and the Leica DG Vario-Elmarit 12-60mm f2.8-4.0 lens and processed in Adobe Photoshop
Yours in Creative Photography, Bob
by successfulbob | landscape photography, Lumix G9, photography, photography gear
Red Rocks of Sedona – Part Two
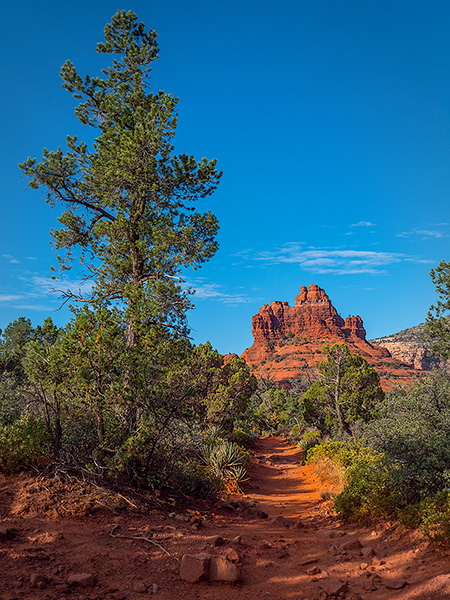
Since I have started back to hiking through the red rocks in Sedona once again, I’ve had a great time making images that show the best part of hiking. For these images, I was using the Lumix G9 and the 12-60mm Leica DG VARIO-ELMARIT f2.8-4.0 lens. This combo has a substantial reach and weighs in about three pounds which is hugely manageable on trails that are considered wilderness by the forest service. Wilderness trails mean clambering over, up and down medium size rocks, so the weight is a factor.
Wilderness area trail photo of the back side of Courthouse Butte – Sedona, AZ
As the trail moves toward another iconic feature called Bell Rock
Meet my twisted friend the juniper.
Lots of interesting junipers litter the sometimes otherworldly landscape of Sedona. Fun fact – the seeds need to pass through a bird to germinate.
This from an article on Lubbock Online by ELLEN PEFFLEY who taught horticulture at the college level for 28 years, 25 of those at Texas Tech, during which time she developed two onion varieties. She is now the sole proprietor of From the Garden, a market garden farmette. You can email her at gardens@suddenlink.net.
“The fruit botanically are cones but, unlike pinecones that are dry and open, the fleshy and fused closed scales of juniper resemble berries, thus the reason fruit of juniper is usually referred to as a berry. Berries mature over 18 months, at first green and turn a dark-blue purple or bluish color as they mature. Berries are visible during the winter months. Each berry develops six triangular, hard black seeds, which are eaten and scattered by frugivorous birds.
“A word for the word jar: frugivorous, defined by Merriam Webster as fruit-eating. Fruit is the preferred food for frugivorous birds, which swallow the fruit whole, digest the fleshy scales, pass the hard-shelled seeds through the gut and disperse the seeds. This is why seedling junipers pop up in unusual surroundings.” http://www.lubbockonline.com/life/2017-01-09/peffley-juniper-berries-sought-birds-food-flavor-base-gin
Yours in Creative Photography, Bob
by successfulbob | landscape photography, Lumix FZ2500, photo walkabout, photography, photography gear
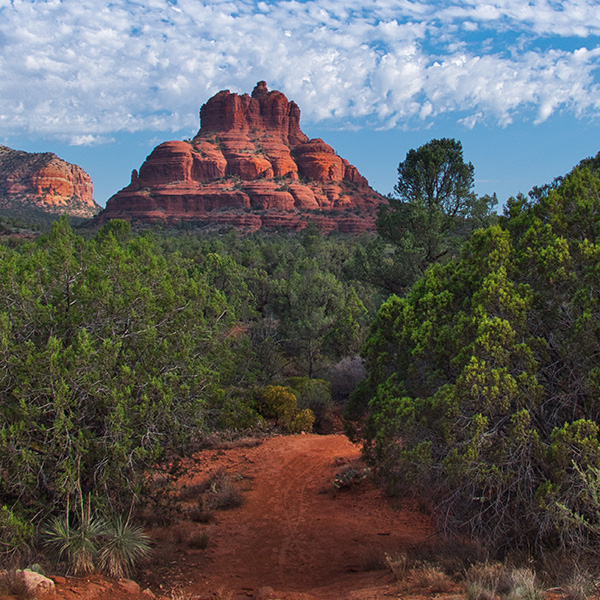
Red Rocks of Sedona, Arizona
I am incredibly fortunate to live in a picturesque area filled with red rocks, blue skies, and bounteous wildlife. I carry a camera with me wherever I go. I used to try to do this in the past but found myself parking my camera when I wasn’t officially working because the weight was uncomfortable. As a Panasonic Lumix Ambassador, I find that I have a camera with me at all times because the gear is lightweight and gives me the quality I need.
 Path down to Bell Rock in Sedona made with FZ2500
My quest for lighter weight gear was prompted by my wife Holly who pointed out that I was hauling thirty-five pounds of photo gear with me on personal trips. When I said, “What’s your problem? You aren’t carrying it.” She replied, “Neither are you as you often leave the gear in the room because it is so uncomfortably heavy. My wife is a brilliant woman who knows how to pierce my sometimes thick skull.
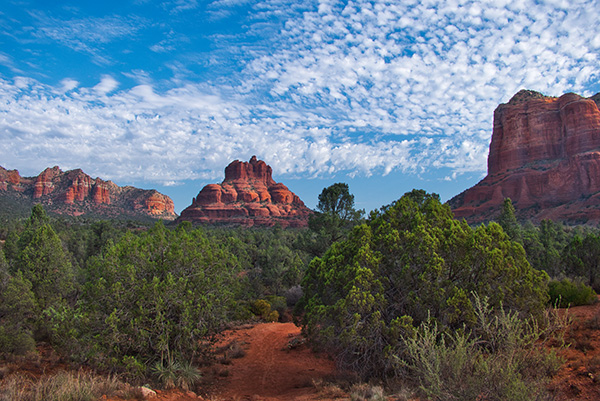
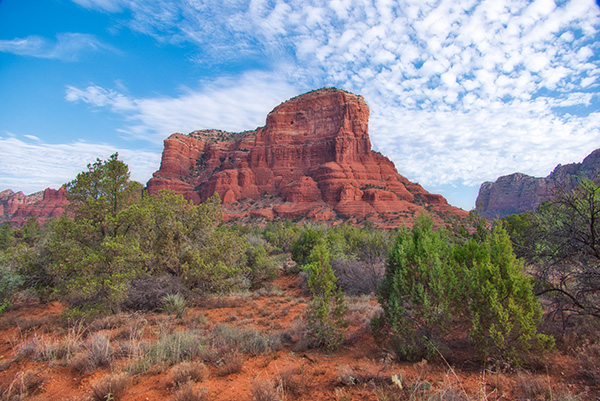 Courthouse Butte – Images processed with Adobe Photoshop and Skylum’s Luminar 2018 **
Today I’m featuring the Lumix FZ2500 which is a prosumer camera. It can do almost everything as it is an all-in-one with a zoom range of 25-480mm and tons of features. The FZ2500 is a little under 2 1/2 pounds. The beauty is that it can focus in macro mode almost as close as you can get the camera to the subject. With the built-in f2.8-4.0 power zoom lens, it has a reach of 480mm optical. That’s a long way!
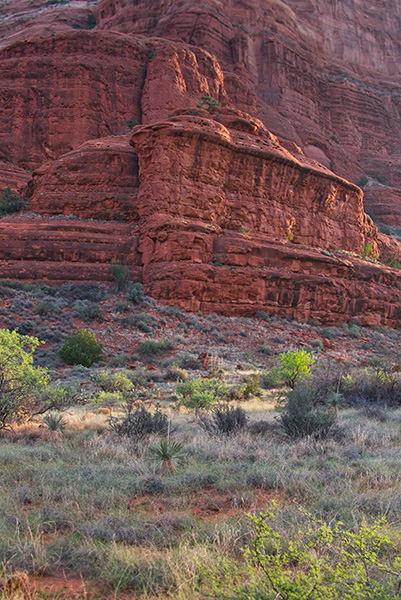 Detail of Courthouse Butte
One more thought is that many times a crop of the photo can be much stronger image and tell the story in a better fashion. Here’s square crop of the top photo in the post.
 A stronger rendition of the top photo with a square crop.
Yours in Creative Photography, Bob
PS – Take ten bucks off Luminar or other Skylum software with the coupon code – COATES
by successfulbob | commercial photography, Lumix G9, photography, photography education, photography gear, photography software
Tether the Lumix G9 Camera
I was working on a commercial job photographing product for the Crystal Magic website today. I’ve got to tell you the tethering experience with this camera was sublime. I know that is some pretty intense emotion for working with a camera. But, if you’ve worked with other systems that don’t hook up quickly to the computer or drop the connection in the middle of a shoot, numerous times, you know exactly how I feel.
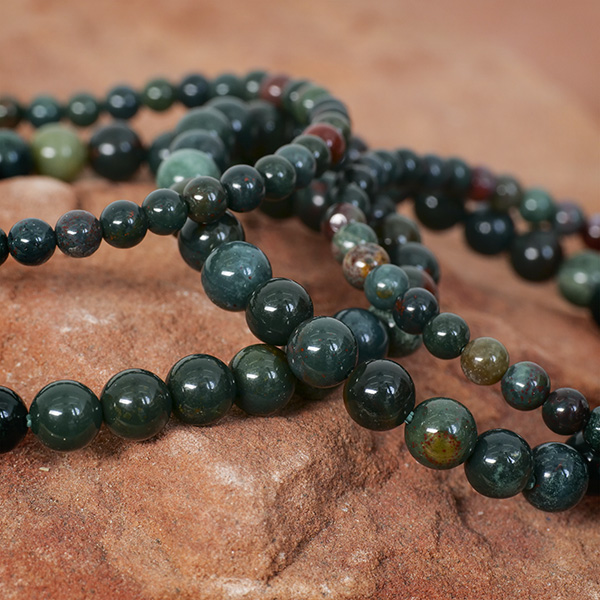
 Here’s one of the finished beauty shots of the bracelets showing the detail and closeup color.
I’ve been shooting with this set-up for a while and realized I hadn’t shared the ease of this and how wonderful it is when you are working on set with a designer or other creative. When they can see exactly what is happening with the live view, it speeds the setup time immensely. And, then immediately see the finished exposure seconds later, while moving RAW files, well what can I say? Wahoo!
I was working with Molly from https://www.crystalmagic.com, and we were shooting a large number of bracelets that needed multiple shots of each. With Molly getting confirmation on each Item and angle as we worked it sped up the process immensely.
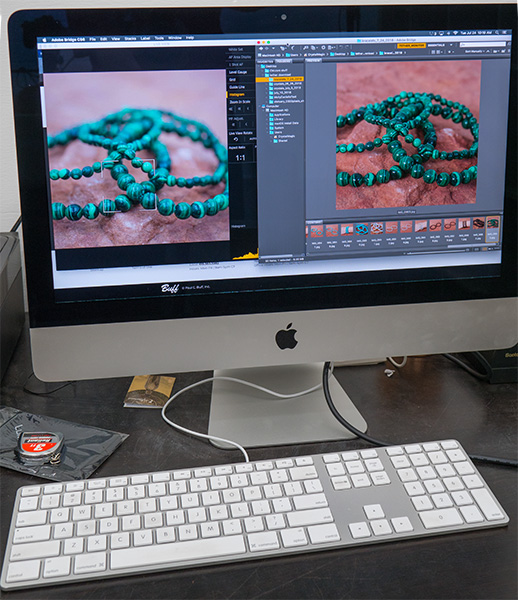 Screen showing Live View from the with Adobe Bridge on the right with the captured photo
With the free download of Lumix Tether which you can get with Lumix G9 camera ownership, you can control the camera, use Live View and move images to your computer in a snap via a USB cord. I shoot to a folder on my desktop and link Adobe Bridge to that folder. When an image is photographed, you can see it almost immediately.
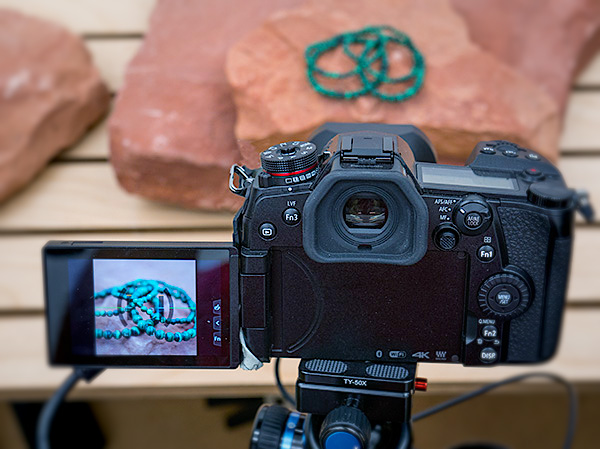 Lumix G9 on set. Note that the camera is set to show what the image will look like in a square format.
All images on the website are to be square aspect ratio. The camera is set to show that to make it easier to determine composition. It’s a great feature, but in case you want to view the entire image in 2/3 or 4/3 format after the fact you can strip away the crop and see all of the photos, but only if you shoot in RAW. If you shoot in jpeg, the crop factor is baked into the file.
In a couple of weeks I will be doing a video on the full use and ease of setup on the G9 and Lumix Tether system.
Yours in Creative Photography, Bob
by successfulbob | black & white, infrared photography, landscape photography, Lumix G6, photography, photography creativity, photography gear, photography software
Photographer Muse – Part Two (or Deux if you prefer)
I shared how much I enjoy working with Pash. I can’t give her enough credit for coming up with concepts she would like to pursue that lead me to new imagery. She knows how to move, and hold a pose, when necessary. Both are equally powerful skills. See my original post about my muse here.
Learn more about Pash and her work with modeling, mask making, performance and more here.
And now to the images.
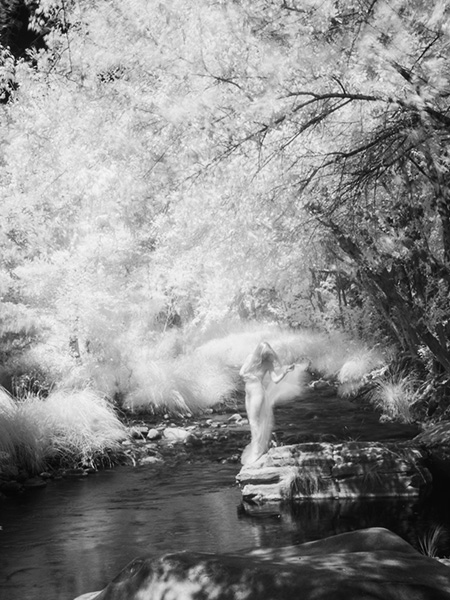 This image is pushed to high exposure.
Going very high key with the exposure of the image with the ND filters in place allow the wind to play a part giving an even more ethereal feel to the image as the leaves and cloth wrap blow gently.
ND filters are by Tiffen. It’s the Pro100 package which includes the holder, a 1.2, and a 1.2 graduated filter. For this shoot, I had a 3.0 and the graduated filters. You can buy much less expensive filters but in ND you get that for which you pay. These are very thick optically pure glass filters.
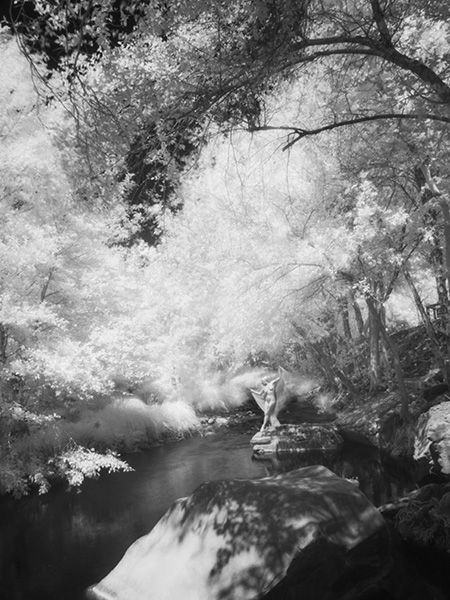
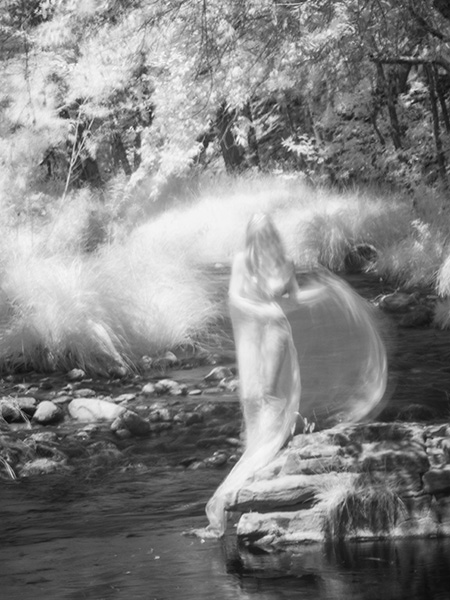 This one turned out a bit spooky!
 All the images were photographed in the same space, but all have a different feel.
A different view of the creek and the amount of space my model Pash takes up within the frame makes for a very different look for all the photos. Let me know which one is your favorite and why. It would be interesting to see the various responses.
All images were created in Infrared made with Lumix G6 converted by LifePixel.
A 14-140mm (28-280mm 35mm equivilent) lens was used. This allowed for the significant changes in framing without spending time swapping out lenses. Files were processed with Adobe Photoshop and Skylum’s Luminar 2018.** Some images were givin a little extra glow. I set up a preset in Luminar to get the image close to where I wanted then tweaked from there.
If you haven’t captured photos in infrared with a digital camera here is what a file looks like when downloaded in RAW to the computer.
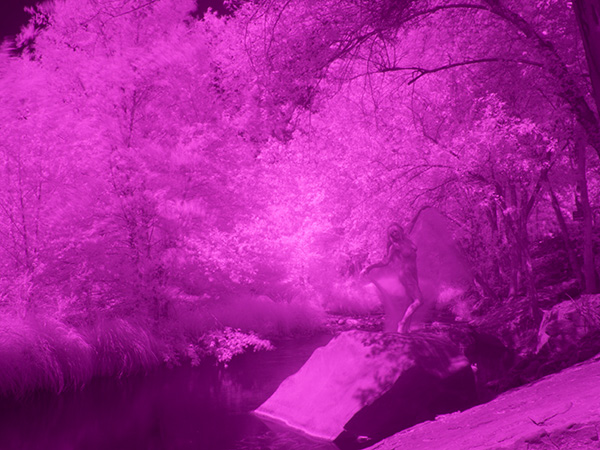 SOOC Infrared RAW file.
The files captured in the IR spectrum need some work as you can see. The nice part of using the Panasonic camera with live view set to monochrome allows you to get a better idea of what the final image will look like. If you shoot RAW plus jpeg, you will end up with a magenta version as above and a black and white version. Can be very handy when you first start shooting IR.
Yours in creative Photography, Bob
PS – Save $10 on Luminar 2018 by using the Promo Code COATES