by successfulbob | bird photography, Lumix FZ 1000, Lumix Lounge, photography, wildlife photography
Had the opportunity to take a few days off and travel to the mountains of New Mexico near the town of Silver City. Stayed in a cabin in the woods with and old friend of ours from St Thomas, USVI… Reminds me of an old joke. “To the woods, to the woods!” “Anywhere but the woods!!” “ANYWHERE???” “To the woods….”
But I digress I did bring some cameras with me to play with.
Probably the best all around camera for travel and convenience from Panasonic is the Lumix FZ1000. I like if for it’s fast glass, range of 25-400mm with a digital zoom option to take it to 1600mm and super light weight about two and a half pounds. Here are a couple photos from the FZ near the cabin.
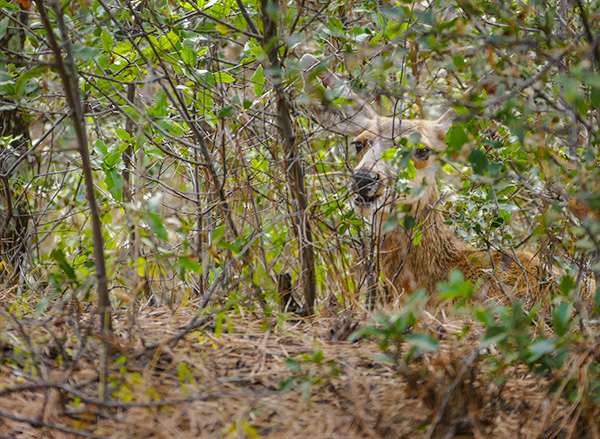
Nature’s camo! If I hadn’t had the camera set to a shallow Depth of Field that deer would be almost invisible.
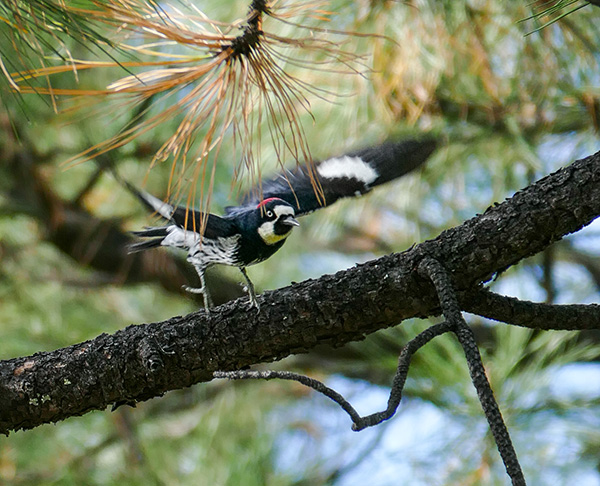
These woodpecker were flitting from tree to tree in search of their next snack. Having a high perch on an upper deck made photographing them relatively easy. The 400mm reach of the lens didn’t hurt either.
Don’t forget to take your cameras with you on holiday. It’s a great time to learn new settings that can help you get better images while not under any pressure…
Yours in Creative Photography, Bob
by successfulbob | photography, photography - art quote, photography education
Sometimes I head off on a tangent tapping into quotes from painters, writers, poets, coaches and others. Today let’s get back to a quote from a photographer. Former Magnum Photographer Wayne Miller documented war, black families and was a Life Magazine photographer among his other photographic endeavors.
A Time Magazine memorial article when 94 year old Miller passed away in 2013 started this way, “To photograph mankind and explain man to man — that was how legendary photographer Wayne Miller described his decades-long drive to document the myriad subjects gracing his work.”
Here’s the Photo Art Quote from Wayne that caught my attention.
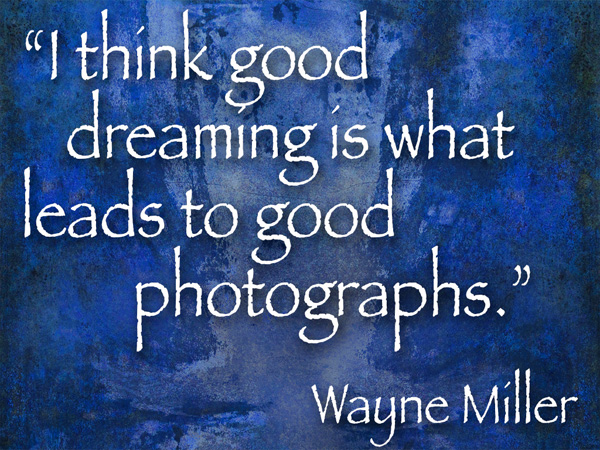
“I think good dreaming is what leads to good photographs.” Wayne Miller
Simple ten word thoughts like these lead me to do some searching to find a way to make my images stronger and a bit different from those that have created before me. I proudly say that i stand on the shoulders of those photographers that have come before me. Without them photography would not be what it is today. When you take strong ideas and then build upon them you come up with stronger images.
What is dreaming? According to Wikipedia, “Dreams are successions of images, ideas, emotions, and sensations that occur usually involuntarily in the mind during certain stages of sleep.” An idea to capitalize on your dreams is to work to retain them after the fact is to have a notebook and pen or recorder next to your bed. If you don’t jot down the ideas that come to you in dreams within a few moments of wakening they go out and become part of the ether again.
To my mind photographic dreaming is a culmination of all the information you place in front of your eyes. Movies, books, photographs, impressions from your travels and added to that your imagination mixing all of these elements together. This can also be done while you are awake to have more control. Give yourself permission to day-dream. I know it was probably knocked out of you at an early age with parents and teachers telling you to, “Stop woolgathering!” “Pay attention!” “Day-dreaming is a waste of time…” Now you don’t want to do it all the time, but you do want to let your mind wander and play. Playing is one of the best ways to learn and develop new ideas and concepts.
What do you dream about? Have you found ways to incorporate your dreams into your photography?
Yours in Creative Dreaming, Bob
by successfulbob | cloud photography, infrared photography, landscape photography, Lumix G6, Lumix Lounge, photography, photography creativity, photography education
Live, learn and practice some more.
This is the continuing story of learning to see and capture infrared images with my newly refurbished Lumix G6 camera from LifePixel where I added a straight IR filter to the camera… (see Part One or Part Two)
Photographing with a camera that has had it’s sensor replaced by with an infrared filter makes IR photography MUCH easier than the olden days of film when fogging a roll was easy and focusing not so much. But as with all things photography making it easier doesn’t necessarily lead to stellar results. You still need to learn to ‘see’ in infrared. A helpful tool is the use of photographing in RAW +jpeg. You can set the camera capture mode to black and white The capture is in color AND black and white. If you have what you need and are happy with the ‘natural’ in-camera capture in black and white you are ready to go…
So far I am not.
RAW file to the rescue. As you saw in part two there are multiple ways of addressing the final IR image and many ways to get to the final image you have in your brain. We still have the words of Ansel Adams to fall back on to create a more artistic rendition of a scene. Paraphrasing for today’s world here, ‘The RAW capture is the score, the processing and final print the performance.’ Just as a conductor can get more out of his orchestra but pulling exhorting his individual musicians to do their best we can manipulate each pixel in each color space to give us the tones we desire.
Some of the things I’ve dabbled with…
Two or three different processing pulls from the RAW files for different areas of the image.
NIK Silver FX Pro 2. to convert to black and white and tweak ‘colors’ into the tones I was looking for.
Channel Mixer Adjustment Layer after the file was open in Photoshop.
Black and White Adjustment Layer.
Hue Saturation Adjustment Layers.
And mixing and matching all of the above techniques to taste…
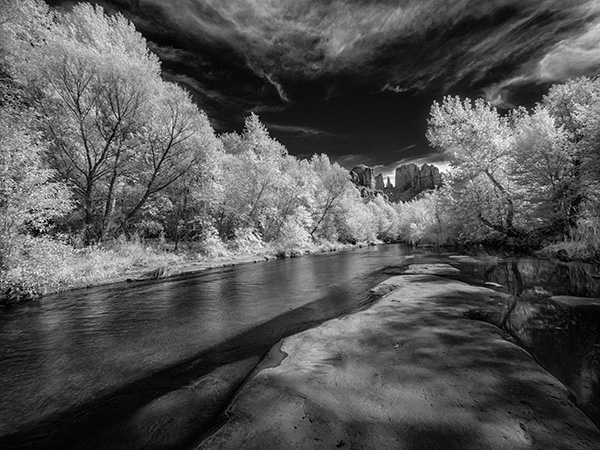
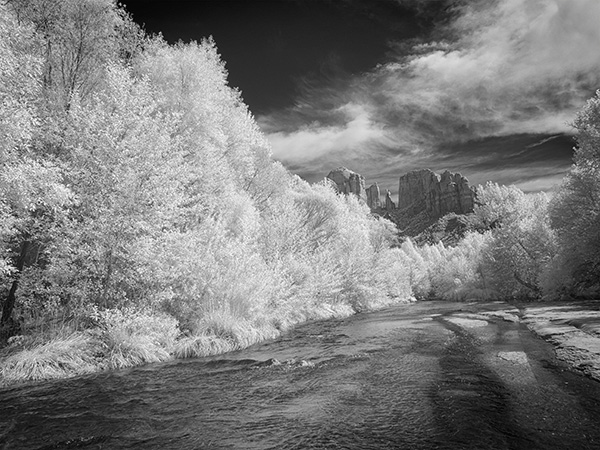
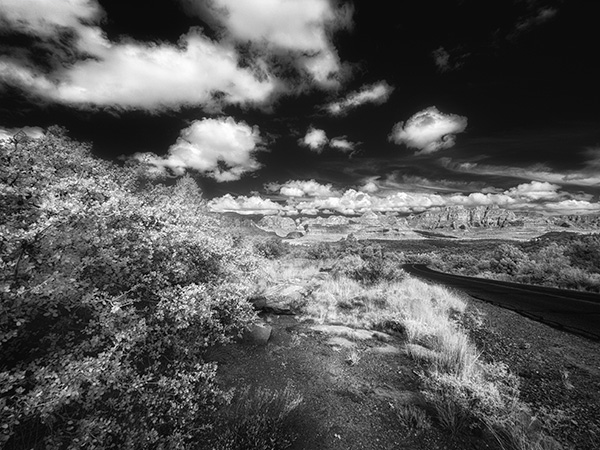
We don’t have a lot of deciduous trees in Sedona, but the banks of Oak Creek lead a parade of trees down from Flagstaff. Having the color information available in the file and Layers and Masks in Photoshop allowed me to create the contrast and tones I was looking for…
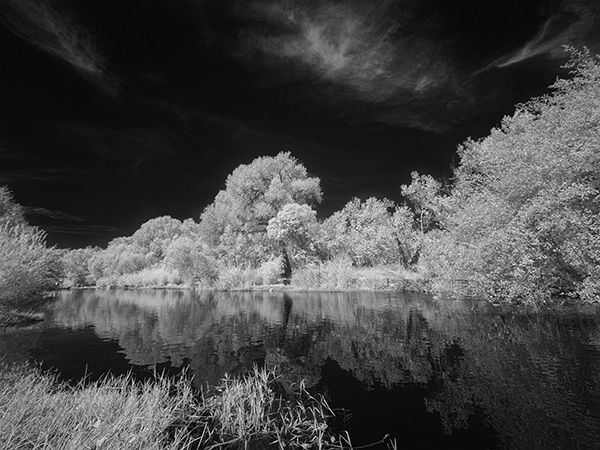
Same scene from a slightly different angle and different processing lead to an image, while still BW IR has a totally different feel than the one above.
As always don’t forget to turn around… Many times there is an enticing image waiting behind you.
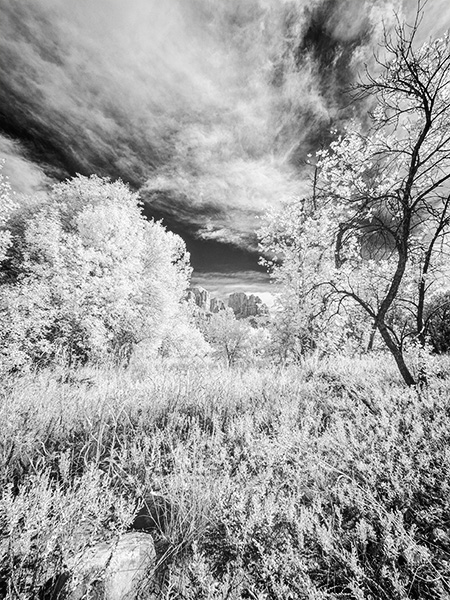
Moving off the creek banks led to this….
I see IR as a great new tool in my quiver. Makes photographing at mid-day very interesting. Can’t wait until I start to learn more about new capture and processing ideas to really push the look.
Yours in Creative Photography, Bob
by successfulbob | landscape photography, Lumix GX8, panorama, photography education, photography gear
I really enjoy the field of view you can achieve with a panoramic photo. The Lumix GX8 is pretty solid with the in-camera stitching when you need a quick capture of the scene for sharing… And with this version going to print. There are still some occasional stitching errors in areas with lots of confusing crossing details or areas with hardly any detail but I had to look really, really hard to find a small error in one of the tree clumps… Sweet!
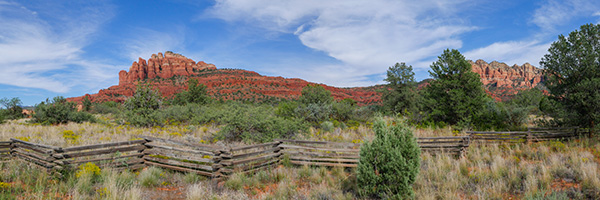
This is the view on the way to Cathedral Rock in Sedona, Arizona. Heading down Verde Valley School Road in the Village of Oak Creek (view of the right side of Cathedral Rock)
Here’s a tip that some people don’t think of when creating Panos. Turn the camera to the vertical position as you make your capture. This will give you some more vertical room. You can also capture a next ‘row’ of image and stitch them together in Photoshop or your favorite Pano program.
One more thought to help get smoother stitching… Point your feet toward or slightly past where you would like the pano to end. Then pivot your stomach muscles to the beginning of the captures and use your stomach muscles to move the camera with your elbows tucked in and the camera touching your forehead.
Yours in Creative Photography, Bob
by successfulbob | photography - art quote, photography education
Do photographers and artists tend to be a bit picky?
You betcha!!
Some, not picky enough.
Most of us are both!

“I guess I’ve shot about 40,000 negatives and of these I have about 800 pictures that I like.” Harry Callahan
Harry Callahan was a self taught photographer who felt he made few solid images. This from Wikipedia, “His technical photographic method was to go out almost every morning, walk through the city he lived in and take numerous pictures. He then spent almost every afternoon making proof prints of that day’s best negatives. Yet, for all his photographic activity, Callahan, at his own estimation, produced no more than half a dozen final images a year.”
We take an awful lot of images every year but do we craft any? We also tend to want to have most of our images be considered very good images but we don’t necessarily take the time to work on creating a really strong piece? I just ask these questions to give you (and I) food for thought.
On the other hand I posit we do create some strong images but don’t think we do because we compare our complete body of work, including our tossers to another photographer’s fully finished work where we only see the finals not the work that went into them.
It is a two edged sword. We need to be confident and not overly critical in the work we produce, but we also need to edit ruthlessly. A conundrum and a fine line to walk if you want to be known as a great photographer.
Yours in Creative Photography, Bob
PS – Hoping this photo/art quote makes sense because it is being written at 2 AM…. (had coffee too late and can’t sleep)
by successfulbob | black & white, infrared photography, landscape photography, Lumix G6, Lumix Lounge, photography education, photoshop tutorial
OK. I went back to the same file I worked on yesterday and reprocessed using a couple different techniques. Here is the new version captured with the Lumix G6 and the 7-14mm f4 lens.
Different processing led to a cleaner more detailed IR image.
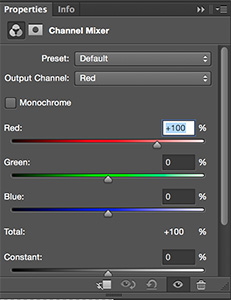
First I used Adobe Camera RAW to process the file twice. Once for the foreground which was in shadow and again for the background which was in full sun. Using a Layer Mask I blended the two files together. Then using the Channel Mixer I swapped the Red and Blue Channel information as this file is still comprised of RGB information. When you first open the Channel Mixer adjustment Layer you’ll see the Output Channel set to Red at 100%. Change this to 0%. Go to the Blue color and change it to 100%. Then change the Output Channel to Blue and make the Red color 100% and the Blue color 0%. This is to give a ‘blue sky effect’. I didn’t like that effect so I kept going.

Swapping the Channels gave me a better image ultimately so I will keep this as part of my IR processing in the future.
Next using NIK Silver FX Pro 2 I converted to Black and White adding some mid-tone structure and fine structure. in NIK Color FX Pro 4 I added a bit of Glamour Glow with neutral color. This helped increase the IR look. A little goes a long way before you blow out some highlights so be careful here. Final bit of tweaking is a blank Layer set to Soft Light Mode using the Brush Tool with Black or White color to dodge and burn the image just a bit to control where the eye travels throughout the photograph.
Looking forward to working in IR more often. Gives a great look to noon-day sun images when you would normally refrain from making image captures.
Yours in Creative Photography, Bob