
by successfulbob | photography - art quote
Sunday Photo/Art Quote – Georgia O’Keeffe
I’m a fan of some of O’Keeffe’s iconic images of flowers, southwestern landscapes and of course flower studies. I don’t like everything she created which I found out when tracking down her images in various museums and books. But that’s OK.
Heck, I don’t necessarily like everything I create!
The fact that there are sections of her work that don’t do anything for me shows is that she was not afraid to experiment and try new techniques and explore new ideas. My guess is she would not have created the iconic pieces if it were not for her pushing through her boundaries of comfort.
 “I’ve been absolutely terrified every moment of my life – and I’ve never let it keep me from doing a single thing I want to do.” Georgia O’Keeffe
Fear can keep us from being successful.
How?
In Sales, being afraid to ask for the order.
In art, being afraid of what other MIGHT say.
In life, worried about what MIGHT happen.
Our minds are trained and conditioned to play out worst case scenarios. It’s a defense mechanism that served humans well when we lived in cave-man times when fight or flight was essential to the survival of the species. We have moved beyond the need for that type of thinking as a species.
Push forward. Try something new. You never know what you might accomplish if you push through negative thinking.
This advice doesn’t mean you should ignore the ‘little voice’ that warns you of potential problems. That can save you lots of grief. Take the voice with a grain of salt and don’t let it paralyze you.
Here’s one more quote to round out this post from, I believe, Michael Jordan. “Don’t be afraid to fail, be afraid not to try.”
Yours in Creative Photography, Bob
Save
Save
by successfulbob | bird photography, Lumix GX85, photography gear, wildlife photography
Bosque del Apache Wildlife Refuge – Part Two
You can take a peek at part one on the Bosque Wildlife Refuge shoot here.
Made four total trips into the refuge which included a couple of sunrises and sunsets. Here’s a tip I’ve found to be handy when photographing in the same location multiple times. Download the images you capture as soon as you can for review. When you have a look, you can tell if any settings need adjustment. Nothing worse than making the same mistakes two days in a row and not finding out how you might have improved until you get back home. I’ve been a pro for over twenty years, and I still find slight improvements can be made when making images in the same location on subsequent days.
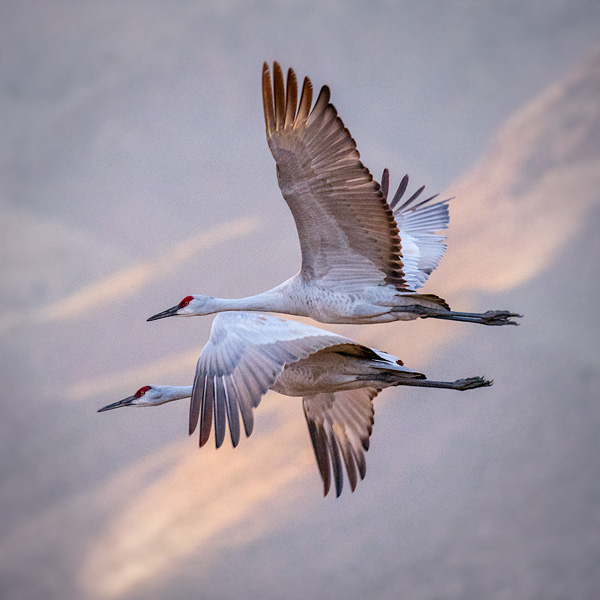
Let’s look at some tracking flight images captured handheld with the Lumix GX85 and the Lumix 100-400mm lens (200-800 35mm equivalent) Most were with the lens fully extended.
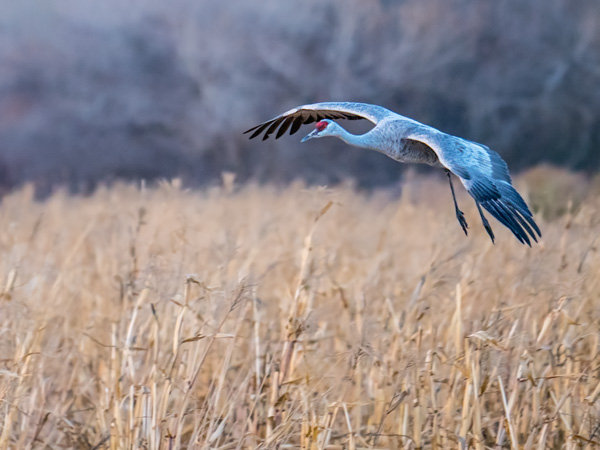 Sandhill Crane in flight over the corn stalks.
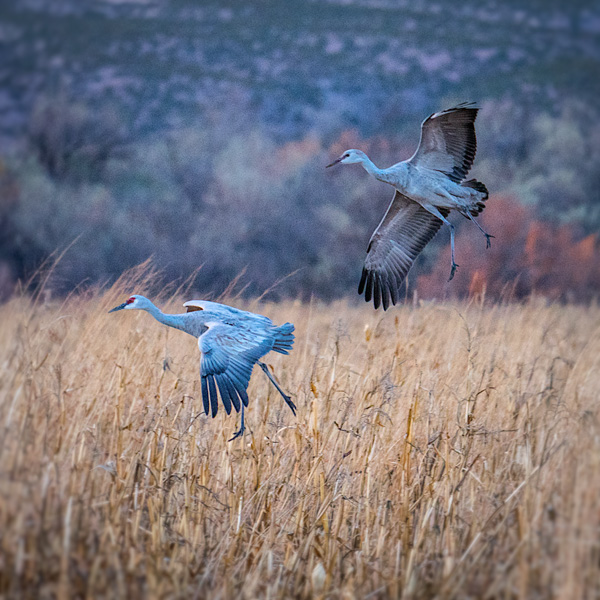 Flying into the corn field getting ready for landing.
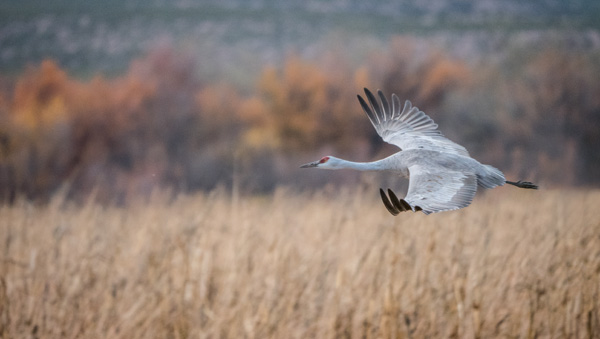 Wings are flared to slow ascent.
 Opposite synchronization of wing position. Mountains in the background with just a streak of sun add interest to the image.
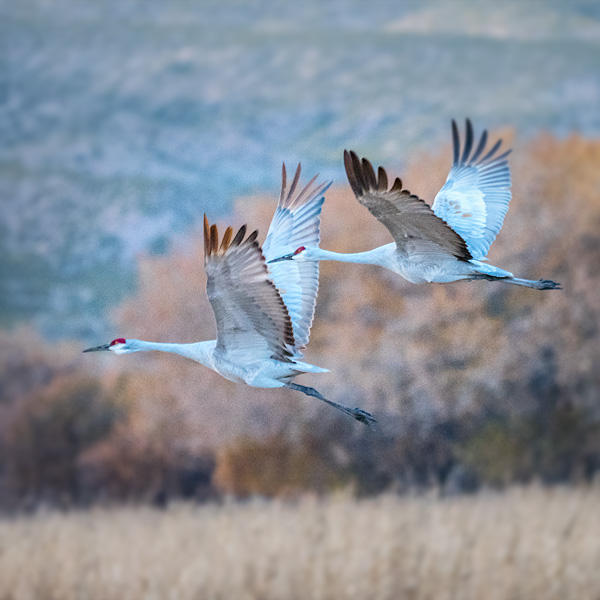 Taking off from the cornfields heading toward the nighttime gathering area in the pond.
There are many ways to capture a different ‘look’ to a wildlife photograph even though the subject matter is the same. In this case, the subject is Sandhill Cranes, but all the photos have a different feel. The different look is accomplished with a change in position of the subject. Using a different background. Changing the crop can make quite a difference also.
I’ll be sharing more options and possibilities for differences with the same essential subject in subsequent posts. I look forward to hearing your thoughts as I move through this series of with the Sandhill Cranes.
Yours in Creative Photography, Bob
Save
Save
by successfulbob | bird photography, Lumix GX85, photography, photography gear, wildlife photography
Bosque del Apache Wildlife Refuge – Part One
Talk about a target rich environment! Possibilities for incredible wildlife photography abound. The scenery, a variety of birds, and combinations of the two make for a great time photographing in this wildlife preserve about one and a half hours south of Albuquerque, New Mexico near Socorro. Learn more about the Bosque here.
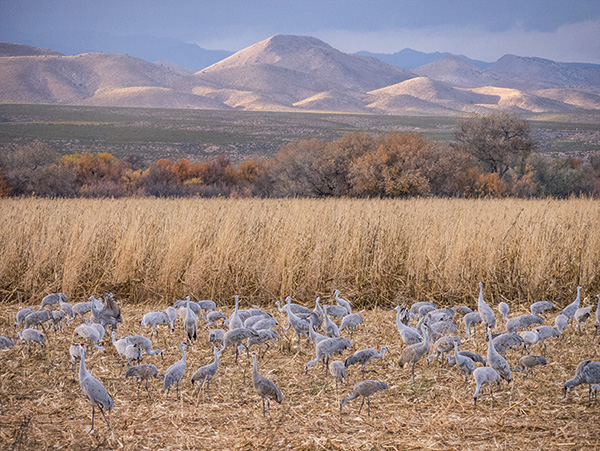
This was my first visit, and I already look forward to returning in the future. Sandhill Cranes are a favorite bird for me to photograph. I have worked with them on the Gulf Coast of Florida. I’ve never seen groups this large. Since they are tanking up from traveling, they are pretty relaxed. They are chomping on rows of corn grown for them. The ponds are just the right depth for them to overnight and makes for interesting photographs as they fly in and out at dawn and sunset.
Let’s take a look at the photos.
This was one of the very first pictures I made when we got to the refuge. I am always trying to show the behavior of the animals when making images to add interest. Because I had previous experience wit the Sandhills, I recognized that this bird was about to leap. The fact that the other two birds are at the end of its wings was serendipity. Not the best time of day for photographing but we were checking out the area.
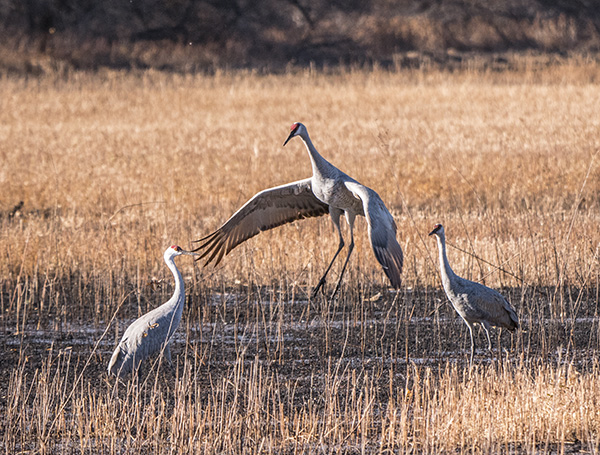 Jumping Sandhill Crane
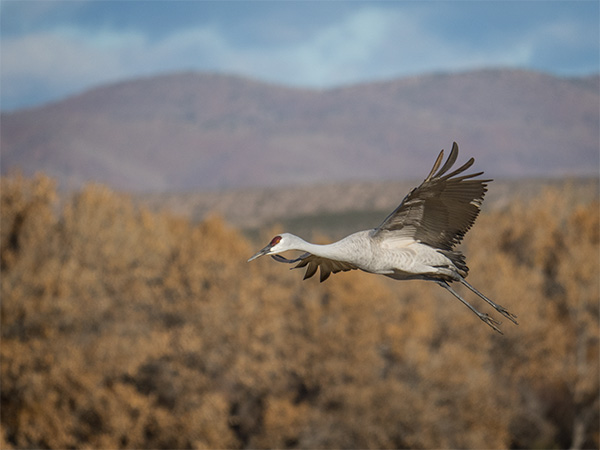 Sandhill Crane on a flyby through the field.
 Sandhill Cranes in the corn field planted for the migration as a feed stop.
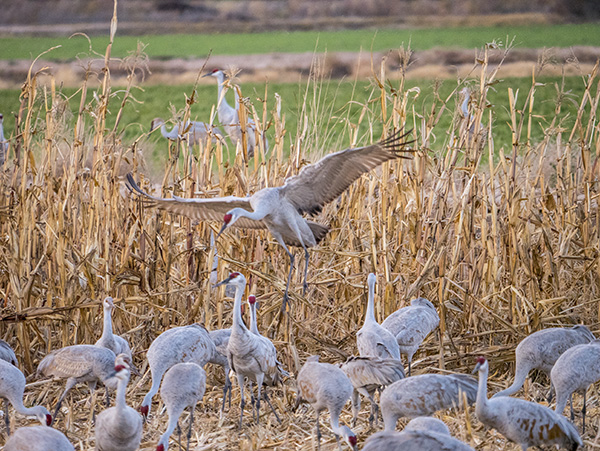 Getting ready for landing in the corn field.
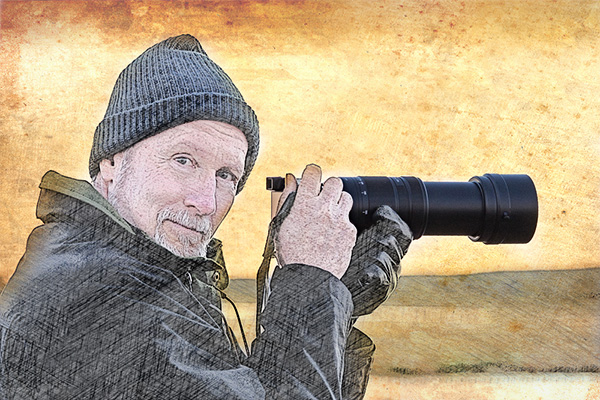 Bob Coates (hey that’s me) Original photo made by my shooting partner on this trip, Dennis Chamberlain. Dennis is an incredible photographic artist. You can see some of his work here. (PS – I arted-up Dennis’s photo so don’t blame him for how it looks!)
Here’s some feedback on the gear that I used. I was testing out the Lumix 100-400mm lens with the Lumix GX85 to see how it would hold up to not being on a tripod. I’ve always tended to photograph birds in flight handheld because I could track their movement better but would often end up with more tossers than keepers due to blur. The dual image stabilization rocks! Total change with this gear. I’m very excited about the number of images I got that were keepers with this rig. You’ll see more of those in the next couple days.
Yours in creative Photography, Bob

by successfulbob | photography
Tip – Target Mode Macintosh Computer
Today’s post is brought to you by the letter “T.” The first three people who get in touch with me with the number of “T’s” that appear in this post get a 1/2 hour coaching session on the subject of your choosing.
When on the road I download images to my laptop computer to check on photos especially when experimentation with new techniques is involved. Such was the case this past week when I photographed sandhill cranes at Bosque Del Apache Wildlife Preserve in New Mexico.
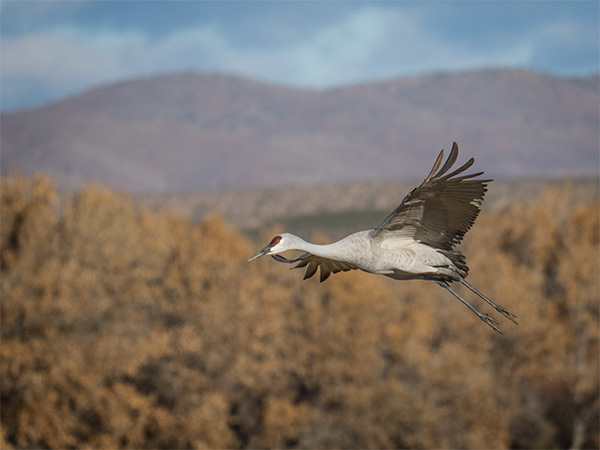 When photographing wildlife, especially when tracking birds in flight, you can be capturing lots of frames from testing shutter speeds, focus, and experimentation for special effects.
Upon return from a shoot like this, rather than download all the images from the camera cards all over again I start the computer up in Target Disk Mode. When in this mode the laptop is recognized as a hard drive when connected via a Firewire, USB, Thunderbolt, and transferring the files can be done pretty quickly. Saves extra time too as I’ve already been culling the duds and misfires and lightly processing some of the images.
 Here’s what your screen looks like when it is Target Mode. That little icon rides around on your screen.
Target Disk Mode is easy to do. Click the “Startup Disk” icon and click the Target Disk Mode button to restart your Mac in Target Disk Mode. You can also enter Target Disk Mode by rebooting your Mac and holding down the T key as it boots. Connect your Mac via a Firewire or Thunderbolt cable.
Yours in Creative Photography, Bob
Save
by successfulbob | Lumix FZ 1000, Lumix Lounge, photography gear
The Range Cafe – Albuquerque New Mexico
sometimes you just find an environment that is a target rich for making fun photographs. I found one such place while in Albuquerque, New, Mexico while presenting my PhotoSynthesis program for the Professional Photographers of New Mexico.
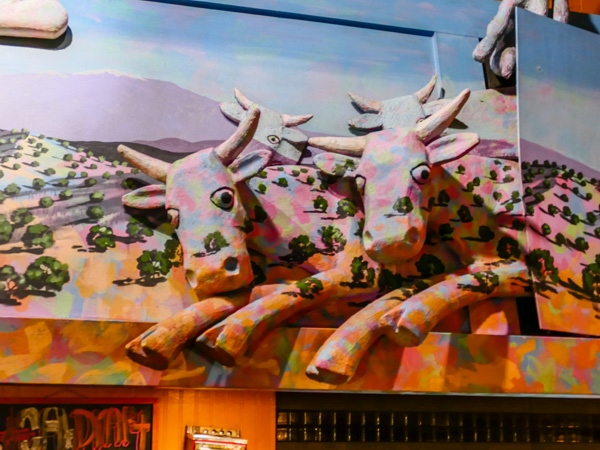
The decor in this place is a hoot with a painted panorama that is disgorging three-D cows, trucks, and other goodies. Meanwhile other parts of the restaurant display blasts of color and neon goodness. (You know that I like neon right?)
Here are a few images from dinner last night. All were made with the Lumix FZ1000 an east comfortable camera to keep on hand that will cover almost all possibilities. I used the built-in HDR setting to help with some of the challenging lighting situations. The next camera in the FZ line is now out with even more features. FZ2500
 Neon rimmed blue light clock face with a red background. Love it!
 A mural that has pink and blue cows jumping out of the painted panorama is not something you’ll come across every day.
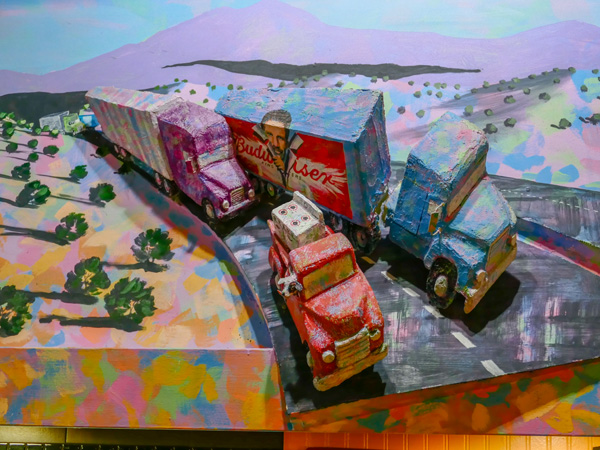 A highway comes out of the mural with multi-colored painted trucks. Way cool!
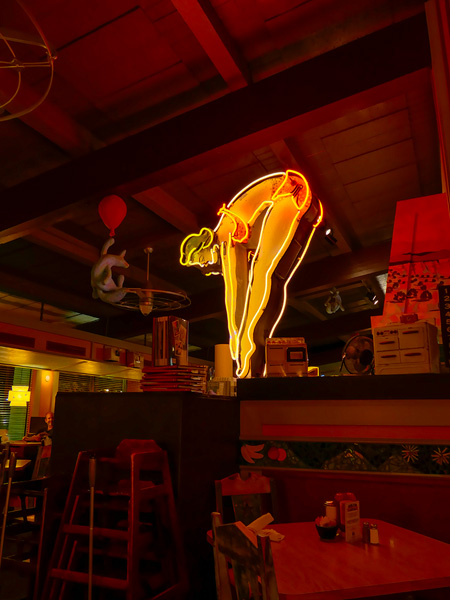 Classic neon sculpture is part of te Cafe decor
A restaurant with unique decor, fun furniture, colors that dance and light fixtures that take you to the moon and the stars can be found in Albuquerque. Oh, and I didn’t mention the namesake part of the decor which is antique toy ranges and stoves from the 50’s and 60’s.
 Find the Range Cafe here
Yours in Creative Photography, Bob
by successfulbob | inspiration, photography - art quote
Sunday Photo/Art Quote – William Eggleston
I share today’s thought from Eggleston who was one of the pioneers of the move to recognizing color photography a true art form. Remember as photography grew throughout the years any change to the medium was met with derision and skepticism. (can you say digital or Photoshop boys and girls??) As technology adds possibilities to processing our vision we get blowback from those who feel there is cheating going on… My personal feeling is can you get the image that is in your head output to another medium such as photo paper, metal or canvas or any material that helps tell the story the way you want it told. How you get there doesn’t matter to me.
Onward to the quote.
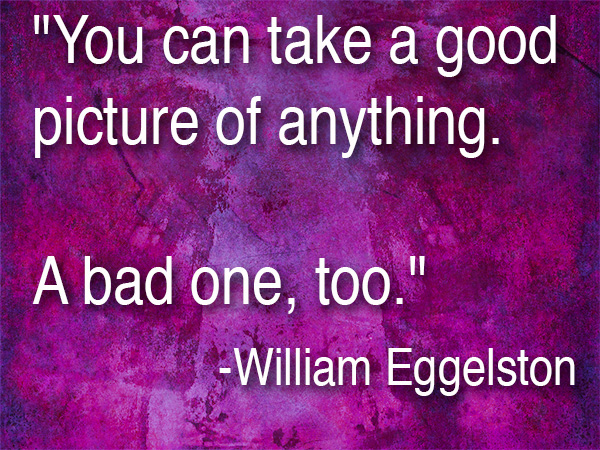
“You can take a good picture of anything. A bad one, too.” Willaim Eggleston
I share this idea with many people when I tell them I am a photographer and live in Sedona, Arizona. I almost always get this comment. “Oh, Sedona that’s a great place to be a photographer!” I always reply that yes Sedona is a beautiful place it’s not what makes for good photography. I’ve seen plenty of crappy photos of Cathedral Rock and I’ve seen some exquisite photographs of peppers and other ‘non-beautiful’ subjects.
We photograph the light. We photograph the shadows. We do it with composition and thought on color and juxtaposition of subjects within the scene.
I leave you with this thought. Are you taking (making) a good picture today?
Yours in Creative Photography, Bob

by successfulbob | photography software
New Photo Processing Software for MAC
Some very interesting software for photo editing has been released by the folks at MacPhun. Basically, you can set up this software very simply or you can build workspaces to create intricate working areas for complex projects. This is new stand-alone software and the price? Only $69. You can try it for free to see if it something that will work for you. Here are the details below.
 LUMINAR NOW AVAILABLE
Offer Available: November 17, 2017
Short Description of Luminar:
Luminar is a new all-in-one photo editor designed to ensure the ultimate in creativity and convenience. The Luminar user interface is built around the idea that every photographer is different, and therefore their photo editing needs are different too. Users can choose from pre-built user interface configurations that match their editing style and needs or create their own.
Pricing:
Retail Price: $69
Launch Price for Macphun Users: $49
Launch Price for New User Price: $59
Luminar Key Features:
• Adaptive User Interface
• Multiple Modes: From basic to advanced
• One-click switch between modes
• Change modes anytime
• All-in-one photo editing tool set
• Includes essential editing tools for different photography styles
• Live editing, live processing, live previews
• Non-destructive editing
• Works as a standalone app or plug-in
• RAW converter & processor
•History Panel
Take a look & try it for free.
Yours in Creative Photography, Bob
by successfulbob | photography - art quote
Sunday Photo/Art Quote – Dorthea Lang
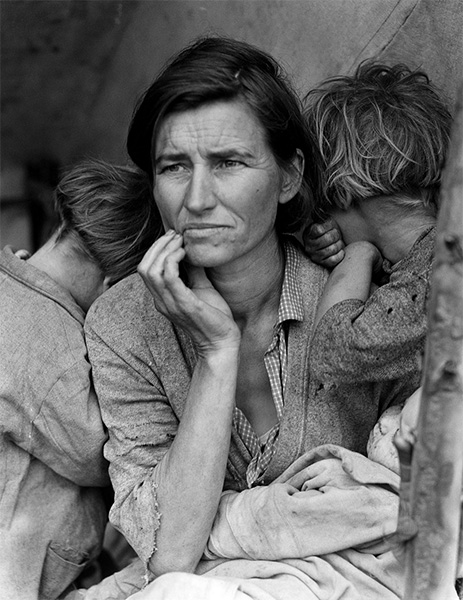
For those who might not know, Dorthea Lang was a photojournalist who documented America during the depression era. Her photographs told the story of the great depression more powerfully than words could have done. I’m confident that even if you don’t know her name, you will recognize one of her most famous photographs taken during that time.
 Known as ‘Migrant Mother.’ Photo by Dorthea Lang
The Library of Congress caption reads: “Destitute pea pickers in California. Mother of seven children. Age thirty-two. Nipomo, California.”
Which brings us to the Photo/Art Quote for today on the Successful-Photographer blog.
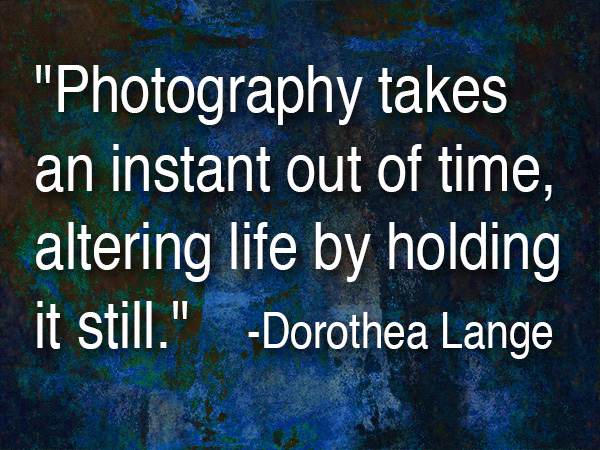 “Photography takes an instant out of time, altering life by holding it still.” Dorthea Lang
“Altering life by holding it still.”
Think about that for a moment.
How do you think about what do we do as photographers? Do you keep a thought such as this in your mind when you are making images for clients? When you change the focus of whatever you do in life to be helpful to others, you end up becoming more successful in the process.
This type of thought also should be shared with your potential clients when speaking about making images for them. Another way to say this is preserving memories but changing the phrasing can contribute to making this powerful message. There’s a line from Zig Ziglar. “You can have everything in life you want, if you will just help other people get what they want.” Sometimes people don’t know what they want in photography until it’s too late. The child has grown up too fast. A family member passes away. Things change amazingly fast in this world of ours and being able to freeze an instant of time is a magical gift.
Do you share those thoughts with your clients? Take the “instants” out of time and alter your client’s world for the better.
Yours in Creative Photography, Bob
Save
by successfulbob | Lumix Lounge, macro, photography, photography software
In-Camera Focus Bracketing
Yesterday I shared info on in-camera focus stacking of images captured with the Post Focus Photo Mode in the Lumix GX85. The PFPM is a great feature for getting images from moving objects, quick captures and times where you won’t need to crop into the image very much because the still frames pulled from the video are eight megapixels. Eight megapixels can get you to a twenty-inch print with no problem but when you want to go big it’s time for a new feature built into the camera.
Focus Bracketing is different than the Post Focus Photo Mode in that the camera will be making image captures using the full-size files and changing the focus between each shot automatically. Here’s the screen you will see to set up the capture of multiple images with one push of the button.
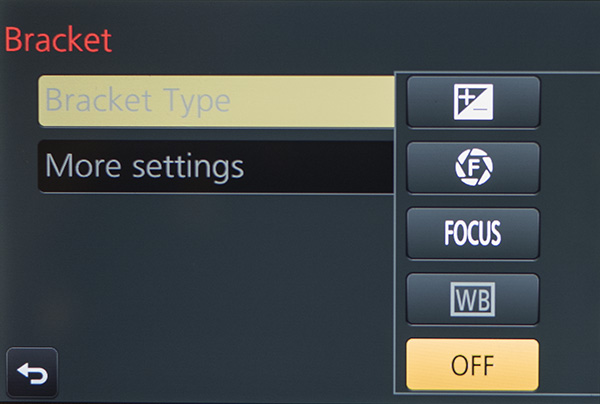 The new Bracket Menu. Options include Exposure Bracketing, Aperture Bracketing, Focus Bracketing and White Balance Bracketing.
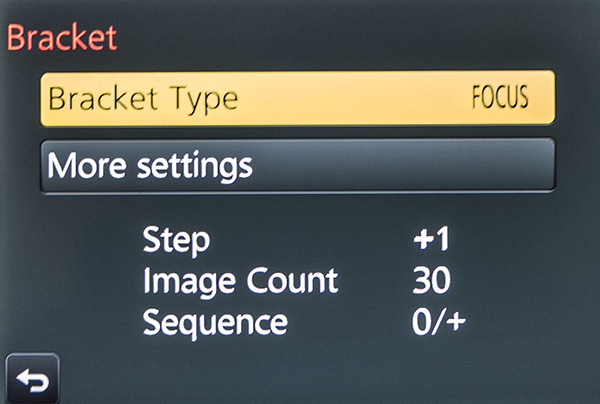 Menu with the Focus Bracket Chosen.
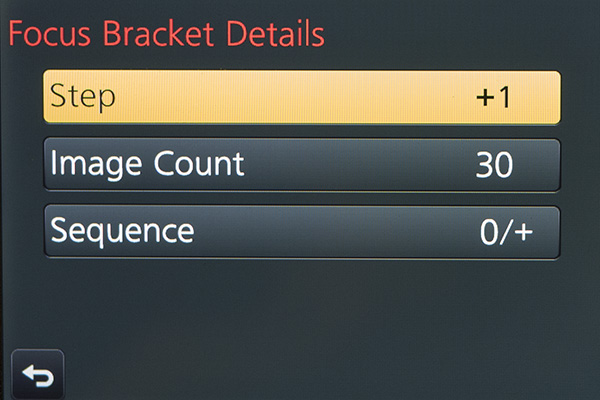 Each one of the menus adds choices. You’ll need to experiment and ‘bracket’ your choices as you learn the results. Step – is the distance that the focus will move on each exposure. Image Count – will be the number of frames made with a single push of the shutter button. You’ll want to ensure there’s enough to cover the scene. Sequence – is the order the images are taken in. Choices are 0/+ to start close and go far (I recommend) or 0/-/+ which will alternate how the bracket is accomplished. I found that Photoshop tends to choke when creating the focus stack using this setting.
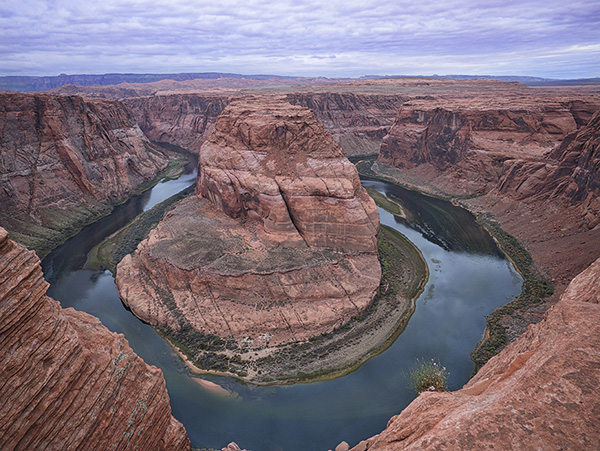
Here’s an example of a completed capture and focus stack using Adobe Photoshop taken at Horseshoe Bend just outside Page, Arizona. The Focus Bracketing allowed for a much deeper depth of field in the final image.
 Horseshoe Bend, Page Arizona. The depth of field extends from the near foreground to the far distance.
People ask why do you want to go to all this work? I just set my camera to a smaller aperture like f16 or f22 for deeper depth of field. There is some science that will come into play here. When you use smaller apertures, you will introduce diffraction into your image which will soften the image. There is a sweet spot in lenses between f5.6 and f10, depending upon the lens, that is the absolute best quality the lens can produce. That is the f stop to use when focus stacking. All the sharp areas will be the sharpest and highest quality when combined.
I’ll look at the actual focus stacking technique in a future post using Adobe Photoshop. There are also automatic software solutions like Helicon Focus, Zyrene Stacker, and possibly others for you to check out if you plan to do a lot of stacking.
Til then.
Yours in Creative Photography, Bob
Save
Save
by successfulbob | 4K photo mode, 4K video, Lumix GX85, Lumix Lounge, photography creativity, photography gear, video
In-Camera Focus Stacking
Cool beans!
Yep, I said it. Cool beans. This feature is quite handy when you want to photograph with a macro lens and show some incredible depth of field in your image.
The 4K Photo Mode in the Lumix GX85 and the G85 called Post Focus which allows you to choose the frame with the focus where you want it, after the shot, also allows you to focus stack the images together to enhance the depth of field. One downside to using this method is that we are pulling stills from the video which means there is 8MP worth of file size with which to work. A file of this size will get you to a 20-inch print with no problem, but if you want to go bigger, you’ll need to use a different method. I’ll share that with you in the next day or so.
Let’s take a look.
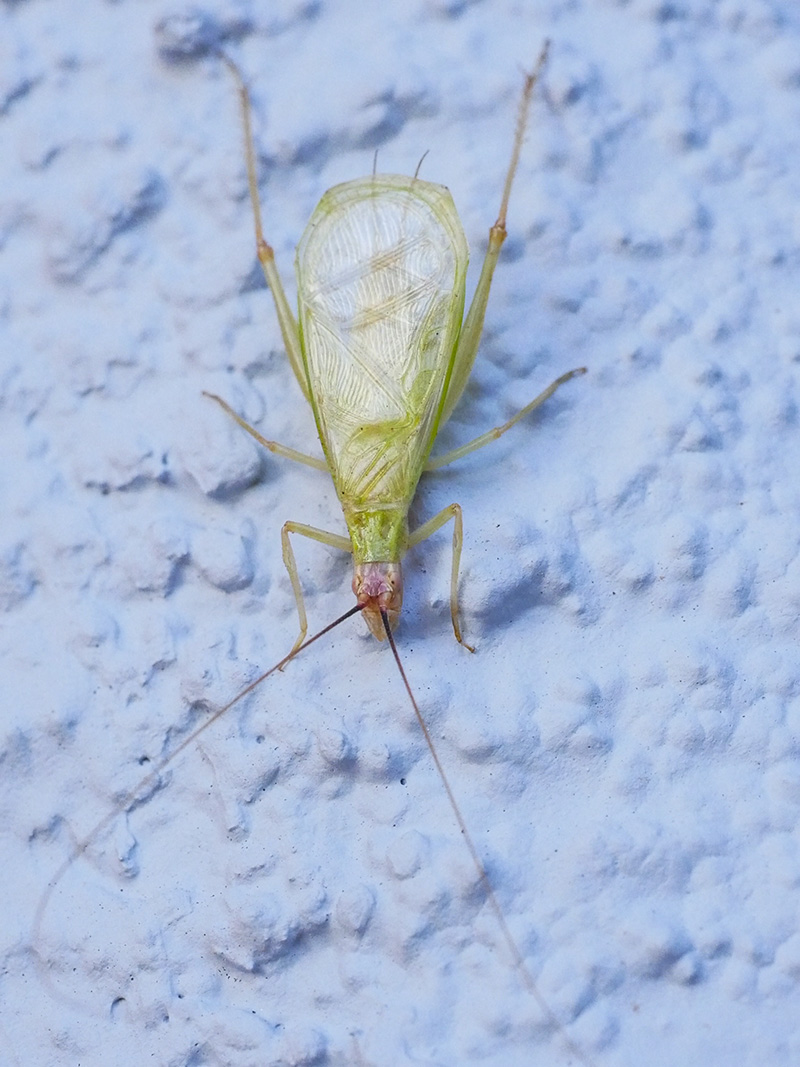 I call this Green Bug. This image is a single frame grab from the 4K video. Printable and OK. But let’s see something a little better.
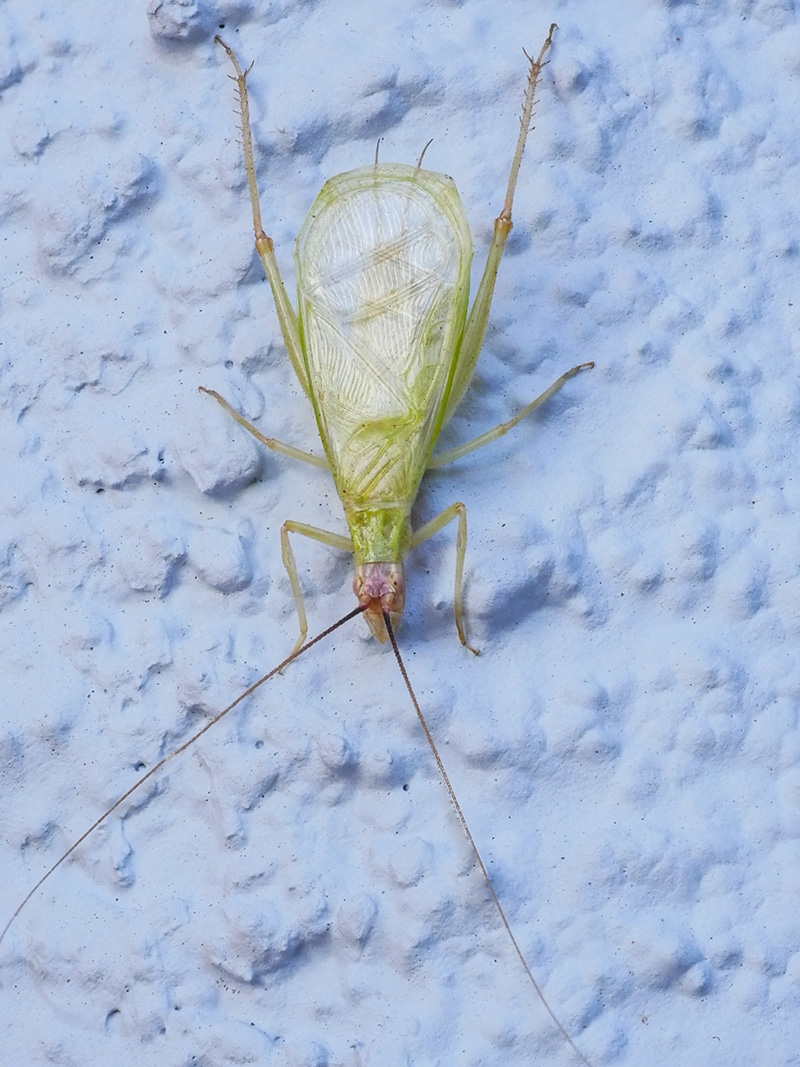
Now let’s take a look at the image after all the images in the stack have been combined to show the sharpest parts of each frame in the video.
 Check out the detail throughout the photo now.
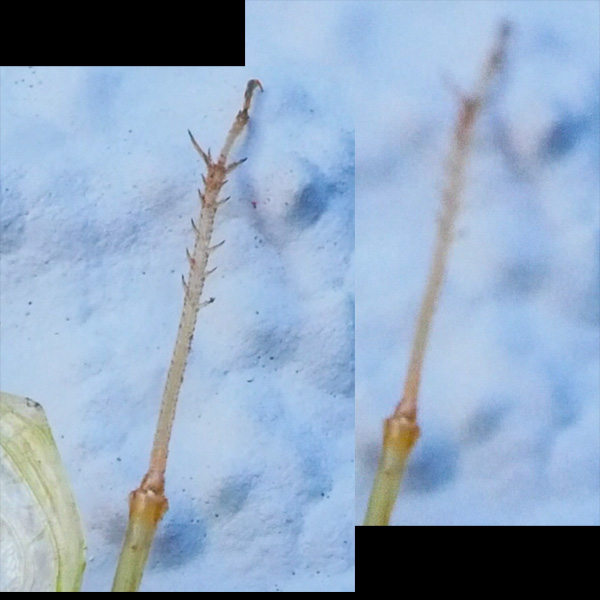 Here’s a little zoom in on the back leg of my friend the Green Bug.
Click Here to see the original video clip
This video image was captured with the Lumix GX85 with a 45mm f2.8 macro lens.
Tomorrow I’ll take a look at the Focus Bracketing feature that allows us to bypass the video and capture full-size images.
Yours in Creative Photography, Bob

 “I’ve been absolutely terrified every moment of my life – and I’ve never let it keep me from doing a single thing I want to do.” Georgia O’Keeffe


